
Academy
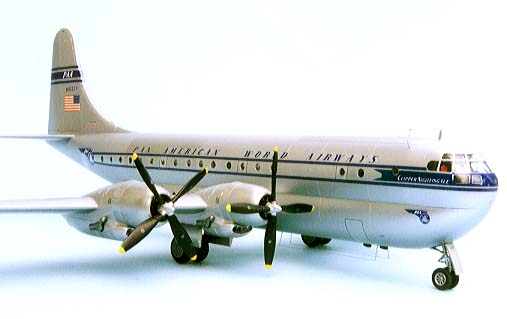
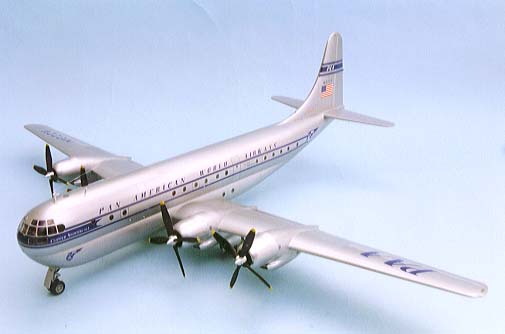
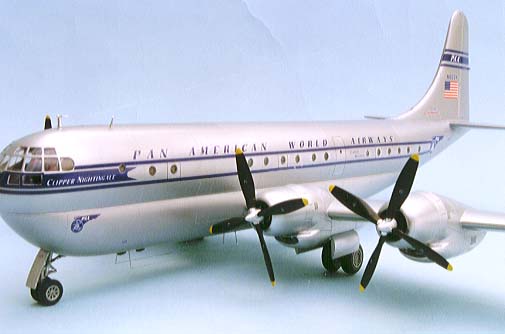
Boeing B-377 Stratocruiser
Kit No. 1603. 1/72nd scale
I couldn’t wait for this model to come into the office for review so I bought one, why? Well as a young lad in 1945 my Grandpa gave me an aircraft recognition model of this plane and looking back now it was in 1:72 scale although to my young eyes it was much much bigger, it was in solid wood and painted grey but it was my pride and joy and all the local kids were envious. During several moves and in the course of being rehoused soon after the war, it seems to have disappeared but not from my memories, and here was a chance to revive those memories and some of happy days watching the real thing manoeuvring around Heathrow in B.O.A.C. colours
I very rarely make silver finished aircraft because of the difficulty of capturing that metallic look and I was wondering which finishing product to use when I came across a new product called Alclad II which has no connection with the original Alclad silver finish. With both these Items on the bench, my enthusiasm was fired up and I was impressed with the results.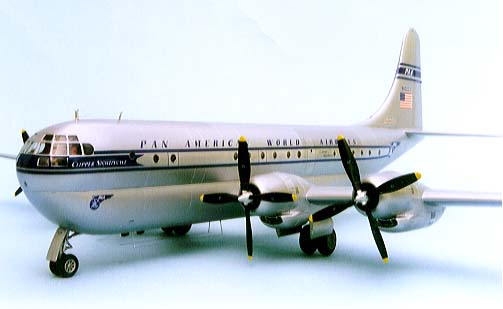
The Stratocruiser was developed by Boeing at the end of the war from the B-29 using the wing and tailplane and, true to form, Academy has done the same. In this kit you get the identical frames that were in the B-29 kit that was released earlier, plus a new fuselage frame and a superb clear frame with the cockpit section moulded into a large part of the fuselage which I find very helpful as no cement gets near the “glass” part. The instruction sheet is basic but adequate and there is a large sheet of decals covering two aircraft, one being the prototype 377 and the other being a Pan American “Clipper Nightingale”, the finish on both machines is bare metal overall, how nice it would have been to see the white topped livery of B.O.A.C!
Construction notes
Step 1 the seat K4 will need a bit of trimming before it will fit between the arm rests K18-19
Step 2 you do not need to mount the nose undercarriage leg at this stage (it’s pretty fragile) as it can, with care, be mounted when all the joints have been cleaned up much later
Step 3 just a reminder to make sure you cement the fuselage windows in up the right way and in the correct location
Step 4 the overhead window N4 was a bad fit you may want to enlarge the location before inserting the part, I could not get it to seat properly and had to sand it back to match the contours of the fuselage and then polish it with “Final Touch” canopy polish
Step 6 you will need some nose weights now but I can’t be sure how much, mine was trial and error but there is plenty of room beneath the cockpit floor. When you add the front glazing N7 make sure that it matches the fuselage contour top and sides, mine didn’t and I had to sand a couple of steps out.
Step 7 when cementing the wing halves together do not try to cement the wheel bay walls together (top to bottom) for it tends to “flatten” the underside of the wing so that it will not conform to the shape of the engine nacelles giving problems later.
Step8 I found part K3 was a slack fit so I cemented a strip of 15thou card to the rear end before placing in position which filled the gap nicely.
Step 9 the rear parts of the nacelles need careful assembly so that they match the contour of the engine cowling particularly around the intake area. The engines L7 have very little surface area to cement into the cowling and could easily be pushed in by accident so I added some tiny blocks of scrap plastic immediately behind them to lock them securely.
Step 14/15 deals with Ariel posts all of which have very shallow locations and would not stand up to too much handling so I elected to replace all of them with fine flower arranging wire. The rigging of aerials was the very last job to be carried out.
The cleaning up of joins went on throughout construction and when complete I airbrushed a coat of grey paint along each join just to check for faults and improve. Masking is the next step, I use scotch tape for the cockpit windows only, laying a tiny piece on each window and burnishing with a cocktail stick until the frames are clear then each is trimmed around with a new scalpel blade. For the passenger windows I place a blob of PVA glue in the centre and work it out to the edges again with a cocktail stick (what would we do without them) be generous with the glue, this is the easiest way I know of getting a circular mask, when all is finished all you need to do is to pop it off with a knife blade.
Having satisfied myself that the surfaces were good I coated the whole model with Halfords grey primer from a spray can (not such a messy job as I thought) a second coat was applied soon after, pay particular attention to any flow marks in the plastic (swirls) as the Alclad will attack these first. Should this happen simply rub down the area concerned with wet and dry and prime it afresh.
This next step is very important, although the primer is silky smooth it needs a rub over with a worn out piece of 1200 grade wet or dry paper to polish it up super smooth (doesn’t take long) before spraying two coats of Alclad II, I used shade “A” aluminium, it is recommended that you use 10-12lbs psi. and allow 10 minutes between but I used 30lbs psi. and never waited at all between coats because the place where I started was dry when I finished the model and I went straight back and started again.
As soon as I had parked the airbrush I used Tamiya masking tape to select a few panels for further treatment using the darker shades “B” and “C” I also added some Humbrol Matt Aluminium enamel paint on a couple of panels to see if there was any reaction between the two finishes with no reaction at all. When the masking tape was removed, I discovered that none of the silver had come off at all, a most pleasant surprise!
I liked the finish I had achieved but if you require a shinier surface then Alclad II can be polished using Micromesh cloths to whatever degree you require. I have tried polishing a test piece and was amazed that I didn’t wear through the finish as I expected.
The decals for the window areas are quite long and will stretch out of proportion if slid off length wise so position the paper above the windows and slide them off downwards using a paint brush, I found some discrepancies around the cockpit area but I cured this with a couple of scalpel cuts, the remainder went on with no trouble at all.
I am not sure if the decal adhesive was weak or if the surface was too shiny but my decal cheat lines lifted off each time I accidentally held them, this was after a couple of days so I decided to coat the decaled area with Johnson’s Klear (Future) using a wide flat brush, this had no adverse effect on the silver finish but it held the decals firmly.
The last thing to be added was the undercarriage and aerials and my model was completed. As much as I like the model I doubt if I would have built it if I had not found the Alclad II, what a boon this is for modellers, and I see the latest “colour” is Chrome this will certainly be good for truck modellers with chromed fuel tanks.
A nice subject and a good kit looking forward to the military versions.
Ted Taylor, April 2000
#Back to the TOP
Last Page
Airbase
What's New
Home
Reviews
Next Page