Tamiya/ Cutting Edge
F-4G Conversion
F-4C to F-4G
Kit No. 0000. 1:32nd scale
F-4G Conversion in 1:32nd scale
The F-4G is a favourite of mine and although I have models in 1:48th scale I wanted A big 1:32nd scale model. The Revell kit is nice but involves a lot of scratch building to make the "G"
version so when Cutting Edge came up with the conversion set to fit the Tamiya F-4C
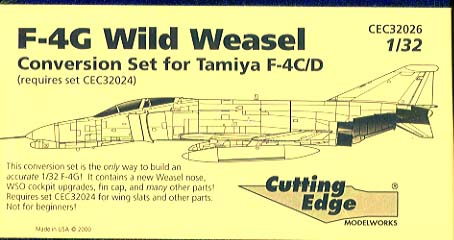
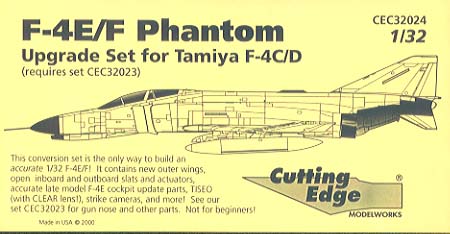
I grabbed the opportunity to make this bird. Let me say here this is not a cheap conversion but the finished model makes it worthwhile.The Tamiya kit is a fine kit in it's own right but it suffers from a couple of problems, firstly is those patches all over the surface, these are battle damage repairs, and these need to be removed, then there are the intakes which look terrible but all is not lost as there are replacement intakes available or you can add FOD guards to an otherwise unsightly area. With the Kit and the two resin sets (CEC32026, CEC32024) in hand I started Construction The first job was the patches, I used a rough sanding block to remove most of the plastic then changed to a fine grade to finish off, take care not to spoil the remaining surfaces or that will involve more unnecessary work. Do not rescribe panel lines around the patches either as they don't exist.
A small portion has to be removed from the front of the fuselage denoted by a panel line and I used a razor saw to cut back to within a half millimetre then I sanded back to the panel line carefully. The lower fuselage needs the same treatment but take care at the front of the nose wheel bay, tape the two parts together and check final alignment and put aside.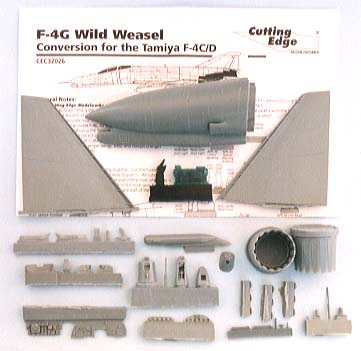
A big session of removing Pour blocks from the parts followed, for the major parts a saw was used then finished with a rough sanding block, but for the smaller more delicate parts I used a scalpel to cut around the parts with care. I left all the antennas on the blocks until needed to avoid confusion.
With all the parts identified and the instruction sheets read at least twice I started the cockpit area, here I had to use parts from both resin sets as instructed, all fitted nicely and were carefully painted (at this scale everything shows), the tub was then installed in the upper fuselage, screwed and glued.
Intake tunnels were then made up and given a light sanding on the internal seams then the forward edges were thinned down in an effort to minimize the unsightly view down the intake and before mounting in the fuselage were sprayed prior to adding the painted engine faces. The exhausts and afterburner rings were sprayed with Humbrol polished steel and polished up on the raised surfaces to highlight the details and when assembled were mounted in the fuselage also. The intakes and ramps were assembled and added to the fuselage and the joins tidied up ready for the wing assembly.
To make the slatted wing you will need to make some cuts on all the inner wing parts so I cut off the required sections before assembly but you can do it after if you wish, either way keep checking the parts with your cuts, note that the lower cut is further back than the top. A bead of superglue along the joins after fixing will make things smooth and even ready for a light sanding.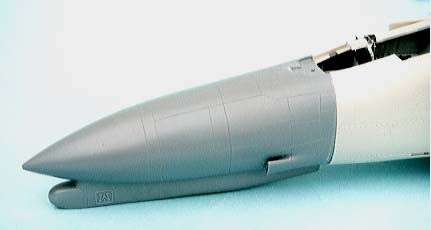
I always deviate from the kit instructions here and leave the stabilators and lower tail surface off until much later; instead I fit the lower wing and cement the forward fuselage. Now is the time to fit the new resin nose and here I found that a little trimming of the inner plug around the wheel bay wall to get a smooth fit but when you superglue the nose in place make sure that the top windscreen area lines up perfectly. You will need a little filler at the bottom edge to bring it all level, and clean up the join.
The new fin cap was fitted to the fin and the join sanded smooth, the tail fin does not seat well with thef uselage but all that is needed is a bead of superglue run along the base join, don't worry about the screw fitting for the underside of the tail area as this can be glued in place later when the stabilators are added. At this stage I decided to make the necessary alterations to the stabilators as per the instructions in the set so they had time to cure before I needed to use them.
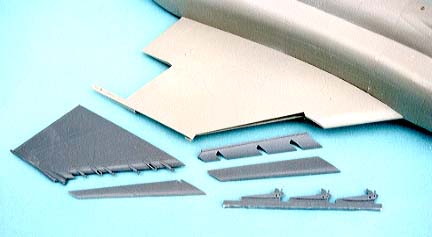
The main gear bays were assembled next and the whole area, including the speed brake bay, were sprayed white, then details were highlighted before adding the top halves of the wings making sure there is a good bond between them and the fuselage sides. I found the hinge line on the new resin outer wing panels did not quite match up to the plastic hinge line of the inner wing so I cut the hinge from the kit outer wing and removed a matching amount from the resin part, the plastic part was superglued into the space left and put aside to harden. The hinge now matched perfectly and was glued into place taking care to get that angle correct, here I found that the new resin part was slightly thinner than the kit wing at the join but a tiny fillet of Revell Plasto filler along the top surface did the trick.
Slats are the thing that Make the E & G models stand out and these are provided in the upgrade set CEC32024, they need great care when adding to the wing and the instructions given should be read carefully at least twice, make sure the slat actuators are correctly aligned then all will be plain sailing (or flying if you prefer).
A general clean up of seams etc. etc. was next and to aid me in this I spray each one with matt
light grey paint and check for faults then put them right, after which I added all the APR-38 low band airiels and blade airiels plus some 5thou strips of plasticard for the light bars along the fuselage and fin (use the decals to determine the size of these).
Painting
I was ready for painting now so the whole model was washed in some warm soapy water to remove any finger grease (I had to use the bath here as the model was too big for the sink) and left overnight to air-dry. Before any spraying was done I masked the wheel wells and speed brake wells with the doors, by adding a blob of Blu Tac in the well and pressing the doors down into position. The cockpit area was taped up and the canopies were masked off with Sellotape (Scotch tape) inside and out.
I use Rub n Buff for the bare metal areas at the rear and these areas including the stabilators and lower rear fuselage were treated with this first then a touch of black lead grate polish was added to give that darker metallic finish, a final coat of Johnson's Klear and these areas were masked with Tamiya tape. Next Item was the black nose cones and the canopy frames, for these I used Hu85 satin black, and the cones were then masked up.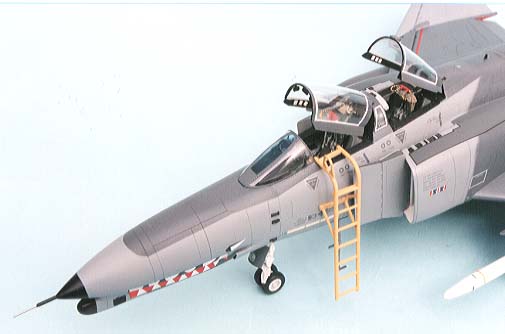
My Insignia are sprayed on, not decals, to do this I spray a patch of the contrasting colour to the camouflage roughly in position then a rub down star and bar is placed accurately and burnished down in all four places, when the camouflage colours are dry, use a piece of sellotape to dab on the rub down and pull it off and there you have painted insignia.
The upper and lower surfaces plus the canopy frames were sprayed with the darker of the two greys (FS36118) freehand, this included the tanks and pylons etc. etc. and then the cockpit/nose area was masked along with the ends of the inner wing. The lighter grey (FS36270) was now sprayed again freehand to give that feathered edge where appropriate.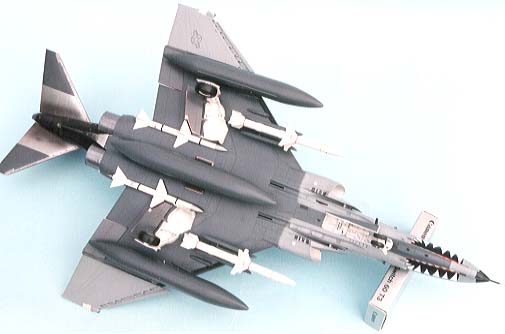
When I was sure all the camouflage was right I gave the whole lot a couple of coats of Johnson's Klear (Future) before adding the decals. To avoid any silvering, as I put each decal down it was dried then a tiny brush full of Klear was put under it, as it dried I rolled a finger over it to squeeze out any excess which was then wiped away, this makes sure any airspace below is filled.
A couple more thin coats of klear to seal every thing and I was ready to add all the remaining parts.
Undercarriage legs were the first items then the stabilators and lower tail surface were cemented on. Gear doors, pylons and tanks followed. Now is the time to decide what finish you want on the surface, I like to see a slight sheen so I dusted a coat of Revell No2 matt varnish overall, but don't go too heavy here, if you try this method, as you can easily overdo it.
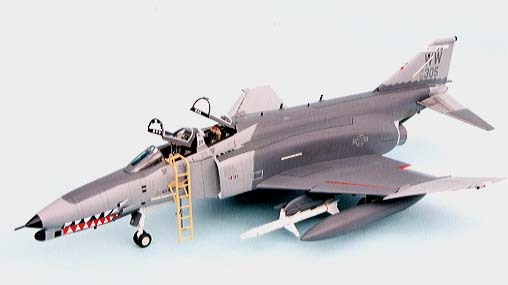
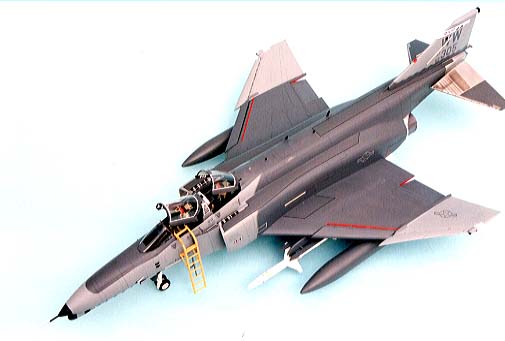
A thin coat of Tamiya clear blue was put on the inside of the windscreen before it was fixed in position with PVA glue and the mirrors from Reheat were added to the canopies with the tiniest touch of superglue. The Paragon seats were placed in but because they were meant for the Revell kit they are too high here so it meant sanding away the bottom until I got the right height I'm afraid, then the canopies were mounted in the open position to reveal all the detail in the driver's area.
Ted Taylor
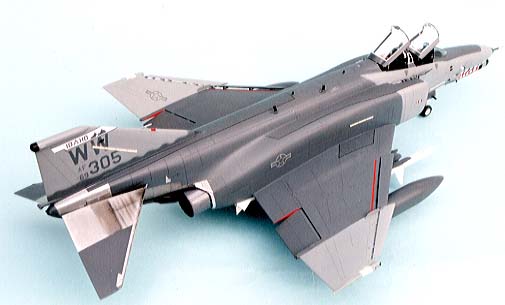
This model has just won two first places in two days in competitions
at Hinkley and Hornchurch
If you want a big F-4G then this is it, one of the best phantoms I have ever built!!!!!
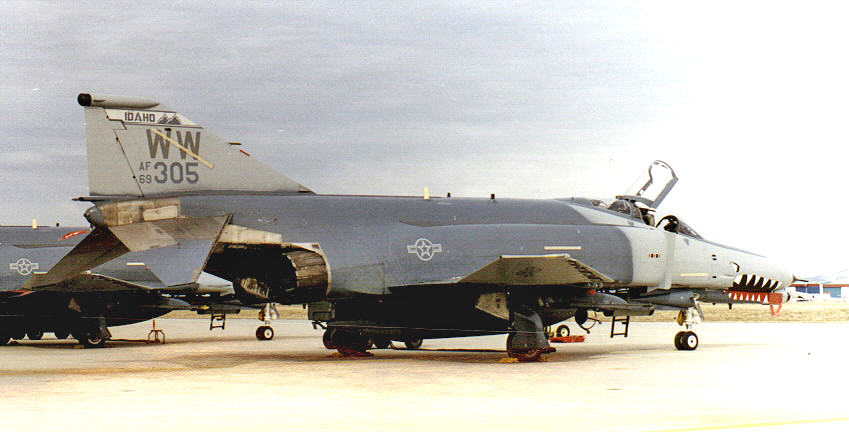
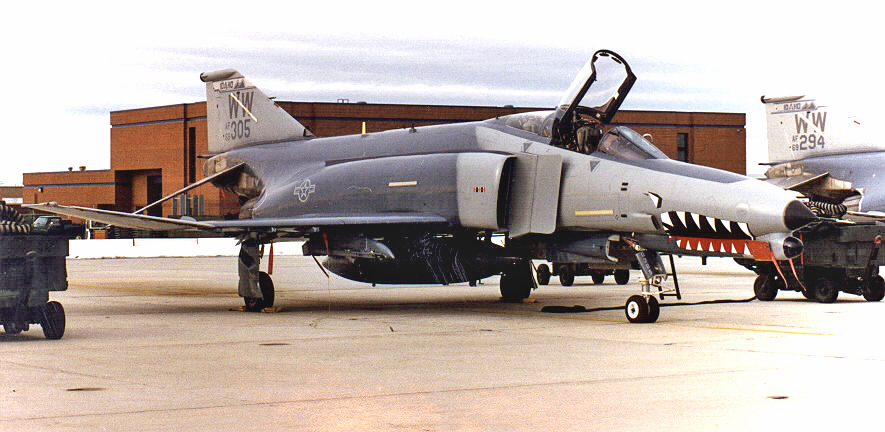
The real thing from Jack Callaway