
AMT/ERTL
LOCKHEED ES-3A SHADOW.
Kit No. 8750. 1/48th scale
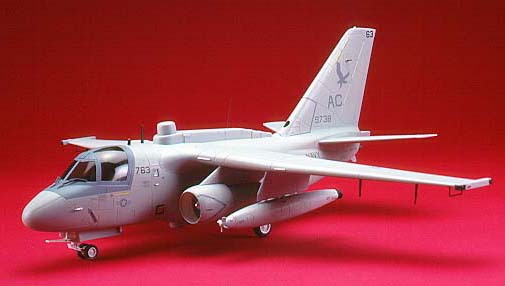
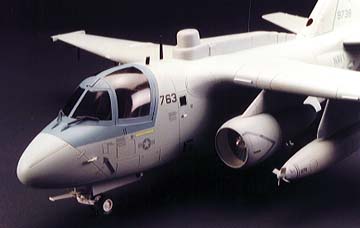
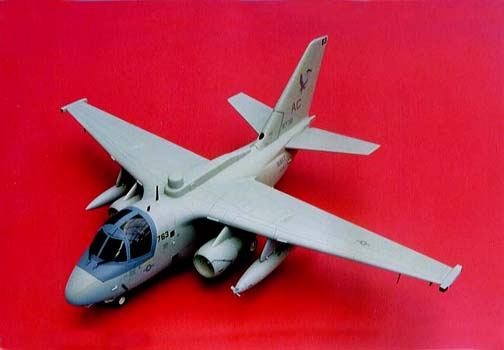
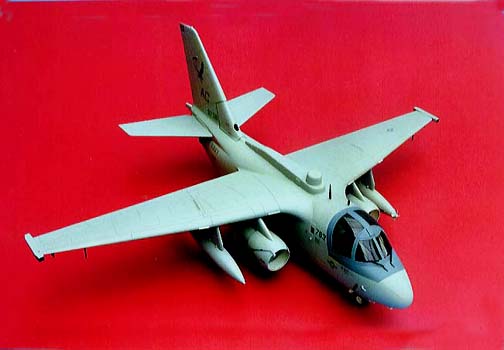
The Shadow is a derivative of the S-3A Viking sub hunter and is tasked with long range airborne early warning for aircraft carriers, it has a range of seven hours, five of these can be loitering on station. Two squadrons operate them VQ-5 and VQ-6 and it is one of the latter that is depicted in this kit serving on the "IKE" CVN-69 whilst on her Gulf cruise in 1995.
ESCI first issued the original Viking model many years ago and at the time was one of the finest kits in the world with excellent engraved panel lines, parts that fitted like a dream and a cockpit that could be fitted after the main assembly was completed. Being grey over white the standard navy colours, one could fix the undercarriage before spraying the bays and underside along with the control surfaces, minimum masking was required and the grey could be airbrushed freehand with ease, there were a lot of colourful schemes provided on specialist decal sheets and I built quite a few but I still do not see many models at shows or club meetings which is a pity I feel. The new kit is still as good as ever but now contains new frames with all the humps and bumps that distinguish this machine but the markings are now low viz on an overall grey scheme, not quite so bright but appealing none the less. The fit of some of the new parts are not up to the original standards but the problems are easily overcome.

The instrument panels are depicted with decals and I like to seal these in with Johnson's Klear especially if the model is to be washed before painting I once watched them float off and learned my lesson the hard way. Construction notes you might find helpful
Step 4 You may need to drill out the mounting holes in the bay walls for the tail hook (part 40) which the instructions tell you to paint black and yellow but dark grey stripes are provided on the decal sheet suggesting the colour should be light grey.
Step 5 The nose gear bay when fitted barely touches the fuselage at it's front end so when I added some lead shot weight in the nose with epoxy resin I ran a little bead around it's edges for strength and the ports (parts 106) were left out till the painting was done but before the cockpit was fitted.
Steps 6/7 If the doors are to be left open all is well but to close them you will need a couple of strips of plasticard cemented to the edges of the bays to locate the parts and fill the gaps, much the same applies to the electronic bays doors, I fitted the long narrow doors and added a strip of 40thou card, overlapping to make a location for the bulged doors then fitted a strip of 20thou card to the top lip of the bay before adding the doors this was trimmed after hardening, a little filler was needed at this point to blend the doors into the fuselage, I decided to add the new belly panel (part 94) at this stage rather than step 14 then all the aerial blades were removed from top and bottom of the fuselage and wet and dry paper was used to clean up the filler before the wings etc. were added
Step 8 make up the wings but only add the blade antenna just prior to painting and the towel rack antenna ( part 208) are best left until the very last step.
Step 9 take care assembling the ECM pods, make sure the navigation lights match up and are facing forward then cut the nav. light off the end of the wing so the pod fits tight.
Step 11 build up the engines but don't add the bypass fans ( part 2) as these can be built into the cowl sections in step 12 making sure that the location slot is exactly at the 9 o'clock position level with the tiny pin on the cowl, to ensure your engine is the right way up, this all makes it easier to clean up the joins and simplify the painting.
At this stage I departed from the instruction sequence, part 203 the APU intake needed a little gentle bending into shape to match the side wall and part 204 the ALD-9 antenna needed a little sanding to match the tail end even then after fitting a drop of pva glue was needed to "bridge that gap". Wings and tailplanes were next to be added, any joins were cleaned up and all the blade antenna were positioned including those on the fin there is some discrepancy regarding the RDF antenna (parts 207) location, the drawings and box top show a high spot while the built up model photo shows a lower spot I wonder who made the mistake.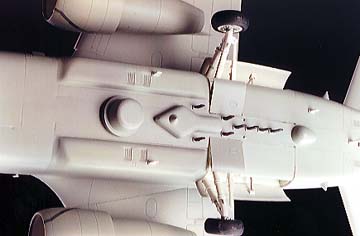
I am often asked which order I paint a model in so here is a quick run through my way, firstly I spray items like wheel bays which can be masked with the kit doors held in position with a lump of blue-tak or intakes with rolled paper towel next the canopy is masked using clear sellotape this and the cockpit area are then sprayed with the dark grey which can now also be masked using Tamiya tape, the overall colour can then be sprayed and when dry given a couple of misted coats of "Klear" ready for decalling.
A little tip I tried recently was to feel the surfaces and if they feel a little rough give them a very light rub over with worn 1200 grade wet or dry paper and, the silky finish is truly amazing and just right for the decals. I may have mentioned before that If I see the slightest trace of silvering with the decal I add a tiny brush full of "Klear" under the offending item just lifting it slightly to apply then after a few moments as it dries roll a finger over the decal to remove any excess which can be wiped away now spray another couple of misted coats of "Klear" and all is sealed in.
Now is the time to do any weathering that might be appropriate then tone down the finish with Revell No. 2 matt varnish to what ever degree suits you again only mist it on and it should be dry in no time at all. Any hand painting can now be done i.e. engine fans and navigation lights etc. all my lights and radar scopes are given a coat of silver then add the particular colour from the Tamiya clear range,
All the remaining parts, wheels, engines, pylons and pods should be added now , I use superglue and activator, one on the part the other on the location resulting in speedy hardening leaving just a little time to adjust if needed, finally fit the small windows into the fuselage then in goes the cockpit and the canopy can be secured with Slaters Mek-Pak, the strip lights need brush over with gloss varnish to bring them to life then all you need is those two fragile antenna you should now be looking at a first class model . I like the aeroplane and the kit it gave me quite a few hours of enjoyable modelling I Hope it does for you whether you are a US Navy fan or not, it's good to find a kit that gives no problems once in a while.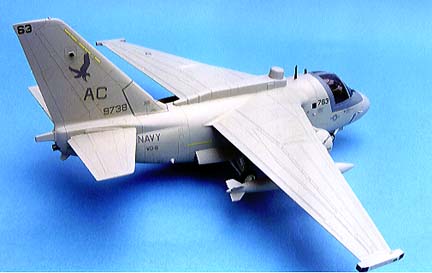
TED TAYLOR April 96
Last Page
Airbase
What's New
Home
Reviews
Next Page