
Dynavector
DE-HAVILAND SEA VIXEN FAW-2.
1/48th scale Kit No 4803.

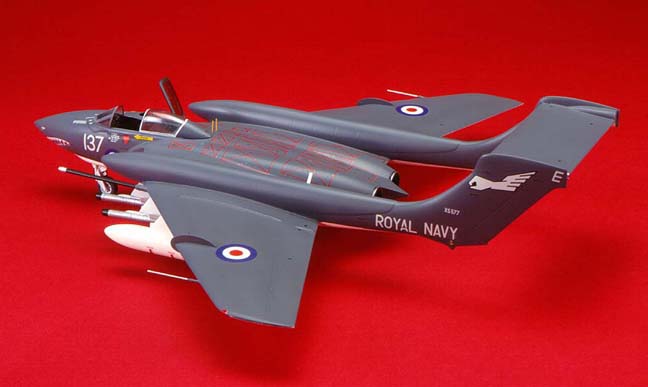
Dynavector Air Models are quickly making name for themselves for top of the range vac-form kits and the very latest release further enhances this reputation. The Sea Vixen has long been a favourite of mine and well I remember stopping every time I drove past Yoevilton Naval base to watch them twin boomers fly, until now there has only been the old Frog 1/72nd kit but the release of this larger kit has made the wait worth while. The Sea Vixen is derived from the D.H.110, the very plane that disintegrated and killed John Derry at the 1952 Farnborough air show, first came the FAW-1 but this was a little short on endurance so space was found for extra fuel by extending the booms and adding in flight refuelling booms along with a change of missile systems this became the FAW-2 which is easily recognised by the projecting booms on the leading edge of the wings, these were mostly rebuilds of FAW-1s but some were newly built aeroplanes.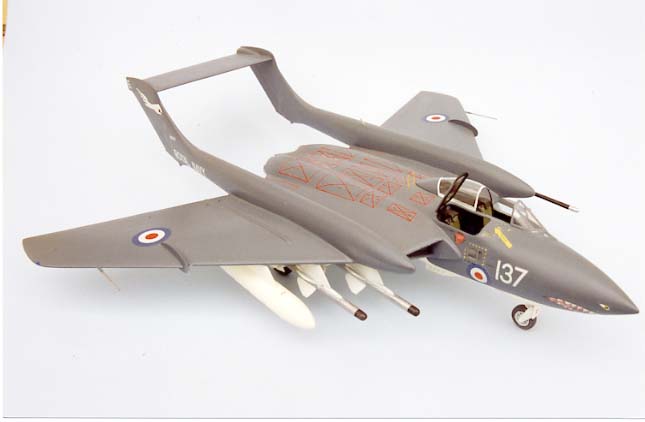
The box contains two sheets of vac-formed parts which are superbly moulded with precise well defined edges to each piece which makes it so much easier to cut and sand each part out, the canopy mouldings are crystal clear and can be cemented with liquid cement, two sets are provided in case you make a slip and these have been moulded off the same master as the fuselage so are a perfect fit, 38 white metal parts, which only need a brushing over with a wire suede brush and they are ready to use, make up the remainder of the kit parts but you also get a large decal sheet with markings for three aircraft, two Navy machines in grey and white and the other a D-3 target drone of Flight Refuelling Ltd in brilliant red and yellow, the only things I had to supply was the paint and two pitot tubes, one point to note here decal number 46 is small and white so take care not to cut it accidentally also you will find two No 87s on the sheet, make sure you know where they each go.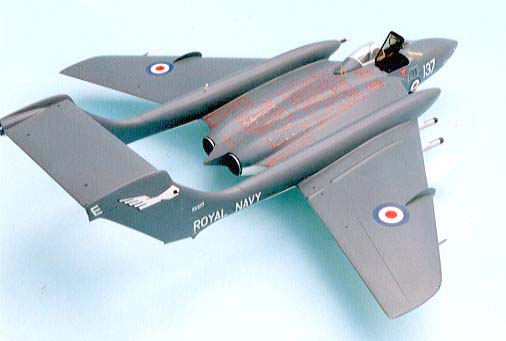
The construction of this model is not quite as simple as the other two kits in the range this is due to the configuration of the real aircraft, while all the parts fit together like a glove the difficulty arises trying to get the booms level and parallel while keeping the tailplane level, this is common to all twin boomers, having said that, it is not a difficult model to make but ofcourse you must be precise when removing the moulded parts from the vac-formed sheet and I do this by running around the outline of each part with a pilot waterproof pen before separating from the main sheet I then score around the outer edge of the line with a new strong blade which gives me a margin of appx 1mm and the excess plastic can now be snapped off. Sanding back seems to be the biggest source of frustration with vacforms, some recommend using wet and dry on a flat surface to remove the remaining plastic but that is the most dangerous with a good chance of uneven sanding this manufacturer does not recommend it, I don't like the mess anyway so I choose to scrape the plastic "collar" away with the back edge of a knife blade until the ink line is faintly visible through the plastic I then use a small sanding block to gradually remove the remainder until the thin "collar" drops off, with a little care on this last stage you can make an otherwise tedious job quite quick and satisfying. It is recommended on the six page instruction sheet that you do not remove the wing joint base supports (that's the bulged cross hatched bits) as these support the main parts so you can keep the edges straight along with several other tips on good vacform modelling.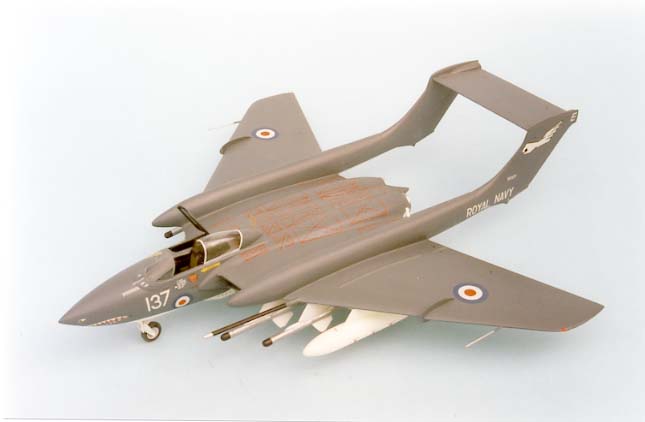
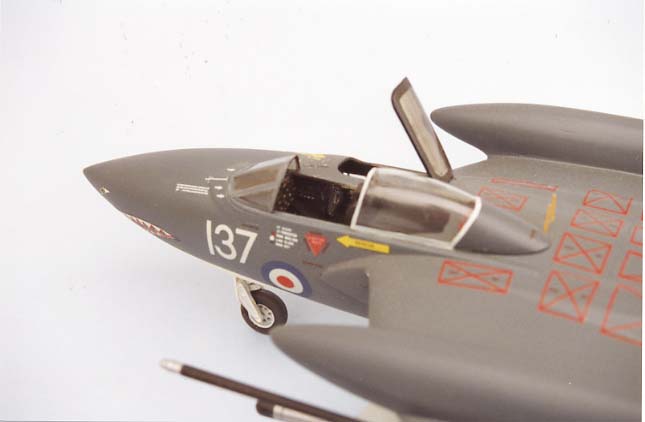
The fuselage is split horizontally and mates quite well but I added a couple 40 thou card backing plates behind the intake arrow heads to allow for sanding smooth later and a couple more on the intake rear wall this was to stop any distortion later when fitting the wings. Before the cockpit area is added you must turn your attention to the observers hatch, if you want it closed then you have two alternatives, one, as this has smoked glass on the real plane you could just paint the glass gloss black when finishing or, two, cut the clear hatch part out larger than needed , trim a suitable hole on the top decking to take it which then allows you to sand the join without being near the glass part of the hatch, however if you want to display it open to show off the cockpit area cut the hatch and hole to the moulded lines and you will have a perfect fit. The base plate for the exhaust pipes was a little unstable so I added some tiny blocks of plastic to the interior of the fuselage top and bottom and before the cement dried added the plate and ensured it's 5mm depth was correct. The cockpit furnishings are all white metal, providing the weight to keep the model balanced, with moulded details, which can be highlighted for appearances, the seats are basic and will need seat straps added as well.
The fuselage can now be made up but leave the metal intakes until the wings are fitted, the booms are best done next, leave them to harden as you can use these as a guide to the shaping of the wing section.
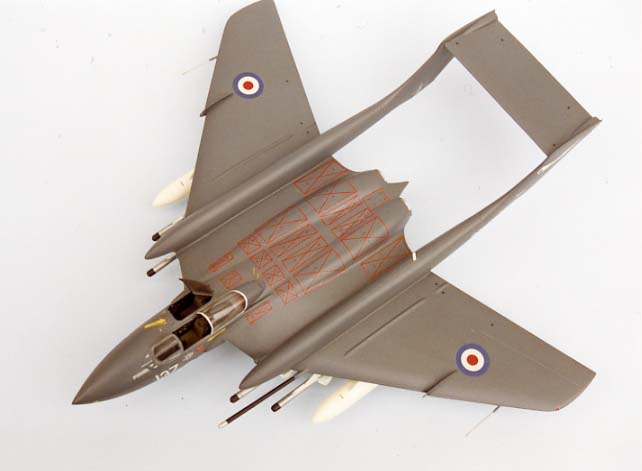
Make up the tailplane and sand the ends of the fairing either side flat, to these areas add bits of 20thou card and when hard sand them back to match the fairings. Remove the gear doors and add the moulded wells, cut out any holes for the pylons you may require. Cement and tape the wing edges, add a spar from 40thou card, taper it on a trial and error basis and insert it just fwd of the wheel bay until it opens the end of the wing to the recommended depth of 10mm, now tape the boom to the wing and add further spacers so the wing conforms to the cut out on the boom, leaving room for some 40thou tabs extending three or four mm, when both wings are ready push the tabs into the fuselage openings and you will have a minimal join line, do make sure that the wings are level as shown on the instruction sheet and leave to harden overnight.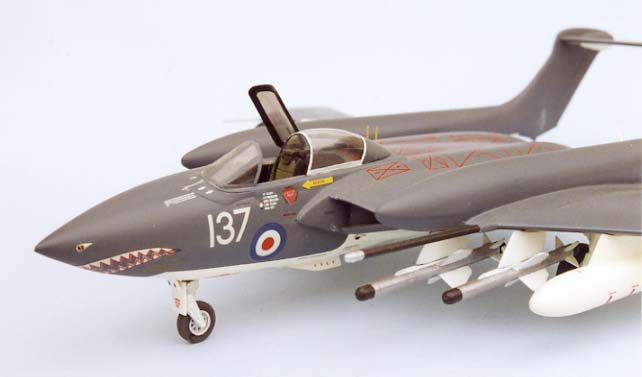
Add the intakes and clean up any joins remaining, one point here to note with all vacform kits lightly sand the whole surface to remove those tiny pips that are formed over the vacuum holes, the booms and tail plane should all be added together and before the cement hardens make it your priority to see the booms are upright and parallel and the tailplane is level, if a gap should appear on the wings use filler later rather than trying to manipulate the parts, I personally just ran a bead of superglue along the join and let it set.
The white metal wing fences provided are a bit thick so I cut new ones from 15thou card, simple to do, just lay them on the card with some double sided tape to hold them and trim around the edges and you have perfect copies fit these and the model is ready for painting, spray the white undersides first including the legs pylons and tanks, when dry mask up with Tamiya tape along the booms and below the fuselage not forgetting the leading edge under the wings and tailplane or the observers window, I used Xtracolor X5 extra dark sea grey but Humbrol No 27 is a good match, to cover the top sides after which the decals were positioned, this alone took me a whole day to accomplish and then a coat of Johnson's Klear sealed them all in, this it's self was in turn coated with a light dusting of Revell No 2 flat varnish to give a slight sheen.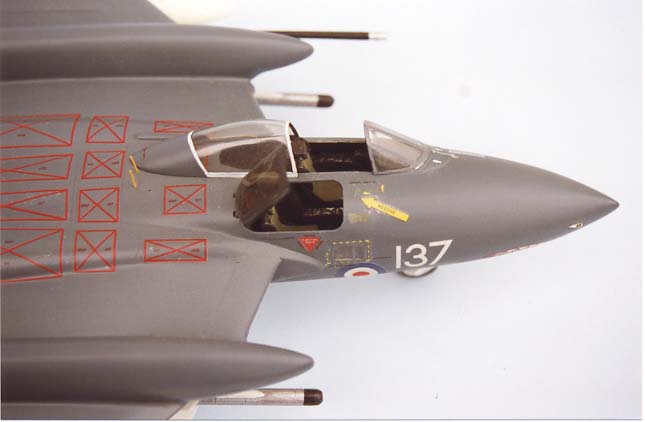
The fuel tanks are handed so don't get them mixed up and the missile pylons need to be positioned correctly, look at the top edges the straightest one goes beneath the boom and the curved one goes out board, fit the remainder of the metal parts and add two pitot tubes, I made mine from the needle on the Revell cement dispenser, all that remains is to add the canopies and two small whip aerials from stretched yellow sprue.
A lovely aeroplane the Sea Vixen and it is a joy to make up a good kit, lots of enjoyment and no tedium, I think you just might enjoy it too.
TED TAYLOR Feb 96.
Last Page
Airbase
What's New
Home
Reviews
Next Page