
Italeri/Academy
AH-1W Cobra
Tank killer Helicopter
Kit No. 2193. 1:35th scale

Italeri/Academy
AH-1W Cobra
Tank killer Helicopter
Kit No. 2193. 1:35th scale
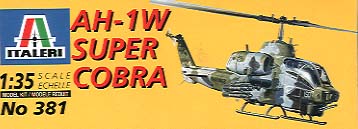
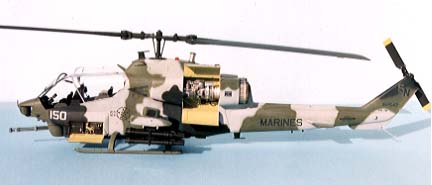
Italeri AH-1W Super Cobra 1:35th scale
This is the Marines best attack helicopter; it is an upgrade from the “T” model Sea Cobra with more powerful engines and reinforced fuselage. These were used in the Gulf war and were quite successful.
Italeri and Academy have chosen to release this kit (I believe the kit originates from MRC) in 1/35th scale as opposed to their usual 1/48th scale range and it certainly makes a world of difference. The kit is cleanly moulded on the whole but there are a few mould join seams and flash to remove but other than that the parts are well designed with raised and engraved details including loads of rivets on the tail section, the large cockpit canopy comes in three pieces and is crystal clear, it can be assembled in the open position if you wish, there are several bays provided that can be constructed with doors open to show off the detail inside one of which is an engine bay with a basic engine moulding that really could do with some plumbing to set it off.
The instruction sheet is clear and concise but there are some mistakes to be aware of, there is plenty of colour information supplied that will result in a good appearance if you have no other reference material. The decal sheet give two sets of markings, one in sand colour for HMLA-369 in Saudi Arabia 1991 and the green, grey, black camouflage of HMLA-169 in the Gulf 1987.
Construction Notes There are only a couple of Items here
Step 2…when cementing the cockpit into the fuselage half make sure the front instrument panel is down below the level of the windscreen (canopy) or it will foul later.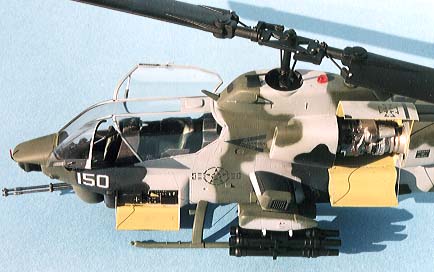
There is no need to add nose weights in the fuselage itself as there is a nice “tool box” to pop in the bay below the cockpit later and this can hold all the weight you require. Add the mounts for the rotor shaft Parts 19b and 22b to one half and check they are level by holding the second half in position and placing the shaft in the holes until the parts are set but don’t get cement on the shaft itself
Step 3…I intended to leave all the bays open so before adding parts 18/21c engine cowlings I covered the openends around the engine bay with 15 thou card, cut to fit just inside the openings, the real thing has plates here and the engine passes through various openings. The effect works quite well as the engine supplied fits tight against the plates. If you are using the tool box for the weights then there is no need to add it until the end and the same goes for the exhausts parts 16/17c or they will need masking while the camouflage is sprayed on.
Step 4…To protect the cockpit interior while spraying, I taped all three parts of the canopy together from the inside and placed the whole in situ, holding it with white PVA glue, then it was masked on the exterior.
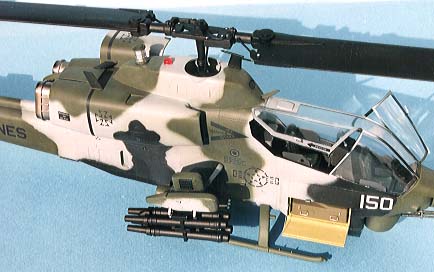
The next thing was to construct as many parts as possible to finish the model but I left off the various armaments and rotors, both the doors and engine cover were held in position with Blue Tac to mask the bays
Step 8… shows the construction of the main rotor and it shows the blades the wrong way round on the Italeri sheet, just turn the blades over, not the centre hub, so that they rotate anticlockwise when looking down, for those unsure the curved edge is the leading edge (refer to any good cobra photo) then add the mast to the hub, the whole unit can be dropped in later and is removable for transportation.
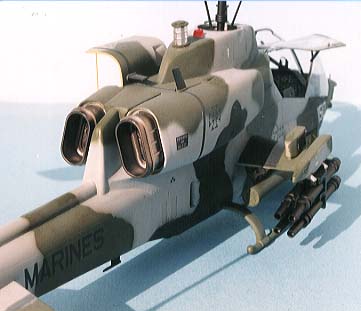
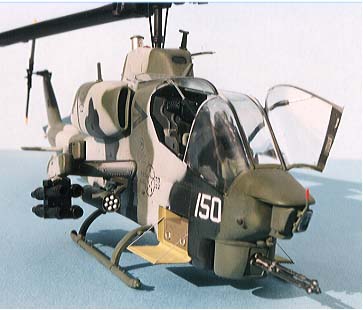
Painting and finishingI chose the three coloured Gulf scheme and used Humbrol paints As follows Grey was Hu128 FS26320, Green was Hu105 FS34097 and black Hu 85 FS27038. The grey was sprayed all over first, this helped to check seams and rectify any problems, then the camouflage pattern was pencilled on and sprayed freehand with the airbrush almost closed and very close to the surface.
I left the paint to dry overnight and then dusted a couple of coats of Johnson's Klear (future) overall before adding a further fuller coat ready for the decals. When this was hard, after about half an hour, I very lightly sanded the whole model with worn out 1200 grade wet and dry paper to get that super smooth finish.
Now the decals were added but there was a lot of silvering so using a small brush each one was lifted slightly and a tiny amount of Klear was placed underneath before the decal dried out and as that dried out any excess was removed by rolling a finger over the decal and wiping away the excess. With all in place another coat of Klear was added to seal them in, then I sprayed a matting coat, which was a mix of three parts Klear and one part Tamiya flat base to get back to a nice sheen.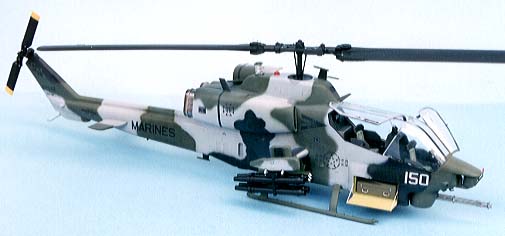
The canopy was now popped off and unmasked with the main section now being properly cemented on and any touching up attended to, both the bay doors and the engine cover were next cemented in the open position, the cables that hold the doors were made using fine florists wire cut to length and superglued in position. Now is the time to decide the armaments load and mount them up, I chose the rockets.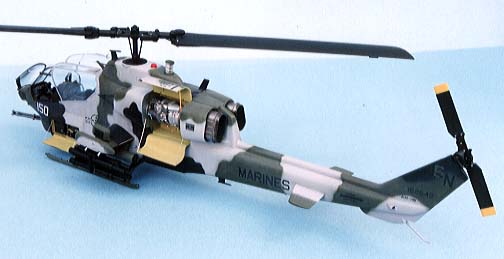
Final painting of items like antennas and pitot tube, magic lantern and gun barrels etc. etc. can now be undertaken, and the canopy “doors” can be mounted onto the main section. I wanted mine open but had to make new lifting rams from rod and tube, as the ones supplied are way too short.
The rotors were sprayed No 85 black with yellow on the tips of the tail rotor but not the main blades and while these dried I sprayed the exhausts with various shades of Alclad II and added them before popping in the rotors.
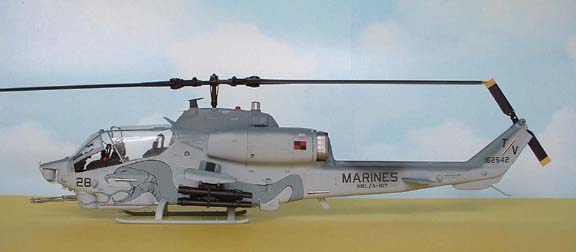
Academy Cobra conversionAt about this time the Cobra company released their update resin set to bring the cobra up to NTS standard and "Two Bobs" released a new "Whiskey Cobras" sheet of decals with some impressive all greys and desert schemes, I just had to try these on a second kit kindly supplied by Toyway Ltd.

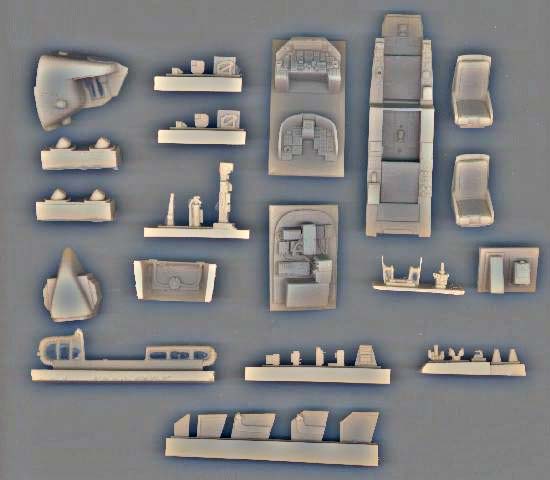
The first thing to do is read the instruction sheets carefully, yes I know you always do, then wash all the resin bits in warm water with washing up liquid to remove any mould release oil. Before cutting all the resin parts from the pour blocks use a felt tip pen to mark the part numbers on the bases for easy Identification later and only cut them off as they are needed.
The fuselage needs some modifications and the cut lines are shown in a photo on the sheet, I cut mine a little away from the panel lines and then taped the two halves together while I sanded back to the lines keeping both sides even. The new nose needs a small amount of flash removed from the turret area, when cleaned up it should look like the original kit part area.
With such a large canopy on this Helo, the cockpit has got to look good, and the resin parts supplied certainly fulfil this need. The instrument panels have all the tiny boxes as separate items and even the HUD frames are separate mouldings, take care releasing these as they are very delicate, The gunners panel has much more refined TSU than supplied in the kit with separate handle and eye pieces, the seats need straps and one needs a set of armour plates built to match the pair supplied. While the resin parts are nicely done the instructions leave a bit to be desired as a couple of items are not clearly shown ie. part 22 the gunners ICS fits directly in front of his seat against the step in the floor across the cockpit and the missile plume detectors on the nose face forward at 45 degrees.
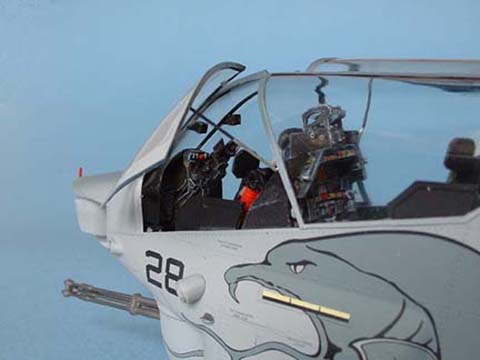
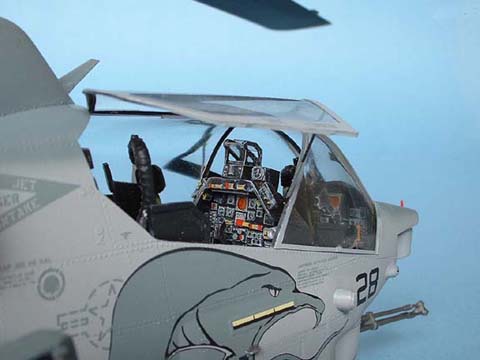
Fully paint and finish the cockpit but leave the gunners panel loose till later as you have to fit the new nose and it could get damaged. Remove the kit side armour panels and assemble the fuselage halves trapping the new cockpit between and on the locations provided. Now is the time to add the new nose which is a perfect fit and the new laser detector asembly, part 33, I found I had a step here so Iadded a 60 thou card insert to carry on the smooth line of the cowling and made a wedge shape base for the "magic lantern" to keep it upright.
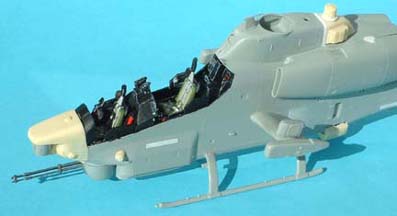
After cleaning up any joints and seams I held the canopy in place while I marked off the area to be removed to fit the new nose, I thought this might be tricky but proved otherwise in the end, care must be taken not to remove too much. The gunners door needs the same treatment and when the fit was OK the canopy parts were taped together from the inside and then masked up on the outside.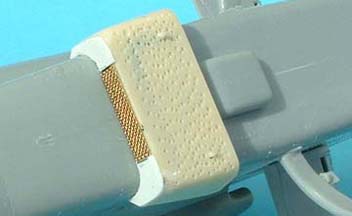
The engine oil cooler part 34 was superglued in position and scraps of 15thou card were used to refine the rear face with some fine wire mesh added in the centre as were the vents on the fin.
After the plume detectors were added the kit landing skids were cemented on and left overnight to harden while all the missiles and rockets were assembled ready to be added later.
Extra weight is needed in the nose and it can be added in the box that fits below the cockpit, try not to exceed the amount needed as you can strain the landing skids. As I was going to use the very decorative decal sheet from Two Bobs I closed all the doors and cowlings to show the designs at their best.
The stub wings can be assembled now and positioned but not the missiles yet, the canopy was added temporarily using PVA glue whilst the model was sprayed. The colours used here were FS36375 Humbrol 127 and FS35237 Humbrol 145, which is the latest scheme applied to the Cobras. A coat of Klear (Future) was sprayed overall before adding the decals, there is a small problem with the decal instruction sheet, whilst the main items are clearly shown the stencils etc. are shown so minutely that it is impossible to identify each item and I had to resort to getting in touch with Bob from "Two Bobs" who helped by supplying large scale artwork, not many manufacturers would do that.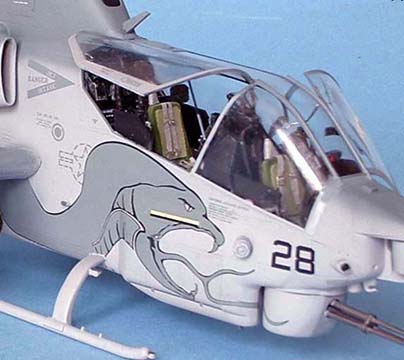
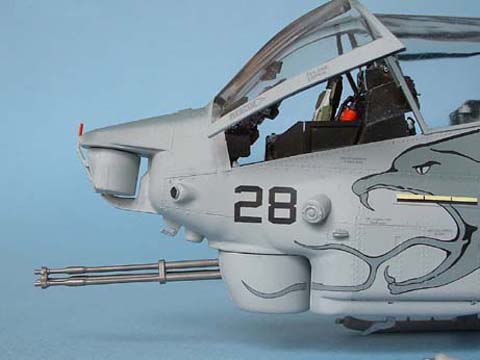
All the remaining items were painted between jobs ready for final assembly and the final coat of Klear was sprayed overall to seal all the decals in. Now is the time to do any weathering or touching in and then you can use your favourite matting varnish to bring the finish to the desired state, in my case I use a mix of three parts Klear to one part Tamiya flat base and this gives a nice sheen.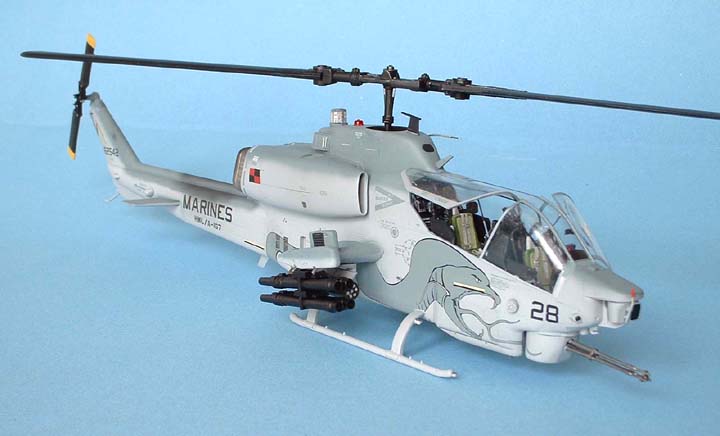
The canopy can now be removed and unmasked not forgetting the tape on the inside, at this stage I found that the gunners panel was wider than the cockpit and I had to file away some of the coaming to let the canopy seat properly. Checking to make sure the side armour plates were clear the main part of the canopy was cemented on and the doors cemented in the open position, I just could not hide up all that detail by closing them.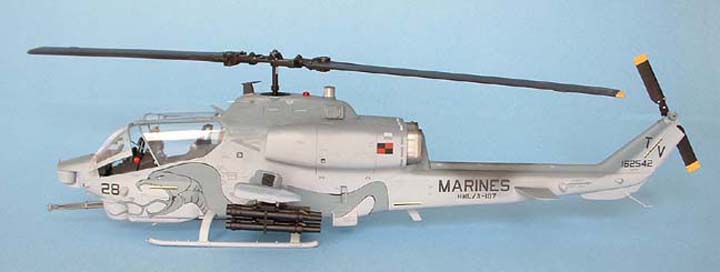
Missiles and rockets were mounted on (take note here, the tow missiles in the academy instructions are shown the wrong way around) the rotors just popped in and there I had a stunning model. I don't usualy drink scotch but this was one "whiskey" I enjoyed thoroughly.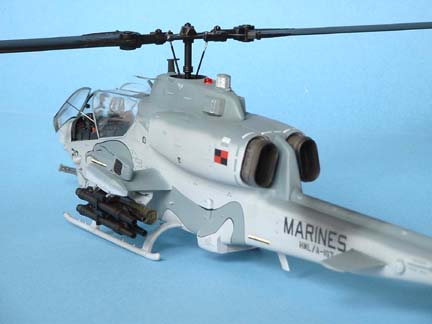
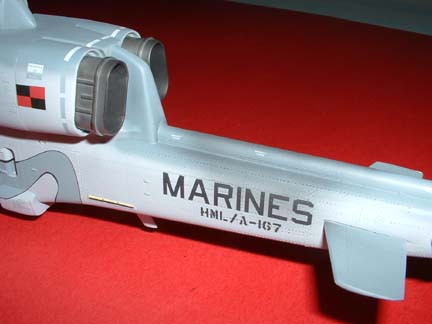
All in all a fine model is the result, it is bigger than some 1/32nd aircraft and has a lot of detail on board, and I quite liked it I hope you will also
Reference: - Paperback “Cobra tank killer supreme” By Mike Verier
Published by Osprey ISBN 0 85045 896 X
Ted Taylor march 2003