Revell
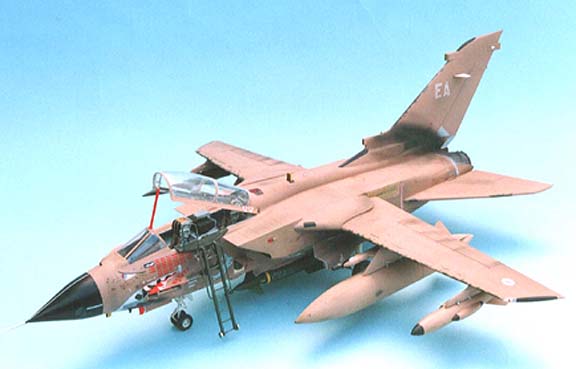
"Mig Eater" Tornado
Kit No.04705. 1/32nd scale
+CAM detail set
Ted's Corner
What made me want another big model like this? Well occasionally, the Editor sends us items to be reviewed and the only way to show the potential of an item is to build it, yes I know it is an awful job but somebody has to do it, so here goes.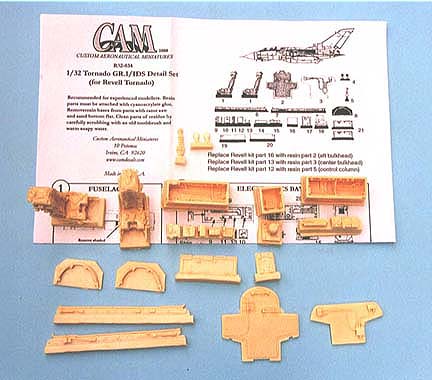
The CAM super detail set arrived and it was full of parts for the front fuselage and looked very impressive on the bench, Revell kindly supplied a GR.1. kit and I thought I would just build the nose section to show off the parts and save a little time, that’s a laugh, as when the nose was complete I just couldn’t resist the temptation to add the remainder of the kit and so !!!!
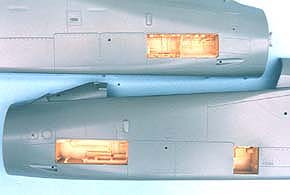
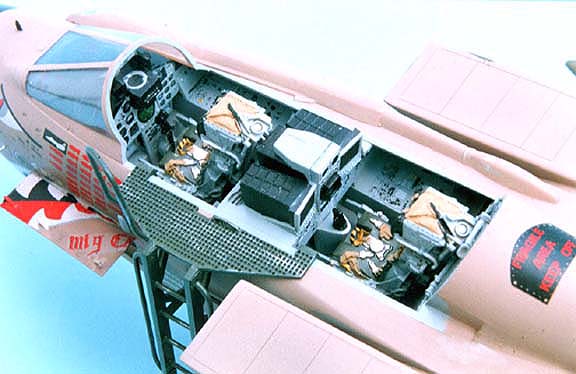
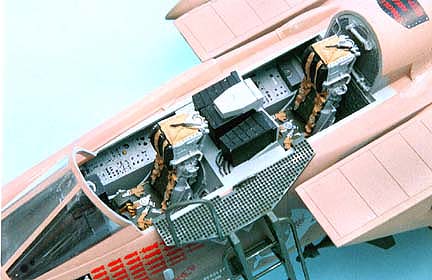
The set contains the two cockpit rear walls with better-detailed surfaces including the pipe work, two new seats with much more detail and separate ejection firing handles, some pipe work for the canopy plus two electronics bays and the lox bay. The bays come with very delicate rails moulded in to take all the separate boxes and gizmos that reside there, these are moulded on small pouring blocks and are easily identified on the small instruction sheet. The doors that cover the bays are supplied and there was one missing from my box, but a quick Email to the distributors, Brookhurst Hobbies in California, had one winging it’s way the very next day.
Construction began with the cockpit but before too much detail was added, I cemented it to the nose wheel bay and left it to harden while I cut out the panels where the E bays were to go. After sawing off the resin pouring blocks, the bays were superglued in position checking the alignment carefully. The next task was to check the two halves of the fuselage would go together with the bays and cockpit in position, alas no. My small sanding blocks were usefull here, the rear wall of each bay was sanded until it was paper thin (I suppose you could take a little off the front edge if they are not mounted yet) then the cockpit lower side walls were also sanded to a minimum and I finally got the two halves to meet without straining
After adding the new rear walls to the cockpit tub, I painted the interior and instrument panels a basic light grey. I have a sample of the actual paint and the nearest equivalent I can find is FS 26280 or BS381C 694 Dove grey.
The instruments were detailed with black and highlighted with dry brushed white. The scopes were given a coat of Humbrol No 11 silver and when dry a coat of Tamiya clear green was added, this give an impression of life. A little dab of silver was also placed on the sloped surface at the rear of the front instrument panel, that below the HUD lens (part20) and again the clear green was added to the lens.
Both instrument panels were cemented in position and the tub mounted in the fuselage halves, I didn’t add the seats or top decking (part 19) as they would hinder the masking of the cockpit for spraying later. I added a tab of 60thou plasticard along the inside of the lower fuselage join to form a strengthener on the butt joint and left about 1/8th of an inch protruding at the rear edge to act as a locator for the rear fuselage.The seats are nicely done up to a point, the seat belts seem to bear little resemblance to the real thing but once painted they look convincing. I have spoken to the people at CAM and they say they will look into improving these. The colour of Tornado seats used to be Medium Sea grey until 1991 when it changed to Dark Sea grey to identify them look at the air conditioning pipes on the side of the head box, the early ones were white now they are black. The cushions and packs are olive green and the survival pack is yellow with the straps golden sand colour.
I looked at the doors on the electronics bays and found they were nothing like the real thing and there were no catches depicted open as they would be so I decided to build my own.
Firstly I cut rectangles from 15thou card 34 x 11.5mm and near the lower edge I cut three slots for the catches, use the kit panels to show you where they are positioned. From 40thou card, cut rectangles 32 x 9.5mm. these are cemented to the upper edges of the 15thou “skin”. Using some 40 x 40thou square strip cut three bits 6.5mm long and butt them up to the lower edge of the plate below the catches. Cut small plates 6.5 x 3mm from 10thou card and lay them over the blocks, then cut 3mm squares as bases for the hinges and cement along the top edge as appropriate. The hinges can be made from 30thou strip and should be adjusted to fit the bay. When the doors are finished make the catches from scrap plastic and add to the outside at an angle to suit. The Lox door is the same with other dimensions. All the doors are supported with round tubular struts so I have used 0.5mm rod cut to length.
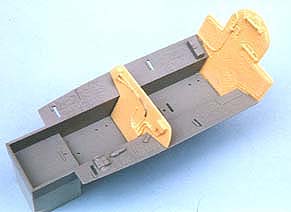
If you have storage problems with such a big model, I would suggest that after assembling the wing halves you could cut a tapered slot into the pivot hole from just in front of the “teeth”. Make the slot narrow at the edge of the hole and gently sand it until it will click into position on the pivot, as shown below from a previous model
This will enable you to remove and replace the wings for storage.
The one poor point on the Revell kit is the wing box seals I feel sure Revell could have provided an extra piece with closed seals as an alternative. To overcome this I use foil to make new ones, this has to be just a bit stronger than the usual type you find on the modellers desk, an Ideal foil is the sort that your scalpel blades come wrapped in. Open a pack carefully and roll out flat removing the impressed number, cut to the size of the seal and with the back of a knife mark up the vertical lines, don’t press too hard as you only want impressions.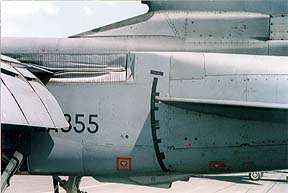
Mark the horizontal centre line and, depending on how far you want your wings swept, cut the forward part of the line. Superglue this over the kit part then as you place the wings in position the foil will yield realistically.
The remainder of the construction is straightforward and holds no surprises.
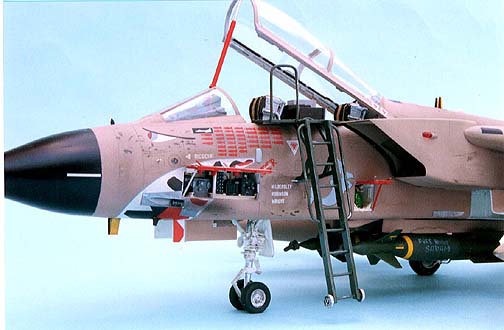
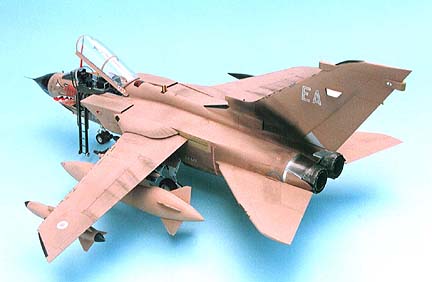
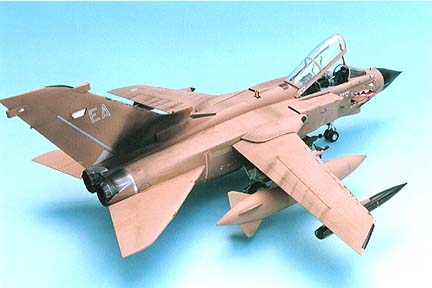
Painting and finishing The E bays were sprayed white Hu 130 and masked with pieces of card cut to size. Wheel bays are white also and when these were sprayed, I masked them with the doors themselves using a blob of Blutak and pushing the door onto it until it seats in the gap. The radome and various antennas were sprayed black Hu 85 and these were masked as was the cockpit using Tamiya masking tape. The desert pink is Hu 250 and was sprayed overall including pylons and tanks etc.
A coat of Klear (Future) was sprayed overall and lightly rubbed over with worn out 1200 grade wet & dry paper to get that silky smooth surface. There are not many decals on the desert storm aircraft but those I used were sealed in with a dab of Klear under them to eliminate silvering before I sprayed a protective coat overall again and finished off with a light dusting of Revell No2 flat varnish.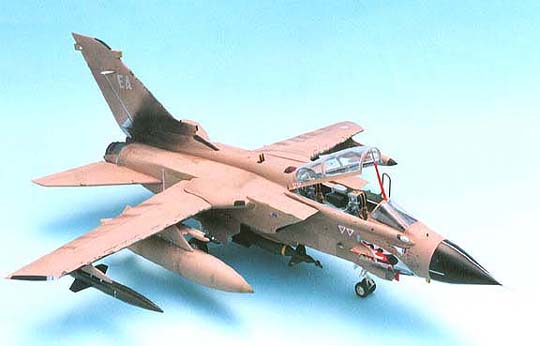
I am always being jibed for making clean models so I decided to do a little weathering this time. For oily stains I used Tamiya’s smoke, Matt black gave the sooty finish on the fin and a very fine dust of it went overall, this allowed me to spray a couple of panels with the base colour to simulate a respray on that panel. When I actually saw MIG Eater at Mildenhall I was surprised at how much paint had flaked off so I simulated this using a tiny brush and the grey and green paints of the original camouflage touching in tiny bits here and there particularly along the wing leading edges and it was quite realistic I thought. Johnson’s Klear also came into use again with a brush full on areas that are liable to rubbing and making them shinier.The inside of the canopy was hand painted but the exterior was masked and sprayed. Later all the masking was removed and the engine bay was cemented on to the fuselage as was the undercarriage then all the tiny boxes were added to the “E” bays and the doors put in position. The cockpit was furnished and the canopy erected over the top.
A rewarding experience I thought and well worth the effort, I maybe would not have built another big model like this if it had not been for the CAM parts, it makes it interesting.
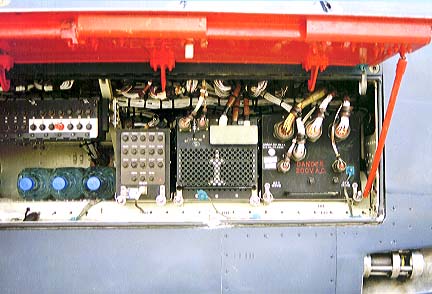
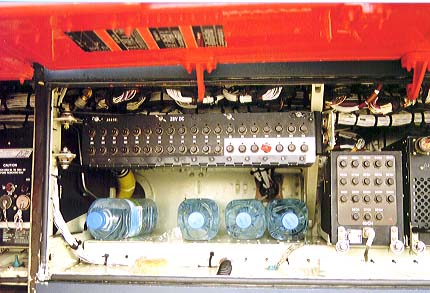
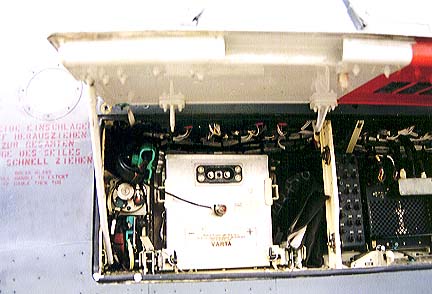
These are the real thing that I photographed at RIAT2000
Starboard
Ignore the water, it was a hot dayPORT
#Back to the Top
Last Page
Airbase
What's New
Home
Reviews
Next Page