Airfix
Canberra PR9/SC9
with AtoZ conversion
Kit No. A10103 1:48th scale
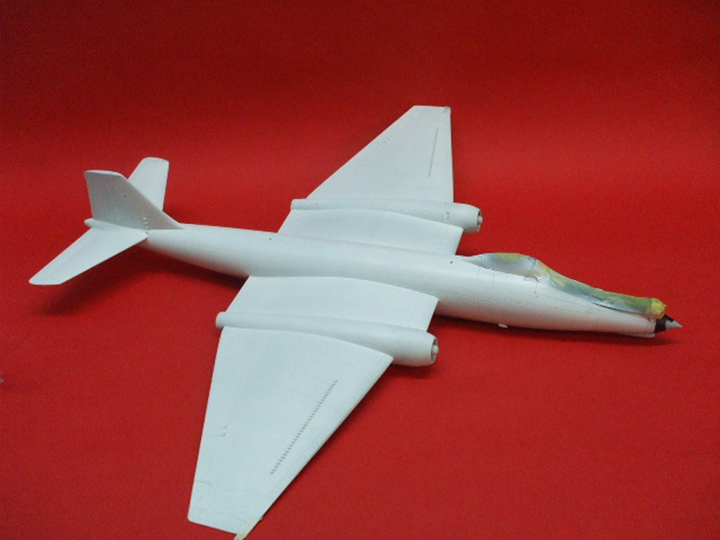
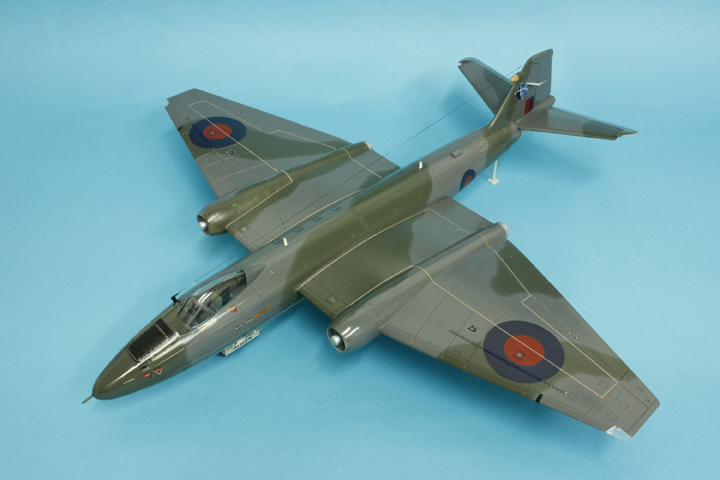
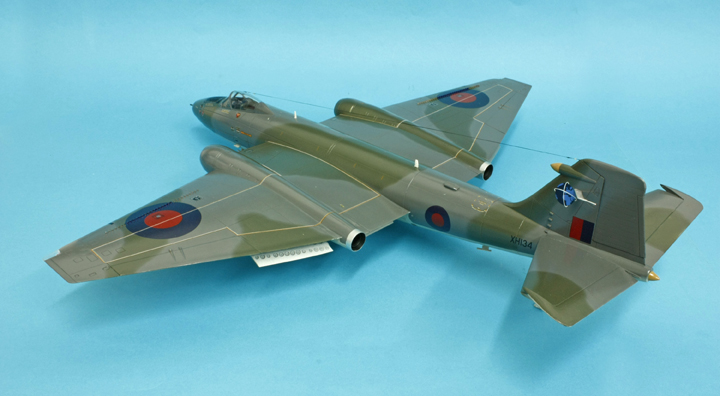
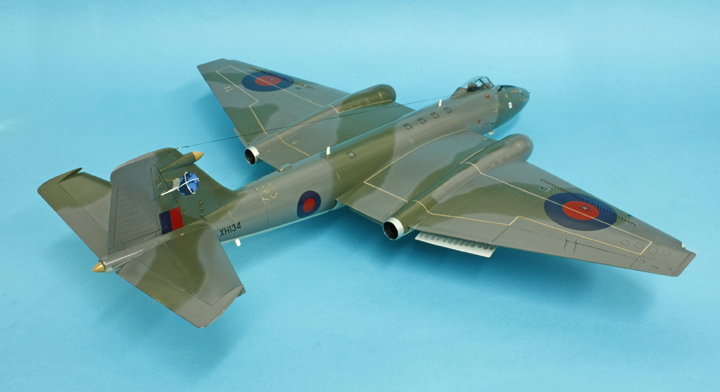
The Airfix Canberras are well documented in reviews at the moment but when the AtoZ conversion set arrived I just had to make that from the basic PR9 kit.
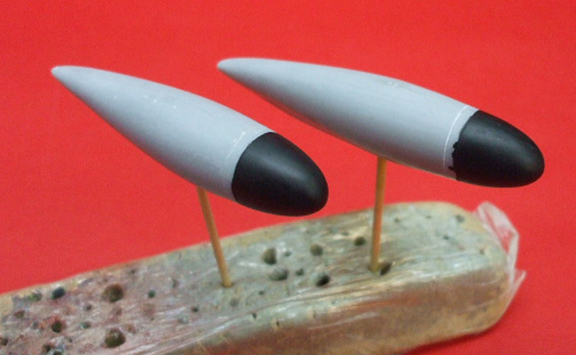
The conversion kit contains three resin parts, the nose section and two new tip tanks which have rounder ends on them and seem to be a little fatter all the parts need only a light rub down with your favourite sander after cutting the tanks from the pour blocks, the pour block on the nose can be left on as it fits inside the assembled fuselage quite nicely ,
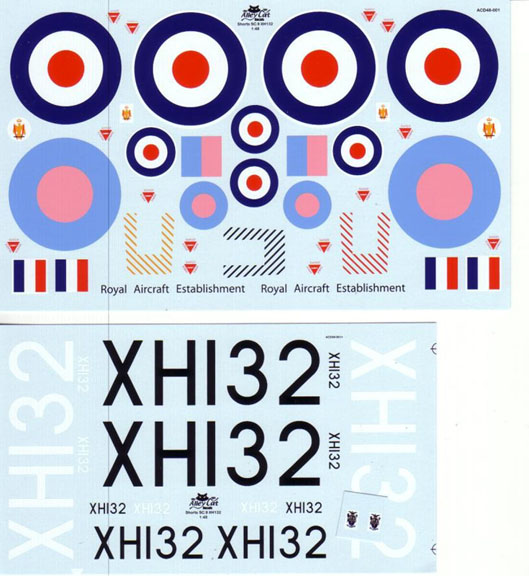
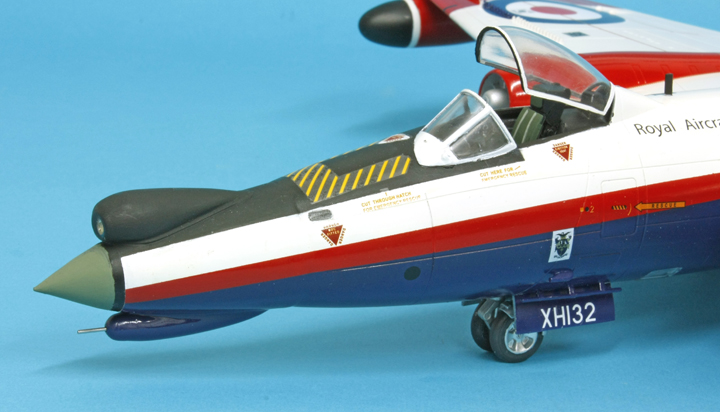
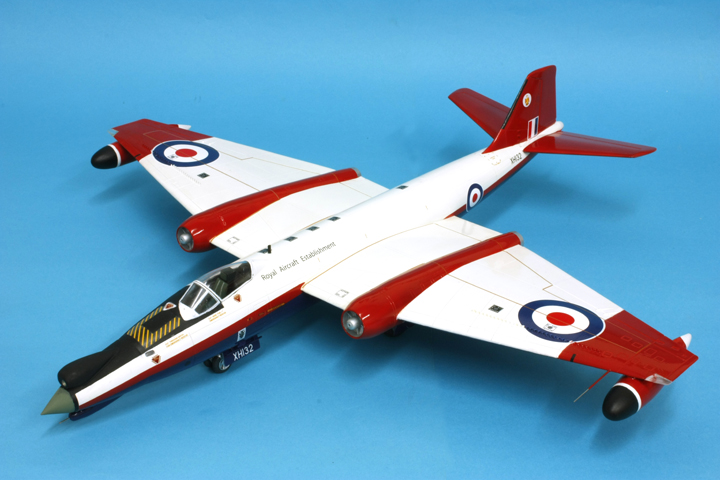
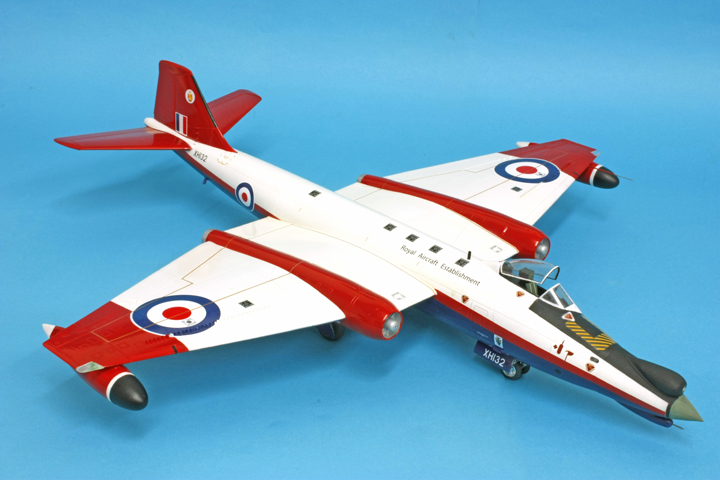
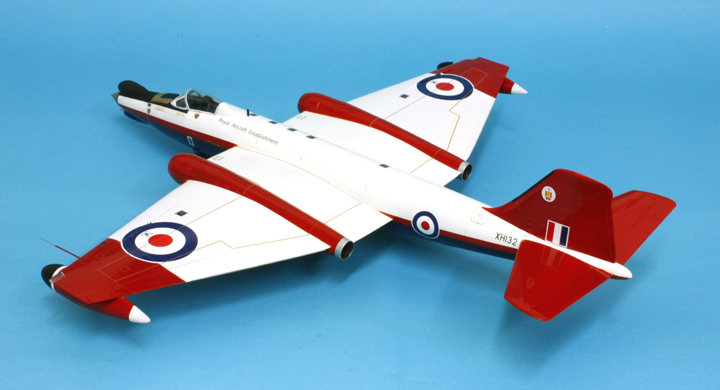
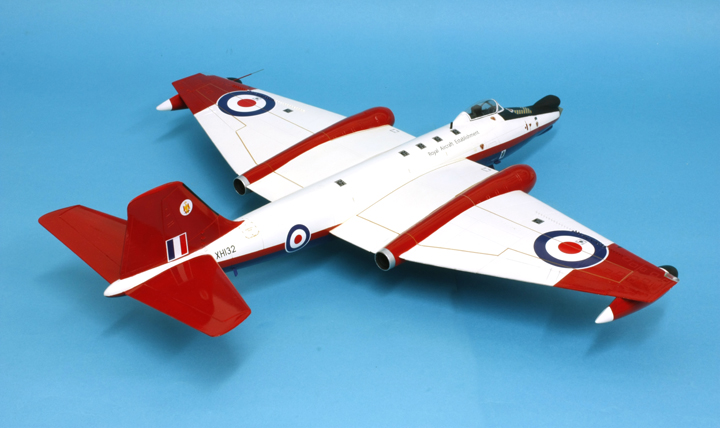
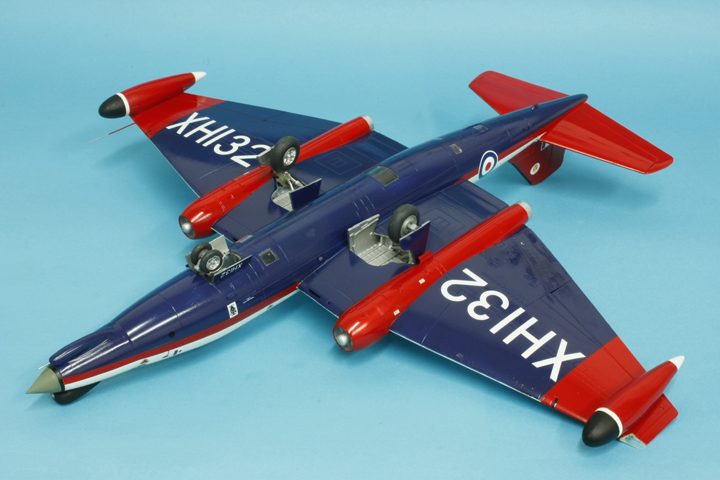
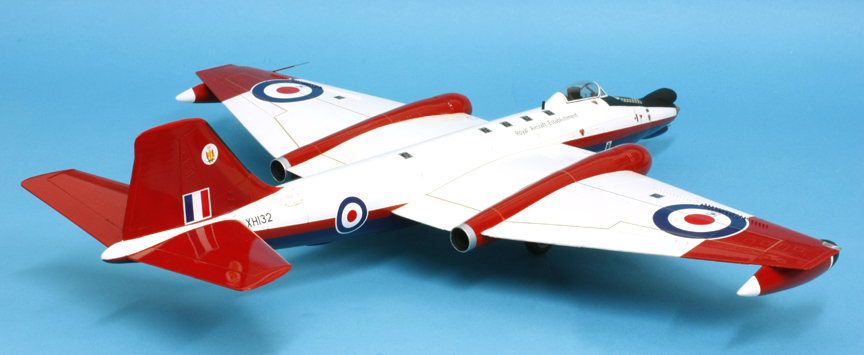
The decal sheet comes in two parts with roundels and fin flashes on one sheet and serial numbers on the other, the placement sheet gives information on four different periods of the aircrafts life and the three bases where it served namely, Pershore in 1970 and 72 then RAF Wyton in 76 and finally at RAF St Mawgan in 1985. You get a choice of colour schemes that should keep most modellers happy, overall high speed silver, overall white, raspberry ripple then hemp and grey.
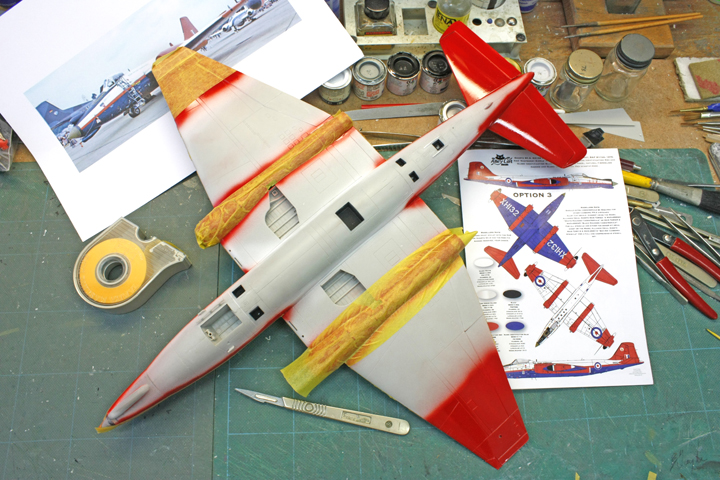
I have admired several times at various model shows a table with all raspberry ripple aircraft on display and promised myself one day well that opportunity had arrived.
There are a few faults with the Airfix kit that can be fixed and are noted on various web sites the main one I believe is the angle of the base of the fin too much of a curve so I sanded away the leading edge so that the straight edge reached a lot lower and gave a smaller curve at the bottom, there is just enough thickness of plastic there to do that but wait until the fuselage halves are joined and hardened off. Remember to open any holes or slots before cementing halves together.
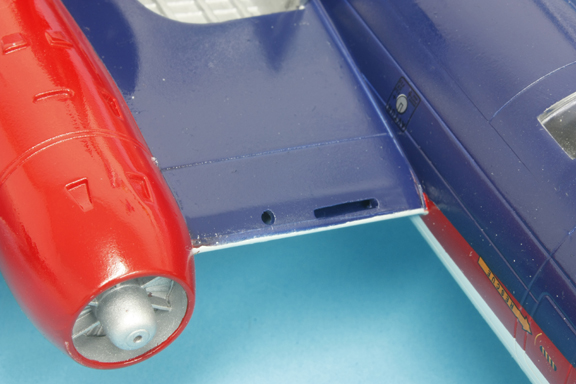
The wings have poseable flaps and moveable ailerons I found two extra halves for the ailerons so make sure you use the pairs that make the thinnest part as the thicker ones will not match the groove they fit in. When the aft ends of the engines are added you may want a little filler but careful assembly is the secret to get the best fit possible.
The Canberra is a dedicated tail sitter in model form so you will need some nose weights, the kit advises 100gms but that is no where near enough, in the standard PR9 I used nearly 150gms in the nose cone and it still needs the prop under the tail in the SC9 I drilled a short way into the resin nose section and loaded 150 gms of lead shot, the combined weight was enough to hold it down. Before you add the camera bay parts 3H or 4H there is room above the nose wheel bay that can take a fair amount of weight.
With that kind of weight in the nose there will be a terrific strain on the nose wheel axles so I removed them and replaced them with a short length of brass rod drilled through the leg I repeated this on the main wheels on all my Canberras as a precaution. When the tops of the main legs were cemented in position I reinforced the joint with a dab of epoxy resin as the plastic is quite soft.
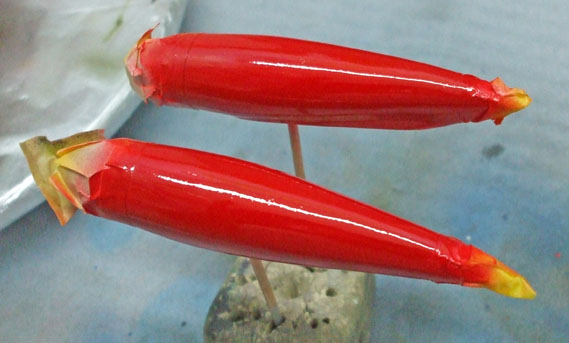
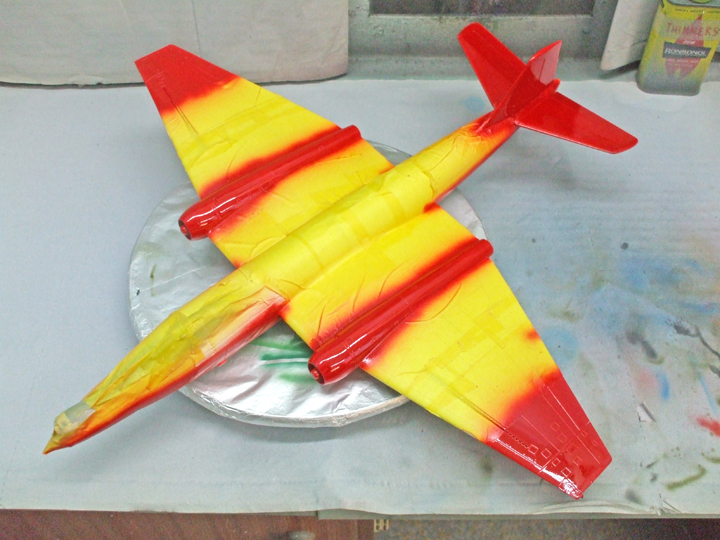
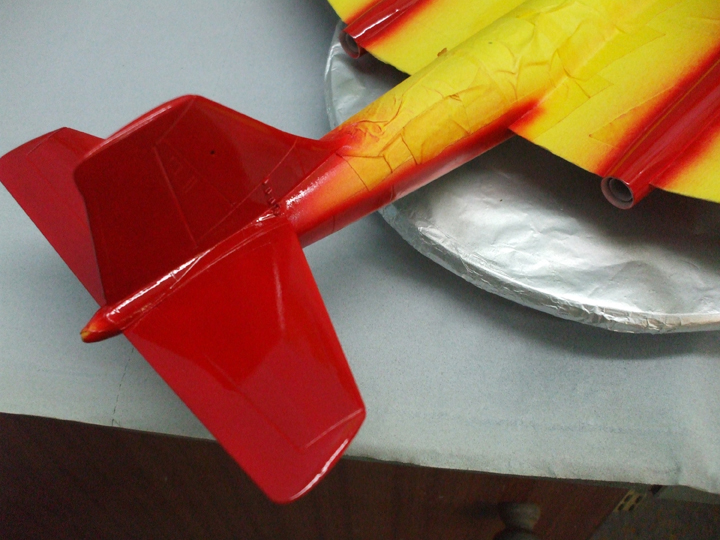
The raspberry ripple scheme must be one of the most difficult to get right and probably uses more Masking tape than any other, I planned for a couple of days how I was going to paint and mask. Firstly I needed a good white base coat to back up the gloss white and the red areas; for this I used Humbrol Hu130 satin white was sprayed on the entire upper surface and those areas below that needed red.
Left for 24hrs the satin white was lightly rubbed over with very fine wet and dry before a thin coat of gloss white was sprayed overall. 24 hrs later this was masked off with strips of Tamiyas wide tape ready to receive the red areas and for this I used Hu19 bright red gloss as I had no insignia red.
Another 24hr wait for it to harden before this colour was masked and the blue was sprayed on, for this I used Revell #53 which matches the insignia blue on the decal sheet.
After all the masking was removed and any tiny touch ups attended to I masked the edges of the antiglare panel to spray Humbrol matt black Hu33 then the wheel bays etc. etc. were brush painted.
The next task was the decal placement and this went normally using a combination of kit and the aftermarket decals. On the PR9 wing there are vortex generators just where the roundels go and it is very difficult to induce decals to settle down over them even with decal setting solutions so I solved the problem by slicing out a strip from the blue area the width of the generators then adding the two parts on either side and painting the generators with a tiny brush using the insignia blue.
Various little touches of colour were needed to finish off the painting stage before the remaining parts such as gear doors and blade aerials were added, the pitot tubes were cut to length from fine steel hypodermic tube the type you find on Revells little Contacta cement dispensers.
I also built the standard PR9 along side this model and was amazed when I saw the difference between the two models, all in all a very satisfying project,
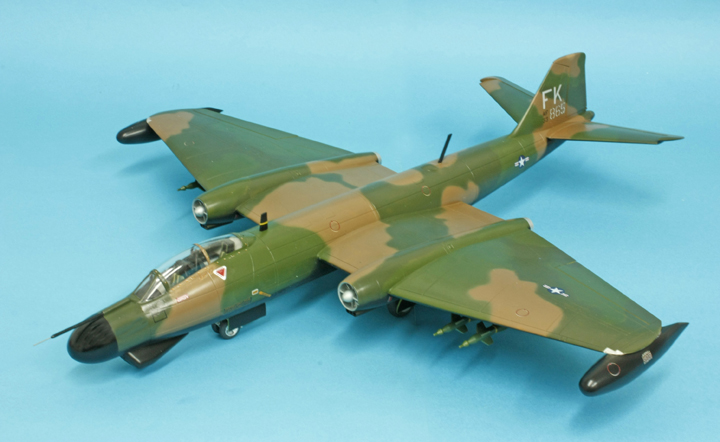
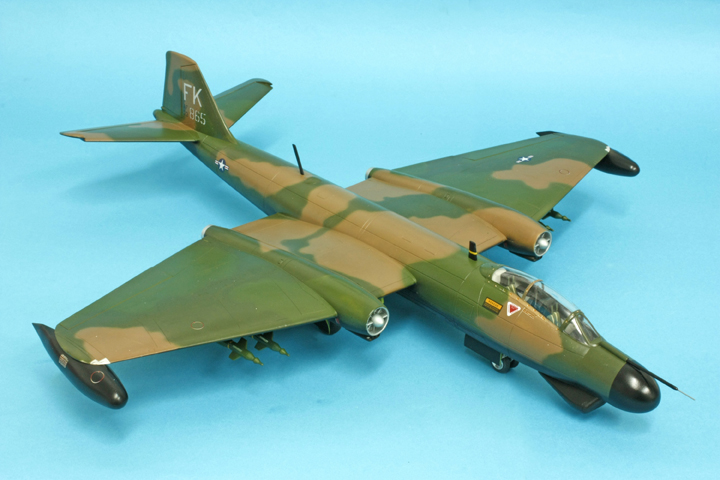
A further model was also on the go at the time and that was the B-57B, this is not totally correct around the nose area but I believe a resin correction set was or is being considered.
Well done Airfix/Hornby.
Ted Taylor
Aug 2009