EMHAR
Bedford Lorries
Long wheelbase dropsider
Short wheelbase tipper Bedford
Kit No. 2401/2402. 1:24th scale
EMHAR
Bedford Lorries
Long wheelbase dropsider
Short wheelbase tipper Bedford
Kit No. 2401/2402. 1:24th scale
It is not very often I get excited about a plastic kit these days but when I heard about this one I was. It brings back memories of a time when I was a young enthusiastic lorry driver, although I had been driving lorries unofficially since the age of 12 in my familys haulage business, when I left school I was still not old enough to hold a licence so I was given a job inside a factory premises and was issued with an O type Long wheelbase Bedford, the very vehicle in the kit. I could drive in the factory but was not allowed on the roads until I was 17 yrs old and had passed my test.
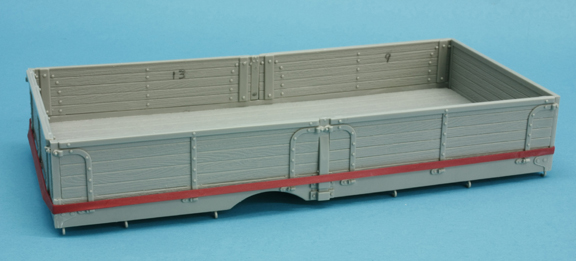
The kits, two versions are available and were released at the same time one a short wheelbase tipper and the other the long wheelbase with a dropside body. Moulded in a nice light grey plastic absolutely flash free and crystal clear window parts, the surface details are beautifully done with fine wood graining on the body parts and the metal straps that form hinges on the
dropsides even have the bolts moulded on what is more the hinge pins for the sides are separate pieces showing how much detail has gone into the kits. The chassis were fairly basic in those days and the kits depict them well and accurately and as the Bedfords were exported around the world even the rear lamp brackets are supplied for left and right hand fitting. Two items in the boxes are Identical the engines and the cabs as were the real lorries, the engine was a six cylinder 28 hp, 3.5 litre petrol powered motor and was the standard manufacturers choice although later in life Perkins developed the P-6 diesel engine and a lot of Bedfords were converted to these as diesel was much cheaper than petrol in those days. Cab interiors were at least very basic no heaters, radios or any driver comforts and for air conditioning you could always open the drivers front windscreen.
My construction notes
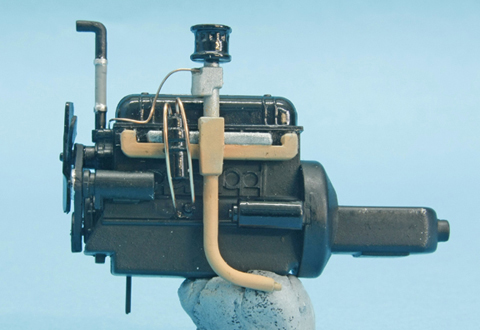
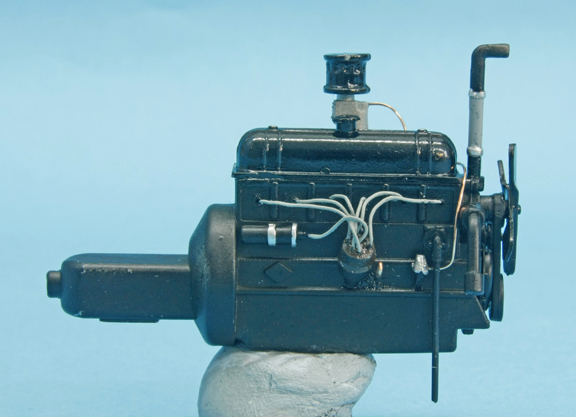
The first item is the Engine, the main block would be finished in a satin black Hu 85 but the rocker cover part B4 would be a shiny black Hu 21 gloss while the fan belts would be matt black Hu 33. The manifolds are separate pieces the intake part B10 would be steel and the exhaust part B9 would have a rusty appearance over the basic steel colour. The carburettor is aluminium but the air filter above it is normally black, the whole exhaust pipe below the carb is a rusty finish I normally spray it steel then lightly dust it over with flesh colour as it isnt dark brown colour rust that you might see on a rail road track. The dynamo and starter motor are shiny black, the coil part B16 is silver with a brown top and the distributor cap part B13 is brown bakelite colour. I decided to do a little detailing here by adding the plug leads from distributor to the engine block where the plugs are, for this I used some very fine 0.45 mm gauge copper wire super glued into 0.5mm holes I drilled in the cap and block. The firing order for this and any six cylinder engine is 153624 and dont forget the lead from the
coil to the centre of the cap. It might be hard to believe but included is the tiny petrol pump part B14 so I drilled a tiny hole through the side of it and ran some more fine copper wire through and up the side of the block and across in front of the rockers to the carburettor, from the pump back the pipe was fed along the inside of the chassis to the petrol tank. I did find one item missing from the kit and it was the dipstick which is just in front of the distributor and I made one from copper wire I suppose that really was expecting too much. The water pump part B21 would be silver but the rubber hoses should be matt black with silver jubilee clips around them. The pipe on the pump to the lower radiator just kind of ends when it should really bend forward to the bottom inlet, to do this I cut off the down pipe and replaced it with an appropriate sized rod bent to the correct shape. Note the corrected water pipe to the lower radiator connection
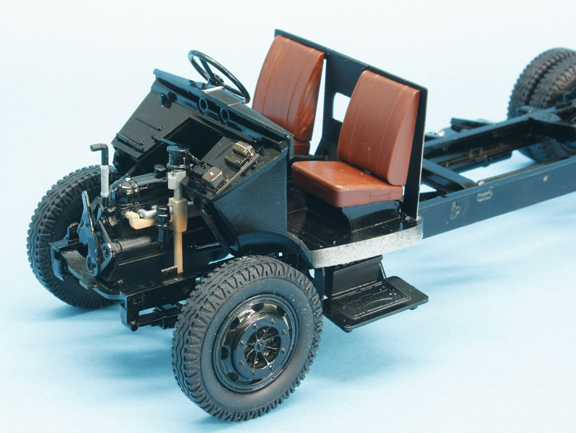
The chassis on both kits are easy to assemble and are quite rigid with good strong cross members and tight locations, the steering is a fixed arrangement as the parts of the axle are a little too delicate to have working joints. The rear axle has nicely detailed leaf springs to support it with helper springs on top allowing the lorry to carry a 5 ton load, take care to locate these as far forward as you can each side as there is a little play in the hanger bracket that could throw the axle out of line. The wheels make up easily but do remember to add part B49 bearings to the centre of the front wheels or they will be unstable, there are no brake drums or back plates on the rear axle so I would suggest you cut a disc from thin plastic sheet, 17mm diameter with a 4mm centre hole and slip it on the axle before you add the rear wheels
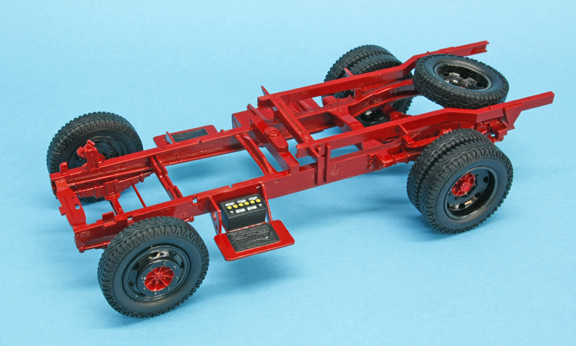
The fuel tank is made from top and bottom halves with ends that slot in you dont need to get rid of the join if it isnt too bad as a lot of fuel tanks have a welded seam along the centre. But if you are adding the copper piping to the petrol pump on the engine then remove the little moulded pipe on the top of the tank and add a copper pipe which will go through the chassis rail you could also add the wiring from the float fuel gauge next to it also into the chassis rail.
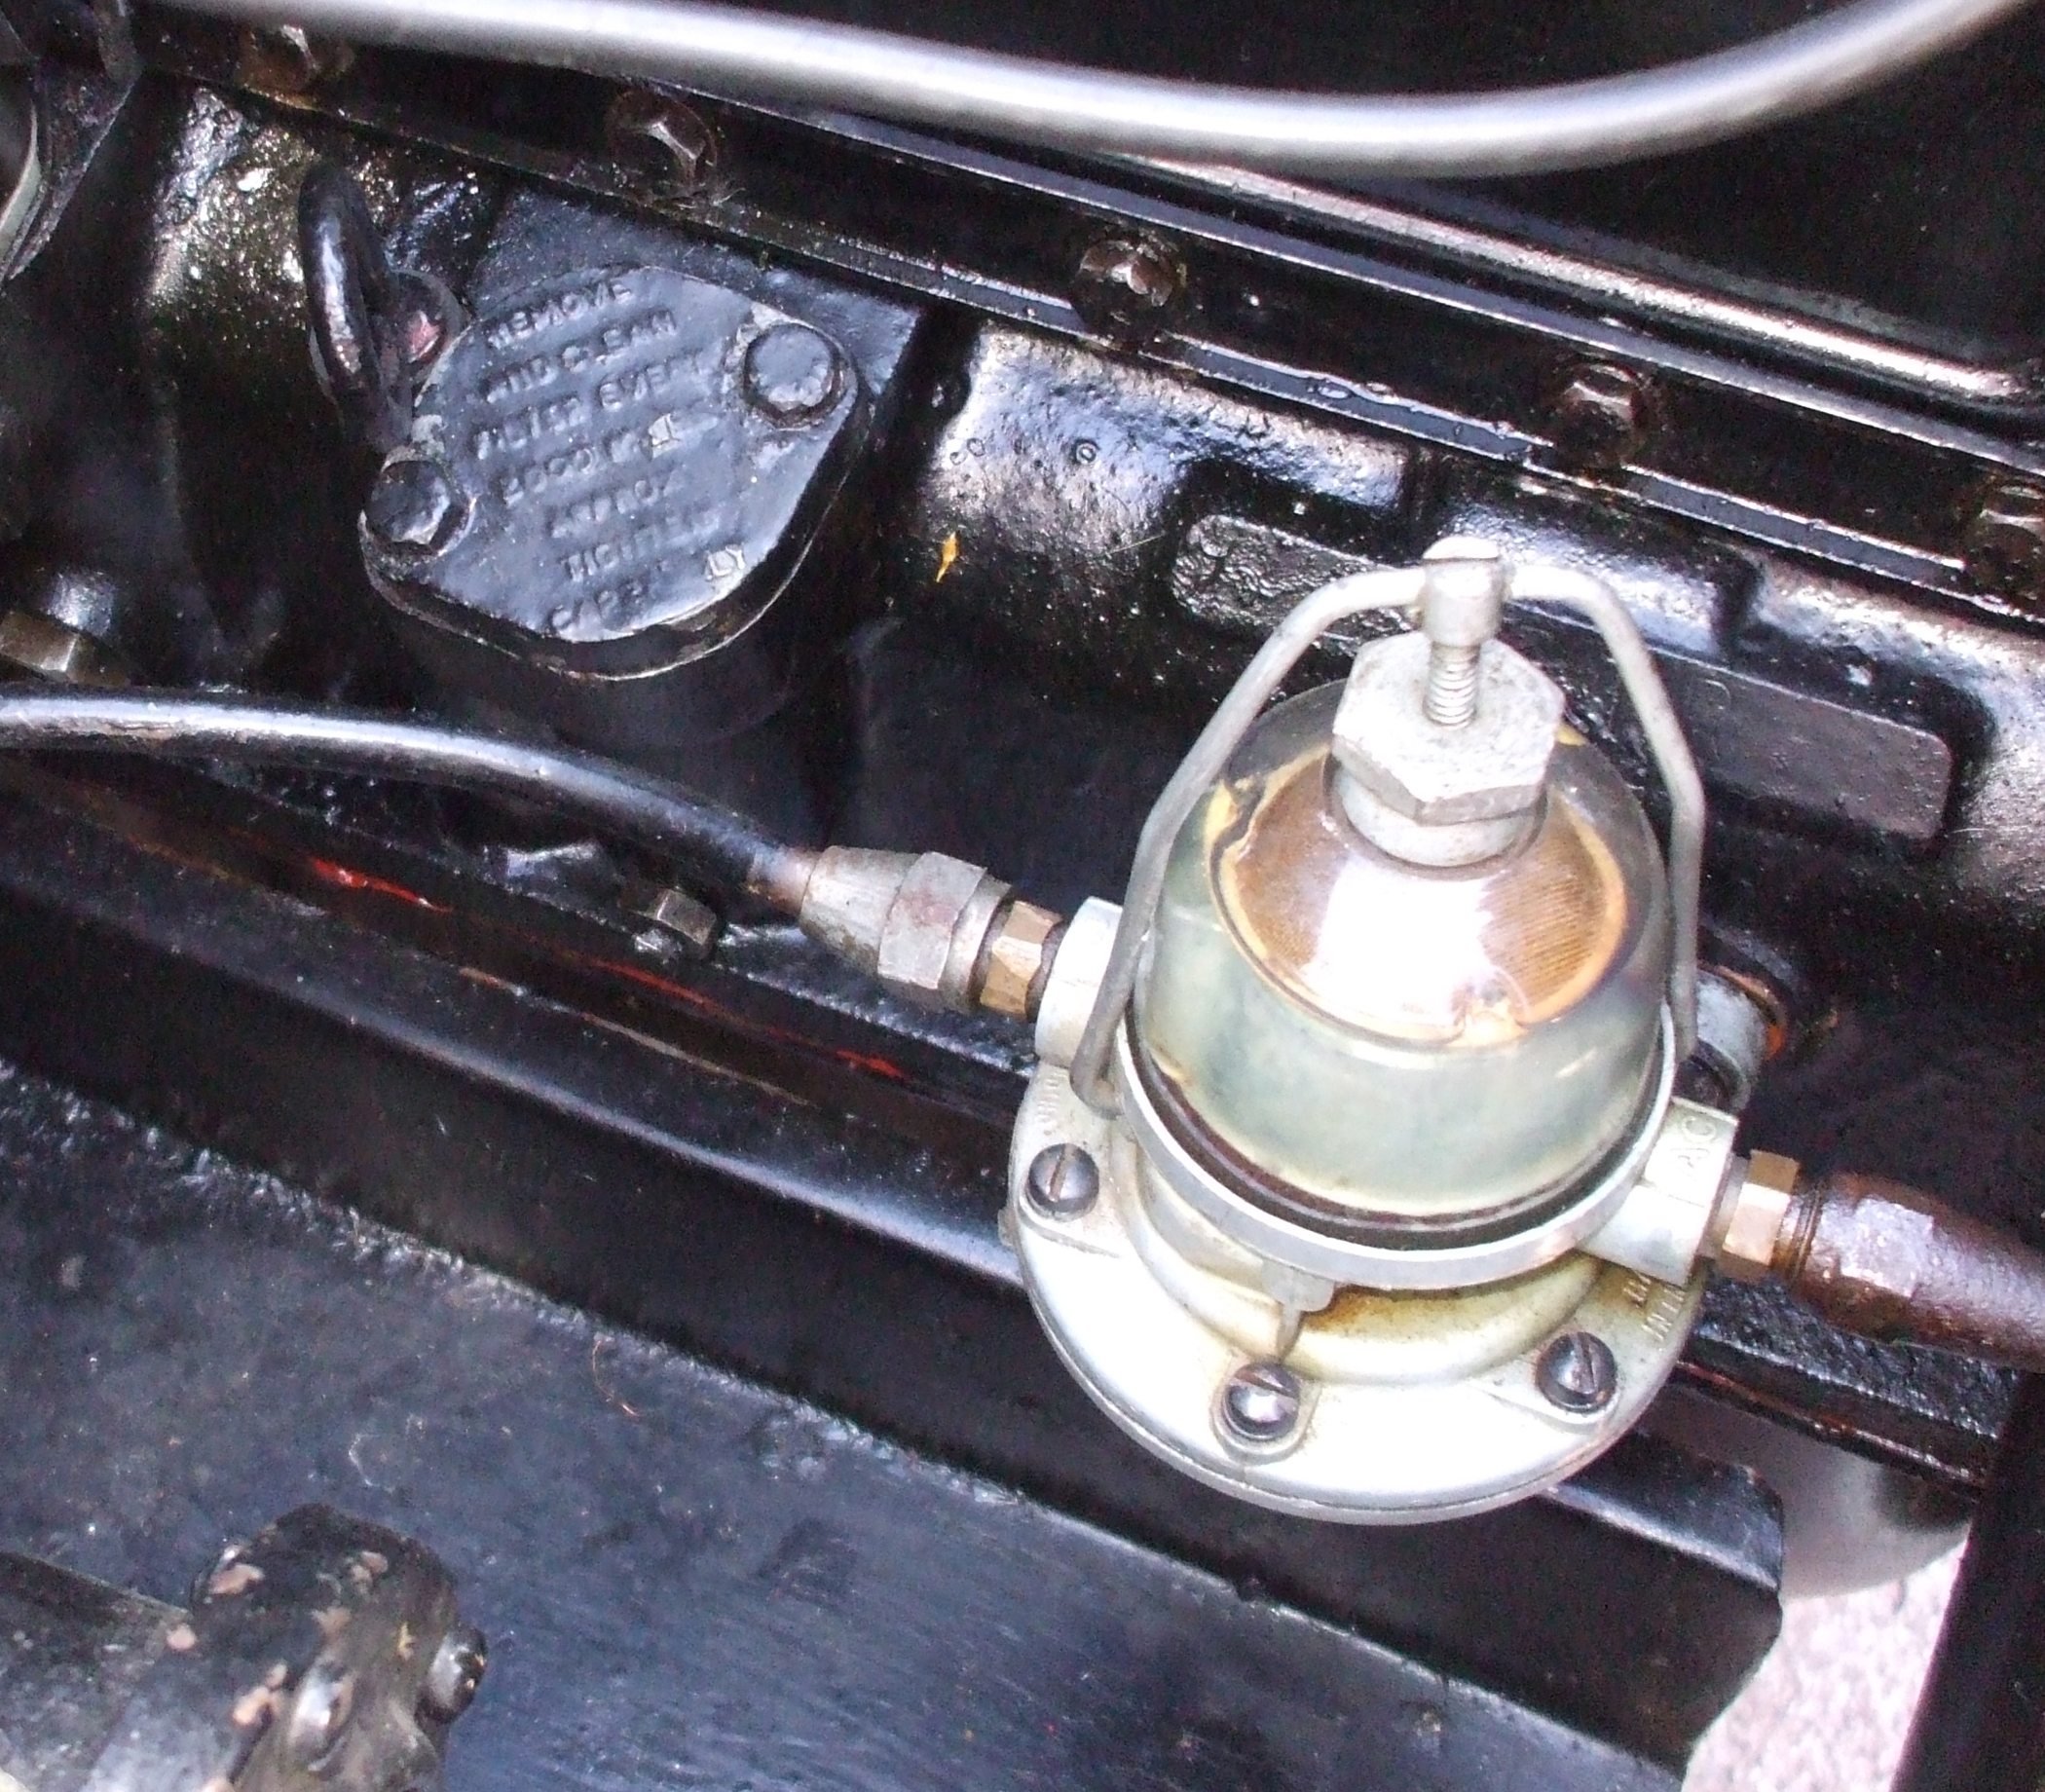
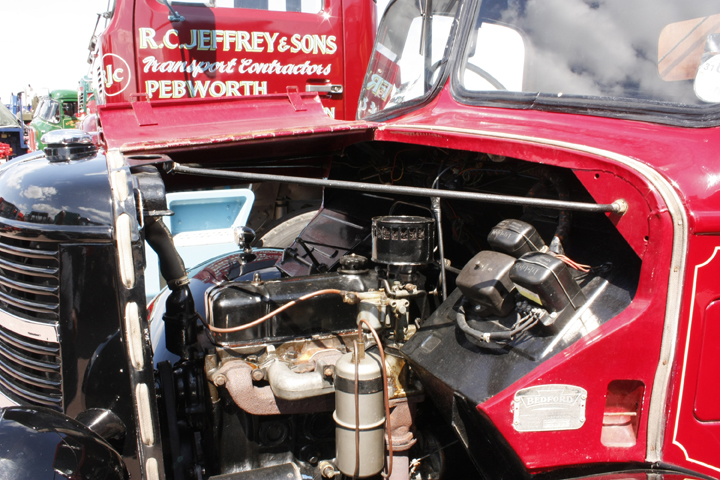
This is the petrol pump on the real lorry also note the dipstick just behind the bolted plate it is just a loop of rod which goes down into the sump

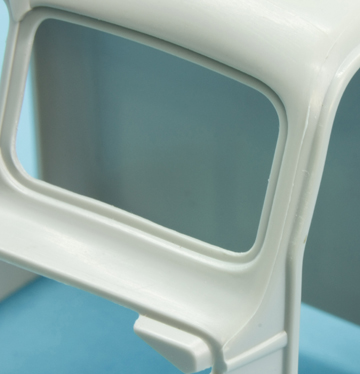
The cab shell has a feint mould join line around it and this needs to be lightly sanded off for the best effect, the doors fit perfectly in the closed position but if you want them open you have to make your own hinges.
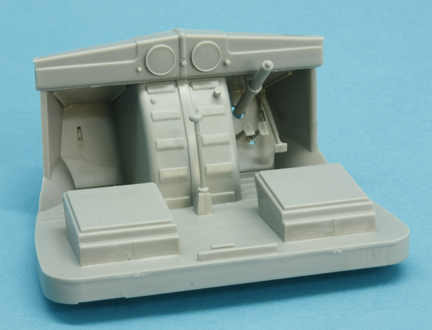
The cabin is made up in two sections the outer shell and the interior which is quite well detailed with foot pedals, handbrake, gearshift and even the dipswitch for the head lights. The metal areas were always a shiny black as delivered except the interior of the doors which were normally painted with the exterior colours, the instruments had chrome rings and the dipswitch was aluminium, the pawl release on the handbrake soon showed its basic steel colour after a little use. The rear wall part A3 was a compressed cardboard item and was a satin black. The exterior of the passenger foot well is where the cut out and fuse boxes are mounted and these had brown bakelite covers.
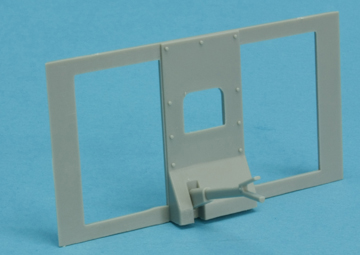
The front windows have metal frames and fit from the outside, dont be surprised if they look uneven thats how they really are as the drivers side opens outwards but the passenger side is fixed. The frames would be painted the body colour, you may have seen vehicles with rubber window surrounds in recent times but these are vehicles that have been restored and not the originals. I found the door windows a tad too large so I gently sanded the top of the glass a fraction and it fitted the frame perfectly.
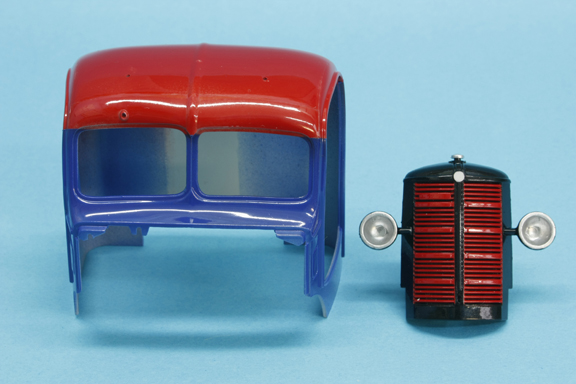
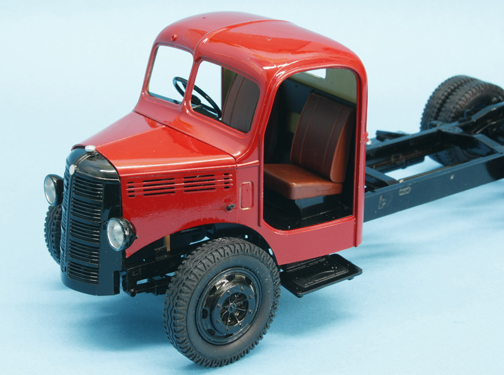
The front wings have good firm locations but I would suggest that you leave the front of the nearside (left) wing temporarily unglued; reason for this is it is easier to fit the assembled radiator and cowling later on.
Make sure you get the tabs under the interior securely located into the slots in the chassis when you cement it on then leave to harden
before adding the outer shell, make sure the floor is level with the bottom edge of the door frames. Now is the time to make up the bonnet parts A4/5 &11 plus the catches again leave to harden then this can be used as the spacer when you fit the radiator cowling. Add the adjustment bar part B50 then the brace part B36 when the radiator is firm. There is an alternative bracing arrangement with two rods going from the centre of the cowling to each corner of the shell, I have to admit that I broke my rods which are so fine whilst cutting from the sprue so I replaced them with flower arranging wire.
If you wish to display your engine you can just lift off the bonnet covers or you can open the bonnet as in real life the side panels just lift off and the top folds back on itself along the centre hinge line, all it takes is one small cut. Now is the time to fix that front wing and the front bumper bar can now be added but dont cement it to the wings they were kept apart on the real lorry to avoid wear as each item moved about.
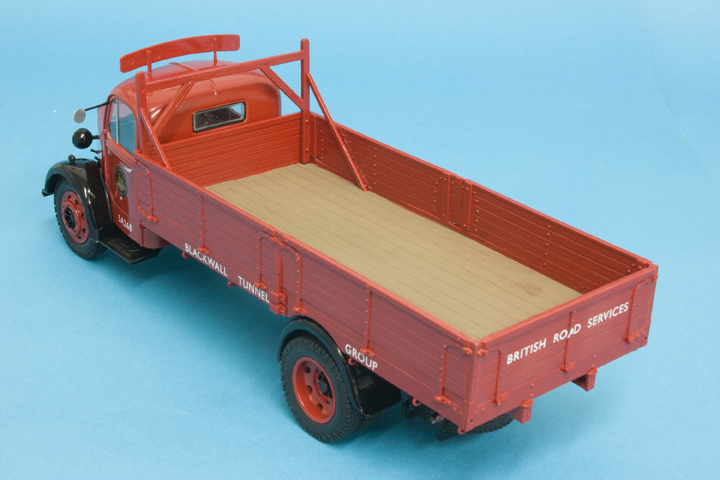
The bodywork construction is much the same in both kits but the long wheel base body merits a couple of notes, dont add the rope hooks parts C23 to the bearers until the last minute as they are quite delicate and will break. When adding the side boards make sure you take note of the correct order and position or you will have trouble and make sure the hinges parts D3 are facing the same and correct way. The manufacturer tried to allow the sides to drop down though it proved technically unfeasible but, I found that if you thinned down the ends of the bars on the sideboards just a little they will slide behind the hinge pins in the down position to give the same effect.
There are some parts to make a headboard (headache bar to our US friends) although not all lorries had one and those that did had so many home made varieties feel free to make what ever pleases you. An optional roof rack is supplied on which most of us kept our ropes and sheets but if one was not fitted the it was not unusual to see the roof bent in where some driver had stood at sometime, also there are two name board for the top of the cab one for the front of the rack and one stand alone item.
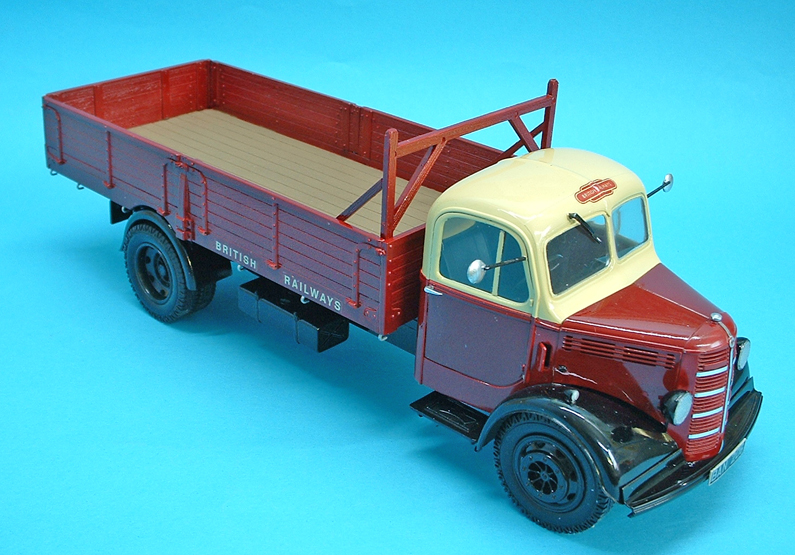
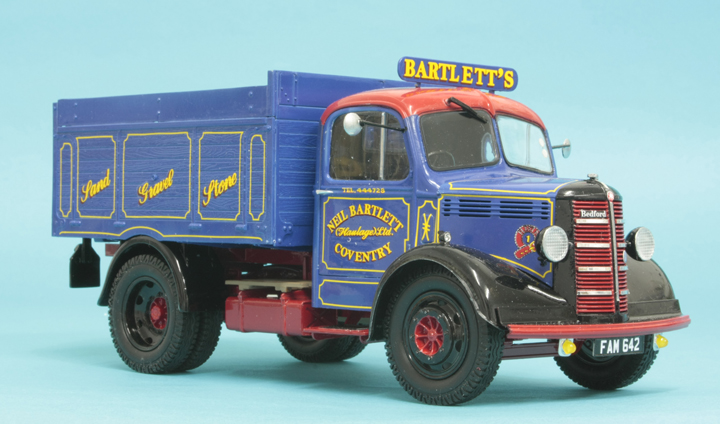
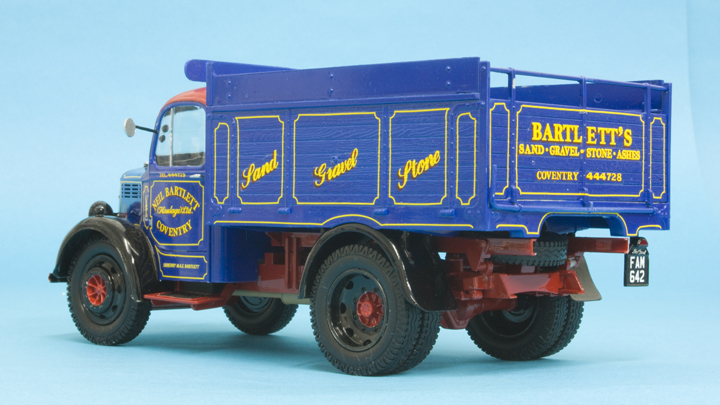
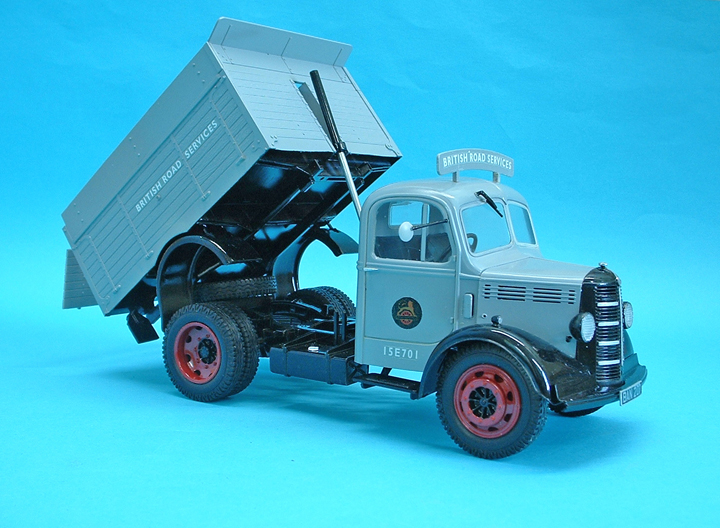
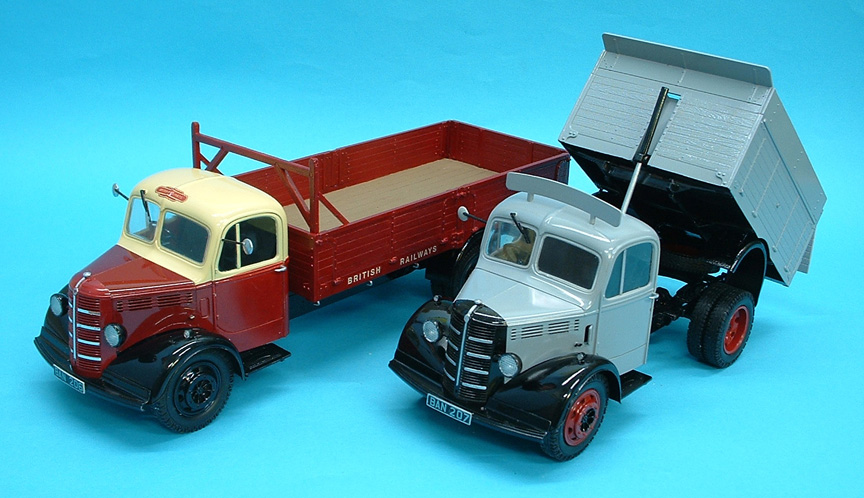
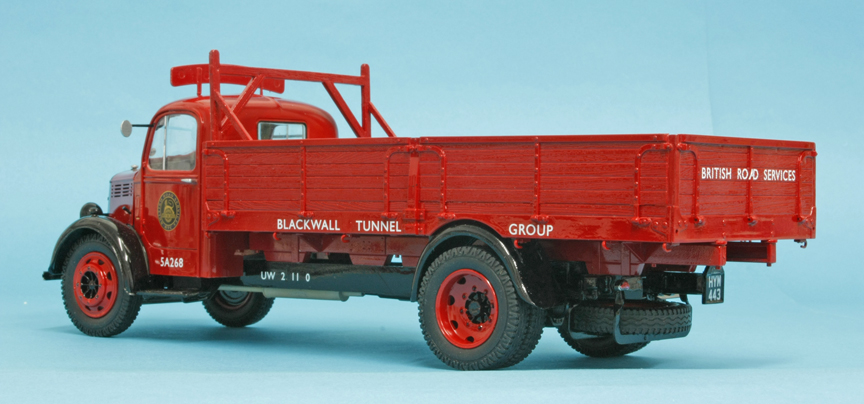
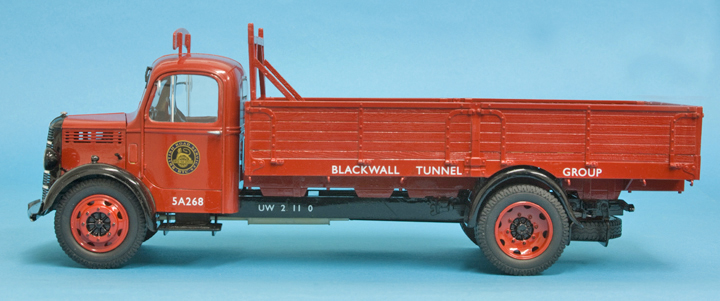
The kits come with some excellent decals, two companies in each box. The LWB has British Rail and British Road Services (BRS) and these cover various depots. The SWB tipper is again BRS with various groups and a very colourful restored vehicle belonging to Bartletts of Coventry. The pin striping on this vehicle is nicely reproduced on the decal sheet with each outline divided into four pieces specifically to avoid large areas of clear unwanted film covering the lovely wood graining of the panels, these are set out logically on the sheet to avoid confusion and every part fits perfectly.
You can probably see why I was excited now, this has got to be the most accurate lorry kit to emerge from any manufacturer so far, and the fit of parts is almost perfect, it may not be one of the modern monsters that roam our roads today but this was one of the backbones of the medium weight vehicle world and anyone alive today that drove one I am sure will agree it was a pleasure to drive. Very highly recommended.
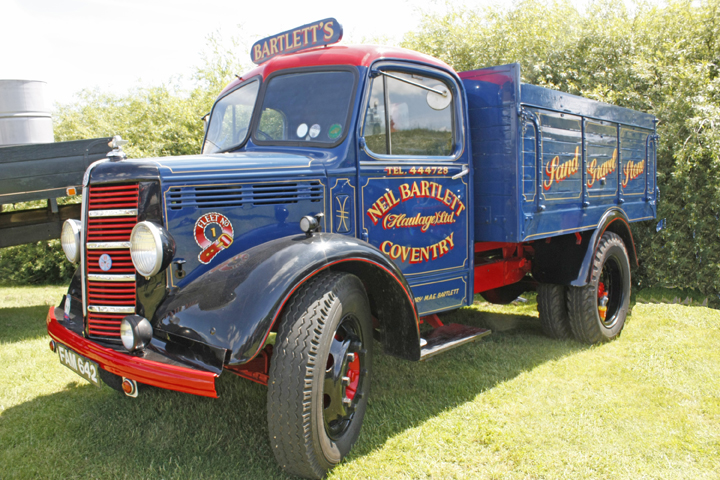
The real thing
The real thing
Interior assembled Cab radiator alignment

Ted Taylor
Aug 2010