Painting and finishing,
My interior was given a coat of light cream but
light grey would also suit, the metal parts of the door interiors would be the
exterior colour with the plastic covered panels semi matt black Hu 85 as would
the engine cover and dashboard , my seats were a medium grey.
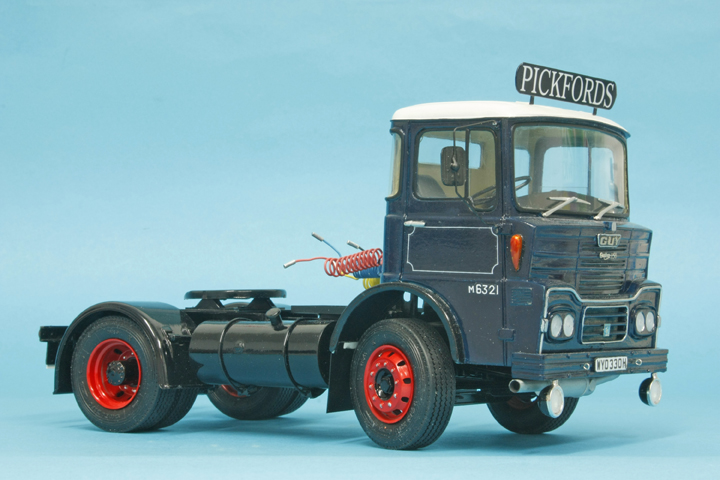
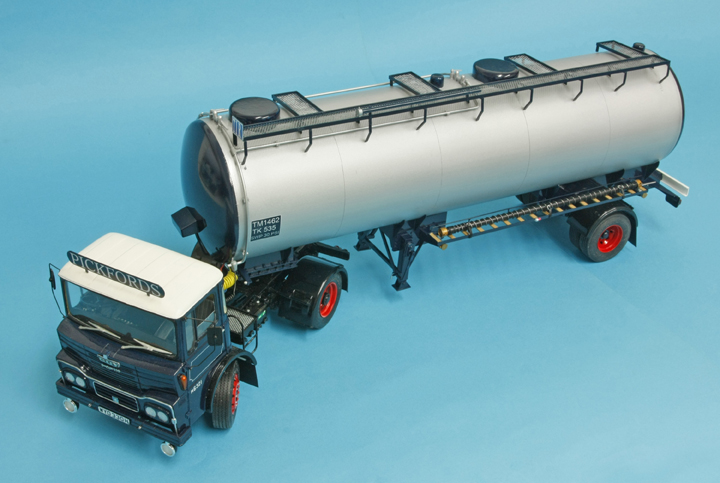
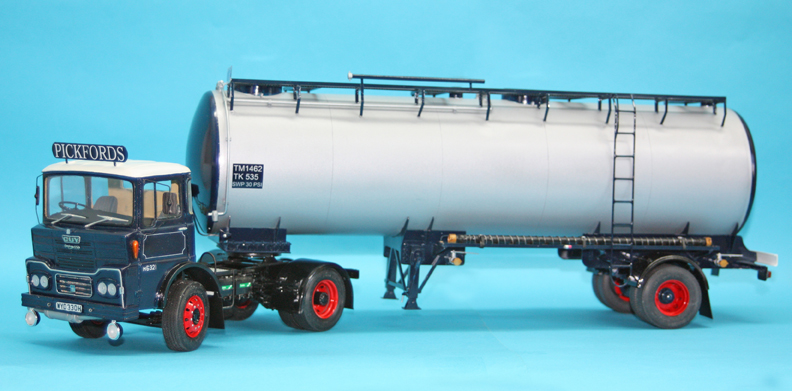
Pickfords Blue is not available in the Humbrol
range but Phoenix-Precision paints have it and BRS
red in their Cherry range, they are on the web. I sprayed the cab with
a couple of coats of Hu 130 satin white as a base coat and for the roof which I
then masked with Tamiya Tape. The blue was sprayed as a very thin mix and given
a couple of coats to give a good strong colour after which I added a good coat
of Revell #1 gloss varnish and set aside waiting for decals.
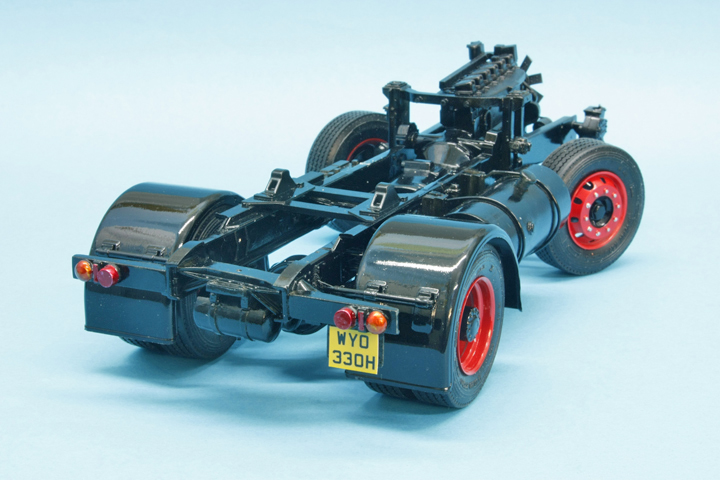
The chassis was sprayed with Hu21 gloss black
but the mudguards and fuel tank were sprayed separately to make it easier for
the chassis frame, the wings on the cab were brush painted with the same gloss
black. All the wheels were given a coat of Hu130 white before covering with
bright red Hu19.
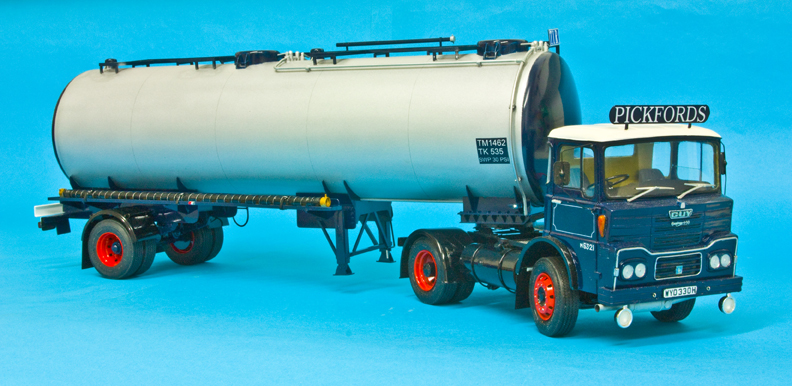
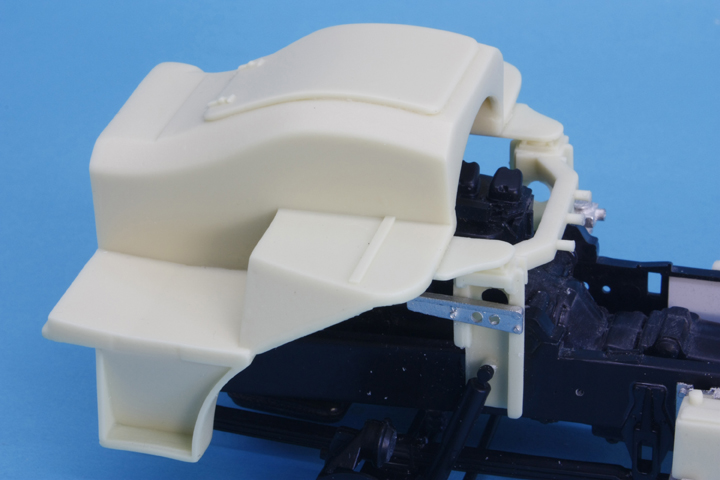
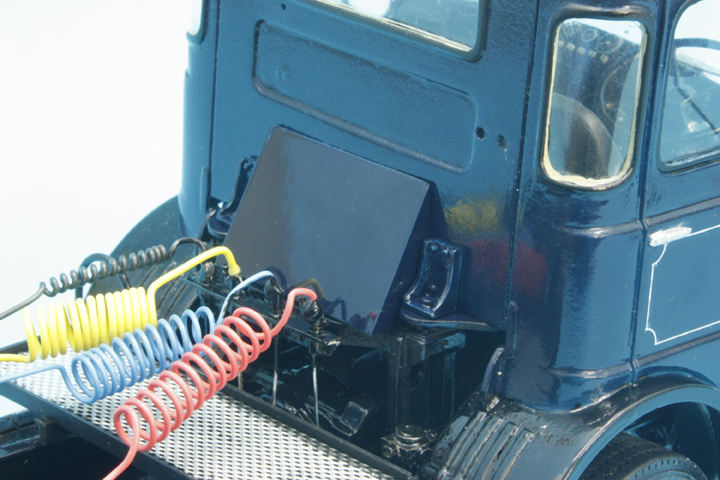
This shows the fire wall as used on most tankers
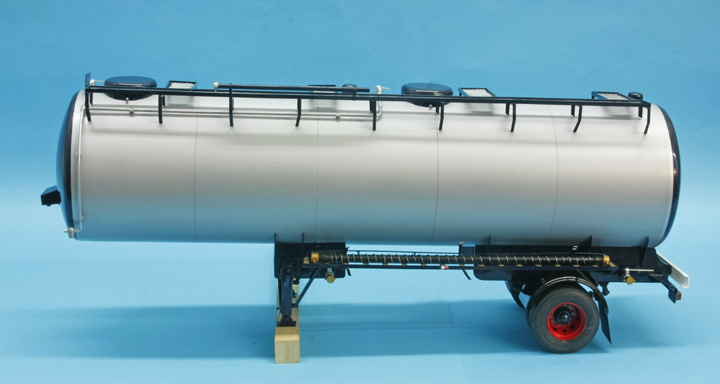
The trailer
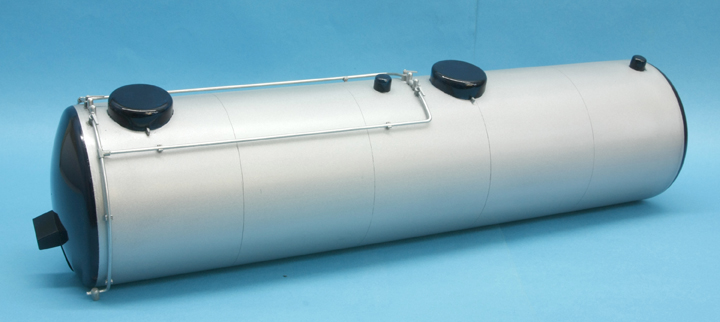
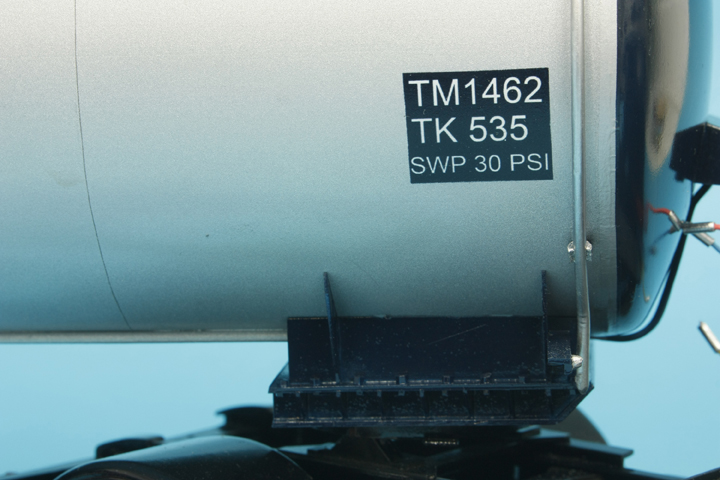
The tank was a 4,000 gallon capacity vessel with
two stainless steel compartments for the carriage of edible oils.
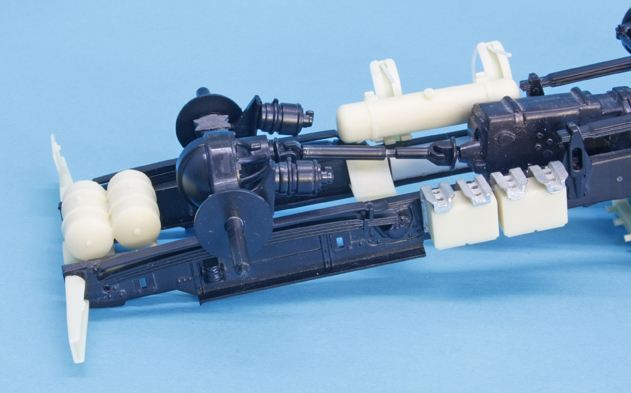
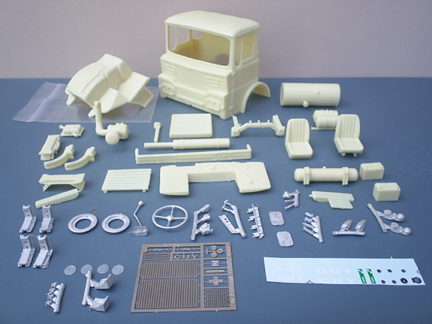
 I eventually found the box with the forgotten
tanker model in it and to my surprise all my drawings and notes were there as
well. The tank was constructed but none of the
fittings were made nor was the Chassis so work began in the spares box, first
item to find was an axle and springs I am not sure which kit they came from but
some small alterations made them suitable for my purpose, wheels also came from
the spares box but needed some modification to make a non driven pair. I cut the
extension for the outer wheel off the inner wheel of an Italeri rear set leaving
a flat surface to which a suitable hub can be added then I use an Italeri
spare rim to which I add wheel nuts from hexagonal rod over each hole this
is then added making sure that the large holes in the rims are opposite each
other so the air valves can be reached.
I eventually found the box with the forgotten
tanker model in it and to my surprise all my drawings and notes were there as
well. The tank was constructed but none of the
fittings were made nor was the Chassis so work began in the spares box, first
item to find was an axle and springs I am not sure which kit they came from but
some small alterations made them suitable for my purpose, wheels also came from
the spares box but needed some modification to make a non driven pair. I cut the
extension for the outer wheel off the inner wheel of an Italeri rear set leaving
a flat surface to which a suitable hub can be added then I use an Italeri
spare rim to which I add wheel nuts from hexagonal rod over each hole this
is then added making sure that the large holes in the rims are opposite each
other so the air valves can be reached.
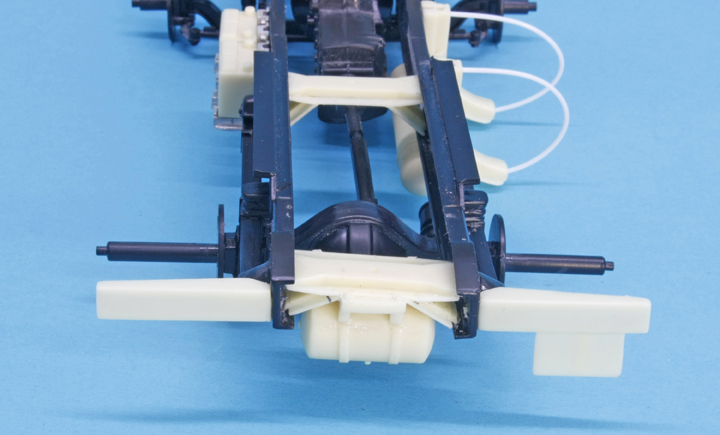
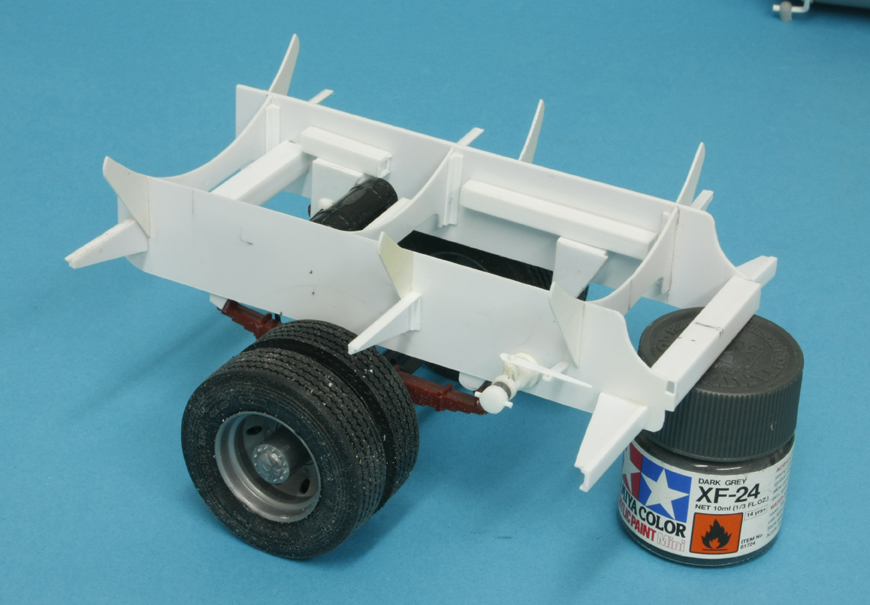
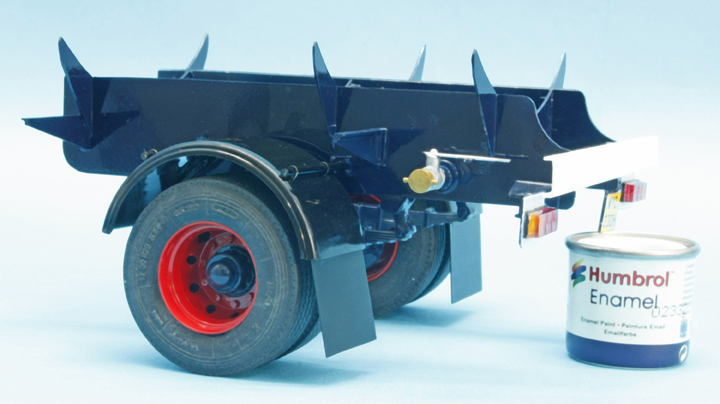
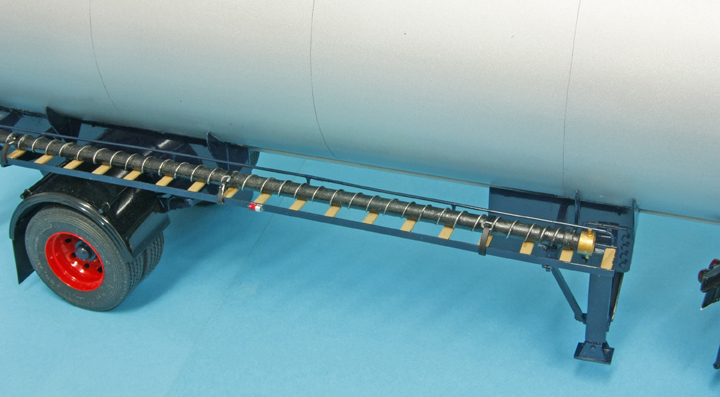
Next job was to make side frames from 40thou
plasticard with cross members and locations for the springs from square fineline
tubing. The side frames were taller than needed and were later adjusted to the
correct ride height. 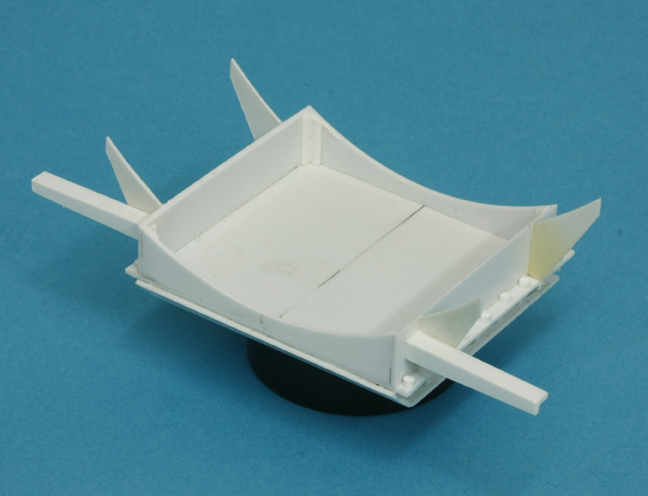
The coupling pin plate was built up from
various thickness plasticard with the nuts and bolts needed cut from Fineline
hexagonal rod and cemented in position. All the curved tank supports on
the three major components were made using a spare piece of the tubing left over
from the tank to give the correct matching curve drawn onto tracing paper which
was then laid onto the card and with a sharp point pin pricked the shape onto
the card which was then cut out following the tiny depressions.
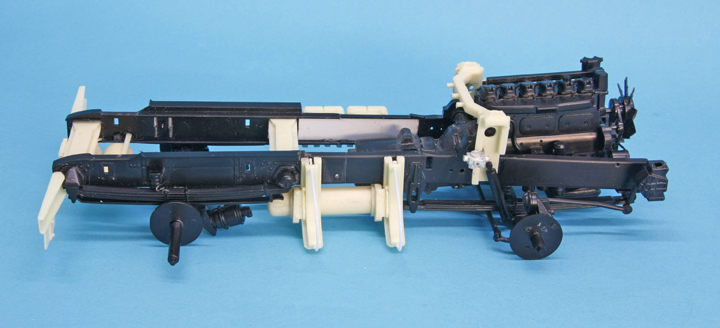
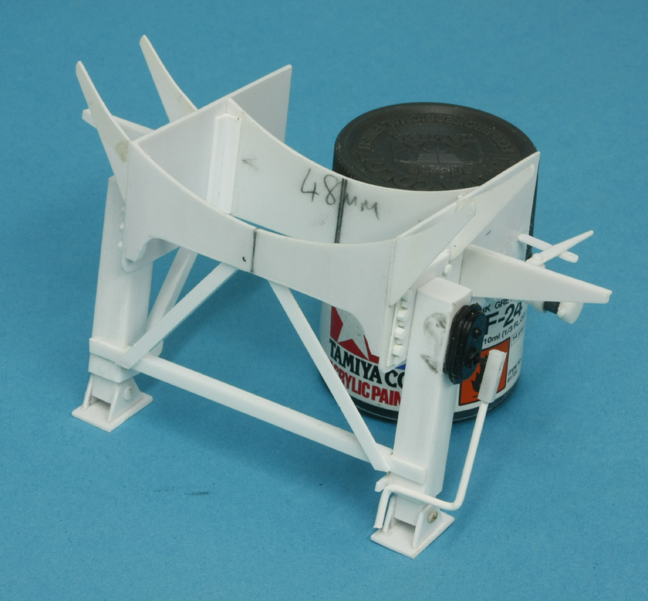 The
legs were built up from two sizes of square fineline tube with angle bracing,
the supports were cut from 40thou card along with the side frames which are
longer than usual because the front outlet is placed there much the same as the
rear outlet is on the running gear frame.
The
legs were built up from two sizes of square fineline tube with angle bracing,
the supports were cut from 40thou card along with the side frames which are
longer than usual because the front outlet is placed there much the same as the
rear outlet is on the running gear frame.
Once the front component was temporarily fitted
the tank was coupled to the unit and the height of the rear side frames adjusted
so there was a slight slope on the tank.
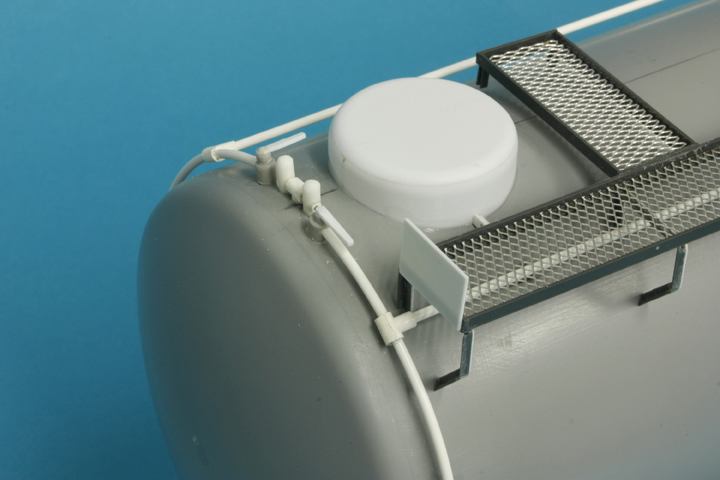 The load in this tank is discharged under
pressure so an air line pipe was formed from Plastruct TB2 tube which has brass
rod inside it and will retain whatever shape is made, the inlet pipe runs up the
left hand side of the tank and into the top of it via a valve and an extension
to the rear compartment via another valve a similar arrangement for the outlet
pipe is on the right side with two safety release valves between the top two,
the clips and T joints are also from the Plastruct range.
The load in this tank is discharged under
pressure so an air line pipe was formed from Plastruct TB2 tube which has brass
rod inside it and will retain whatever shape is made, the inlet pipe runs up the
left hand side of the tank and into the top of it via a valve and an extension
to the rear compartment via another valve a similar arrangement for the outlet
pipe is on the right side with two safety release valves between the top two,
the clips and T joints are also from the Plastruct range.
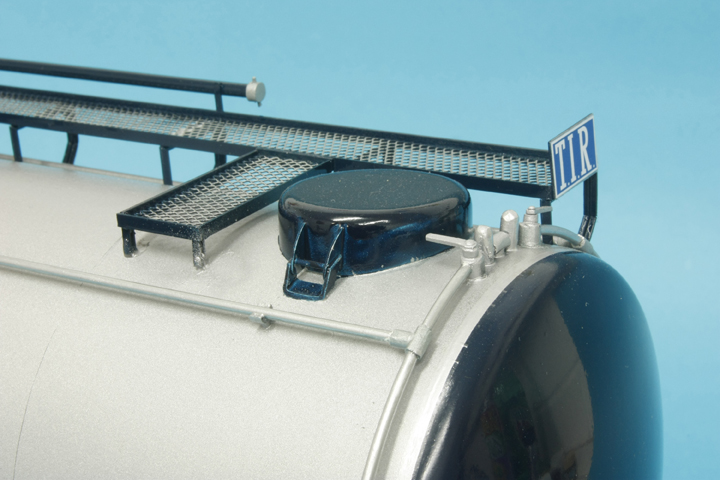
To make the two man hole covers I cemented a
strip of 20thou card around an 80thou disc then another 80thou disc, slightly
larger, was added to the top and left to harden. The covers for the foot valves
(the two small lids) had a disc cemented to a piece of small tube, later the
shoulders of these four items were sanded to a rounded shape to give a domed
effect. The lower edges of the lids were shaped to match the tank by wrapping a
sheet of sandpaper around the tank and rubbing them back and forth on it until
they fitted.
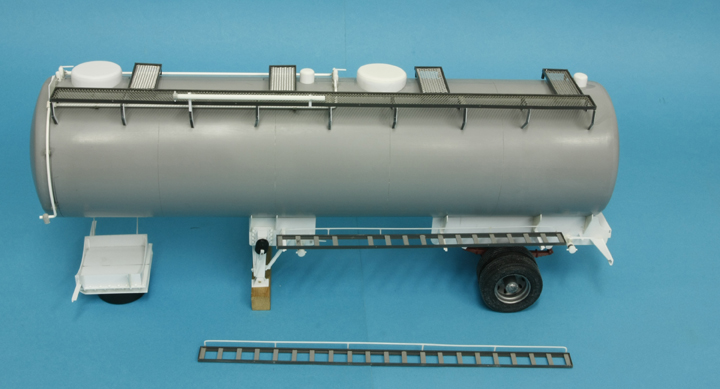
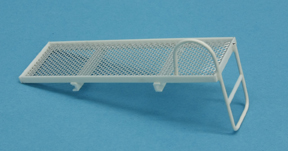
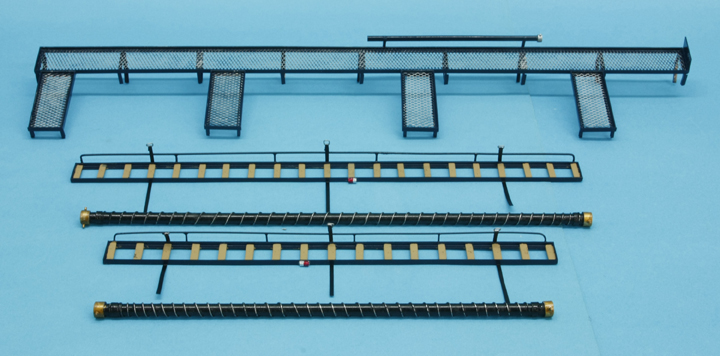
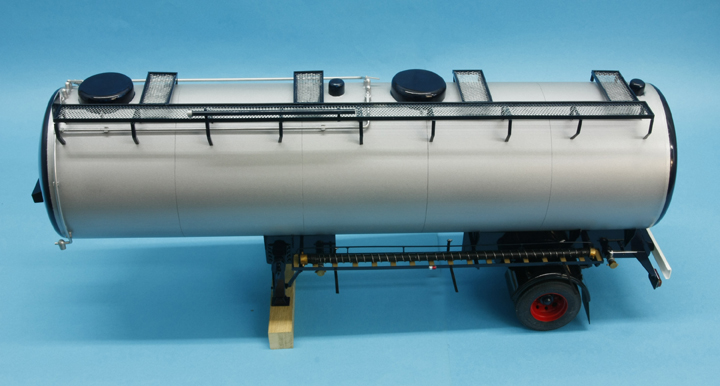
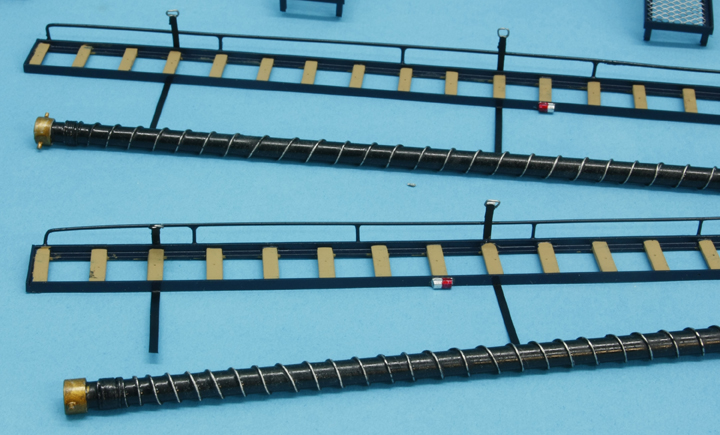
The catwalk was made using A3 angle and expanded
mesh similar to that on the unit with the supports from A2, a tube for the
dipsticks was fashioned from fine tubing and mounted on the side while the
ladder was made from a length of TB1 bent into a long U shape with steps from
bits of 40thou plastic rod. Hose racks are needed on both sides and these can be
made from A3 angle but this time fill the centre with lengths of 3mm strip to
represent the wooden battens on the real thing. Hoses can be made from tubing
with fine lead wire wrapped around and couplings from odd bits of tube added on
the ends.
Painting and finishing,
the three main components, the covers and the ends of the tank were sprayed blue
separately then the tank ends were masked off and Humbrol matt aluminium from
the Metal Cote range was sprayed on the main body and pipework, later a coat of
Johnsons Klear was added to seal it.
All the components were fitted using epoxy resin
for extra strength and to avoid disturbing the paint, once they were on the
discharge pipes and valves were made from scrap rod, pipe and strip then
positioned before placing the hose racks on the brackets. All the usual
furnishings for a trailer were built from scrap plasticard such as rear light,
reg plate plus front sidelights arms and a box for the suzie couplings on the
front. My decals were made on a computer using Experts-Choice white decal paper
from Bare Metal Foil Co.
All in all a very satisfying model of one of my
old trucks brought to a conclusion after 30 years in hibernation.
Ted Taylor
Aug 2009
#Back to the Top

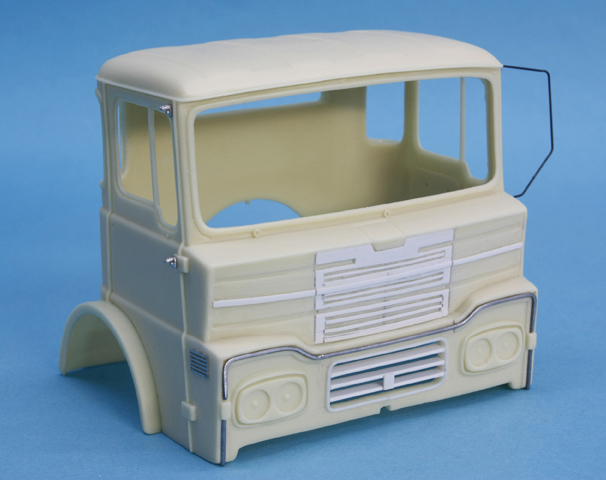
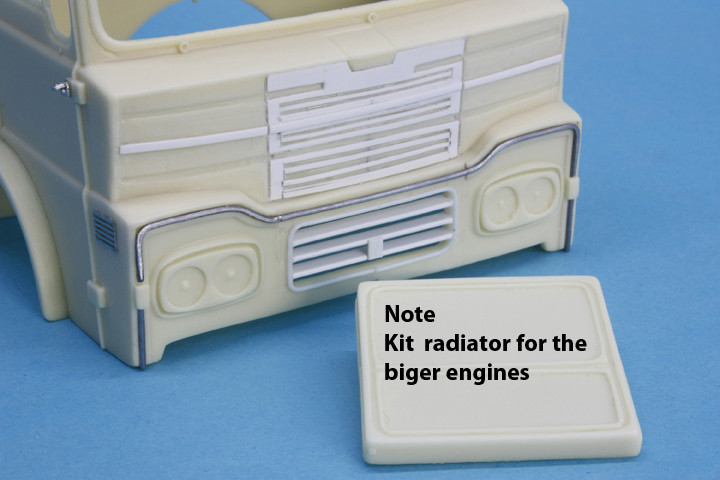
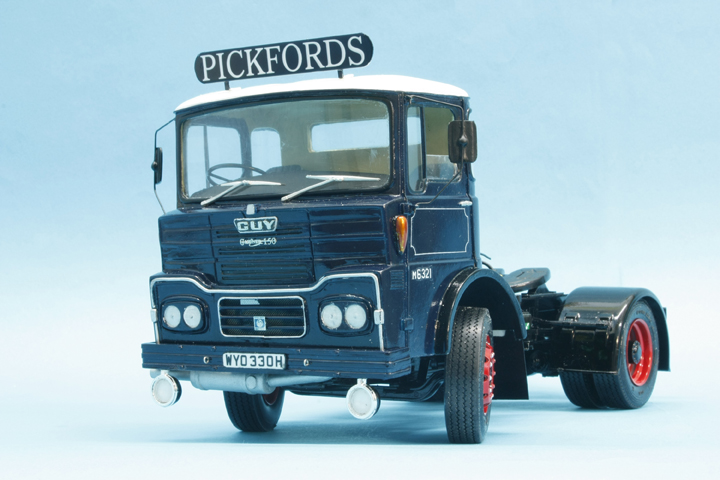
My first job was to sand/scrape off the two air vents at the sides of the grille and then scrape out the top centre section deep enough to lay a sheet of 20thou plasticard in there. The centre panel on the real truck is removable so I made the card just a tiny bit narrower than the space available to give a panel line effect this was then carefully marked and cut to represent the grille before being glued into the centre.