Revell
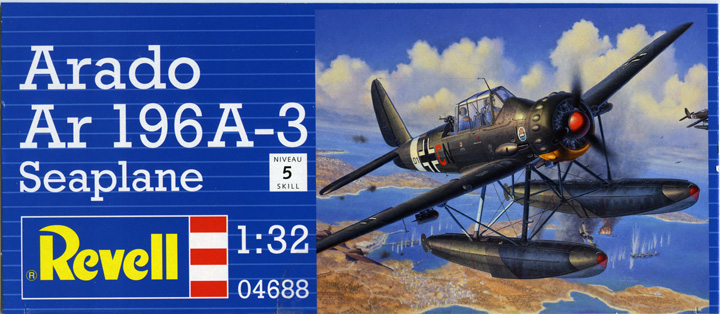
Arado
Ar 196A-3
Reconnaissance float plane
Kit No. 04688. 1:32nd scale


Revell
Arado
Ar 196A-3
Reconnaissance float plane
Kit No. 04688. 1:32nd scale


Although I am not a particular fan of float planes I do like to make up a good kit and this one is a cracker. When I first saw it on Revell's stand I just knew I had to build it and somehow I wound up with two kits. I wanted to show how both wing positions looked, folded or open. Both versions are clearly noted in the construction booklet but do pay attention to the order of things as some parts may be impossible to fit later. I have used Revell's paints throughout but I adjusted the camo mixture as there is too much contrast in their mix between RLM 72 and 73, the correct colours are available from XtracolorMy construction notes
Step 1-6 I would advise you to paint all the parts before assembly starts as there are quite a number of different colours to use here.
Step 7 when you add the side frames make sure you line up parts 41 & 47 with the notches on the top rail of the frame
Step 8 part 57 is a sliding seat for the gunner/radio man and so part 58 (seat backrest) is reversible, the choice is yours
I thought about the rigging for the floats for some time, I wanted to use monofillament Nylon or fine fishing line and I found the whole lot could be done with one length of it by fitting part 34(lower fuselage) to the struts (parts 21/22) to the tops of the floats (parts 9/10).Revell have made tiny indentations where you need to drill a 0.5mm hole for each entry and exit point, with a little thought you can do it with a join in the thread on top of part 34. Later add the weights to the front of the lower halves of the floats (particularly if you want the folded wing version) and add to the tops.
Step11-12 don't forget this step if you want folded wings but leave parts 109 out for the straight wing
Step 13 I found part 78 (fire wall) a bit proud when trying to close the fuselage halves but a little sanding around it's edges soon put that right and no filler was needed at all. After taping and leaving overnight it was hard enough to have the lower fuselage added and only a tiny smidgens of filler was needed across the rear end join.
Step 14/15 The machine gun needs a delicate touch to make up nicely but don't cement part 74 to part 75 (the mounts) until you have decided which position you wish it to lay in and do that as the very last Item after decaling.
While waiting for parts to dry I painted the many engine parts, this is made easy as all the bits are separate, I added a little black wash on the cylinders to highlight the ribbing and built it up. Make sure you line up the two exhaust outlets by using Part 127 as a guide until they are set but don't cement them to it yet.
Step 16 Cement the braces (parts 79/80) to the fuselage firewall and add part 127, make sure part 183 fits but I did not cement it in to make it easier to paint later it can be fitted when you decide which side panels you want to display open.
Step 17-20 basic control surfaces no problems here.
Steps 21-23 is the build up of the in flight wings, in both cases the wings can be painted and decaled before adding to the fuselage, the join is very good and should only need a little touching up when fitted
The differences in the wing mounts are shown here.
Steps 24-28 shows the parts used for a folded wing but do remember to drill the tiny holes indicated in the top surfaces (parts 91/93). Parts 89/90 are a loose fit so they need to be pushed right home inside the wing.
Step 39 Cement the three parts 172 to the top of the appropriate cylinders and add front cowl ring, press down on the rears of parts 172 to make the ring a tight fit and leave to harden. The ring with the cooling gills is a sloppy fit now so on the rear ends of the parts 172 I added a tiny strip of 15 thou plasticard which took up the slack.
All the engine panels can be propped open if you wish but for painting purposes I hold them in position with a dab of Blutac until dry then they can be positioned as you require.
The canopies are all flat parts and will need careful gluing to keep them clear, I have used liquid cement but PVA glue may be a safer alternative for an unsteady hand, before the cement hardens place them on the fuselage where the locations will give you the exact shape and angles. Don't add the grab handles until much later when the canopies are in position and the masking has been removed.
Step 57 the rudder must be located into the tailplane before sliding both into the fuselage as neither will go in after each other
Painting and decaling I sprayed the yellow areas with a white base coat first and then the yellow, when dry these were masked with Tamiya Tape along with the canopies and rear cockpit.
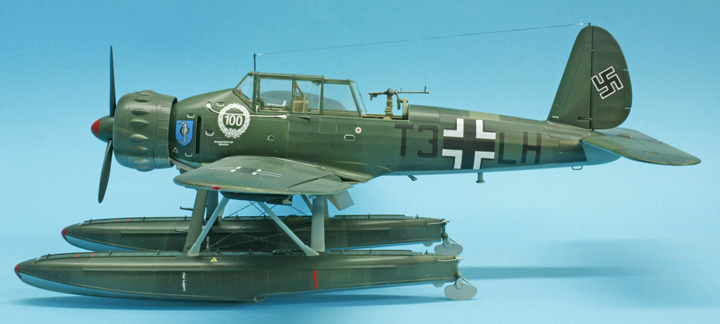
The undersides were next and the RLM65 was sprayed on freehand this was masked along the lower rear fuselage line while the lighter green was sprayed on freehand. Left overnight the shapes of the splinter camo were masked along the edges and the darker green sprayed on carefully to get those sharp lines so prominent on Luftwaffe aircraft. I left it to dry hard for a day then a couple of coats of Klear (future) were dusted on overall before adding the decals.If you intend to use the marking for the plane that was on Tirpitz please note that the sea horse badges on the cowlings should be facing forward after being separated from the code letters.
Another coat of Klear overall sealed them in and a mixture of Klear and Tamiya whitebase in 4 to 1 proportions dulled the finish to a nice sheen.
Once the masking was removed all the grab handles, aerial posts, clear light parts, mass balances etc.etc. could be added. Two propellers are provided but only one will fit in the spinner and back plate so perhaps it is for another version later, who knows.
All in all an excellent kit, there will probably be some interior add-ons from some of the resin guys at a later date but there can not be too much needed as it is so well detailed now.
Highly recommended and at the low price it is, most can afford it
Ted Taylor
April 2011