Readers Pages
Brian Boot builds
the
Trumpeter
Mil Mi-24V Hind-E
Attack Helicopter
Kit No. 05103. 1:35th scale
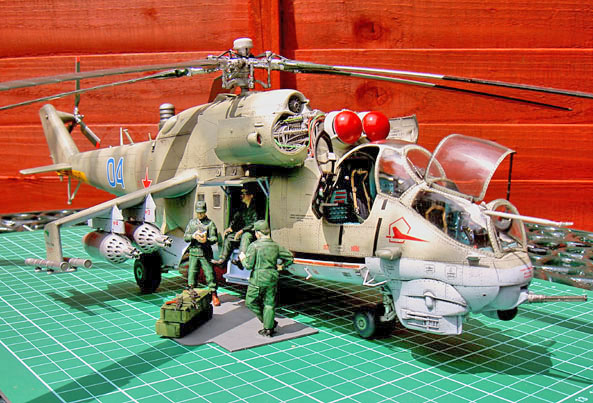
I don’t build many helicopters but when the 1:35th scale Trumpeter Hind came on the market I could not resist purchasing it for two reasons, the first was the good reviews, second was my attraction to this particular ‘eggbeater’. I bought the 1:48 Monogram version some years ago but never got around to making it. The Trumpeter kit is expensive, but not relatively, working out the hours it took to complete the model compensates for the cost and then there is the potential for super detailing and motorising a model this size, this alone in my eyes made it well worth the expense.
A good part of most modellers enjoyment when buying a new kit is the ceremony of the opening of the box and closely examining the contents therein whilst also seeing the model in their mind’s eye in markings and colour schemes of different kinds and how they will approach the actual building of the model. Most of us say to ourselves ‘This will be THE BEST model I have EVER made! This is the spur that drives us to start work, Of course we never achieve the perfect model and the day that we might think we have achieved the impossible is the day to give up model making. Enough of speculation and motivation theories, so on to how I tackled this very good kit.
Like most modellers, further enjoyment of our hobby
comes from the research we undertake and the data
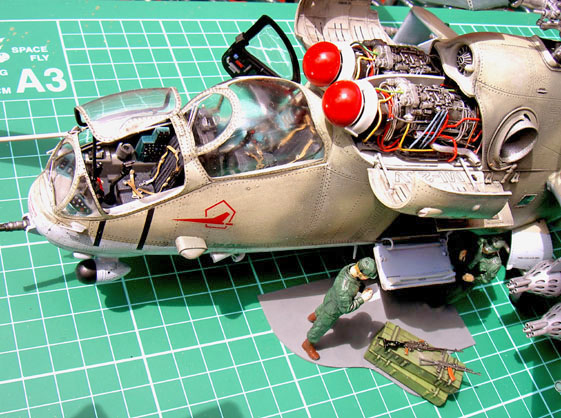
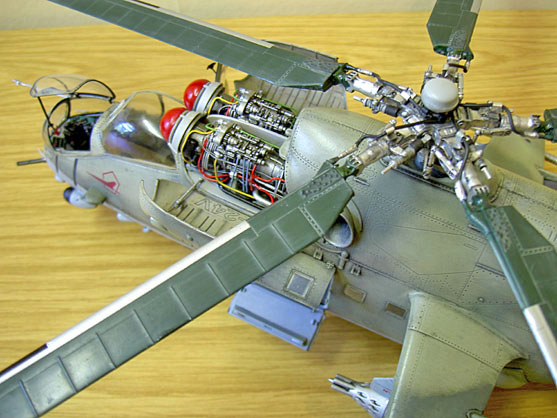
we acquire to help us toward an accurate representation of the ‘real thing’. I found some good references on the external details of the Hind and the various markings it carries on the internet, but as I intended to add a lot of internal detail a good book on this helicopter was needed. I found it in the Verlinden ‘Lock On’ No.16 Photofile. The information provided by the extensive photography was more than enough for my purposes. The engine bay in particular is accessible by way of hinged panels on the real aircraft and would give me ample opportunity to add all the pipe work, wiring and ancillary equipment not provided with the kit.
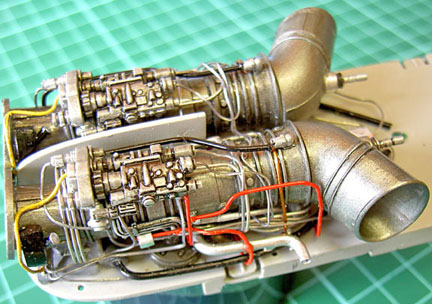
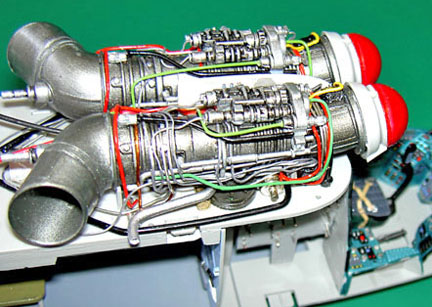
Trumpeter’s representation of the twin 2,200 shp Izotov TV3-117V engines is good but with the aid of the Verlinden book I could really go to town on additional detailing in this area especially as it is quite open to view making it well worth while. I spent some time perusing the excellent Lock On photos and deciding what areas to work on and depict on the model. It is almost impossible to add EVERY detail on a model and as I give myself 3 months to produce a model, hard decisions have to be made on what to leave out.
To represent all the plumbing I utilize fuse and telephone wire and fine solder which is available from Maplins, some of it I pre-paint. Instant glue with a ‘zapper’ or accelerator is used to secure each item. The whole engine bay was given a wash of thinned black enamel over acrylic paintwork which help to punch out the detail and the Tamiya clear colour range to represent heat staining. It took several nights work to bring the engine bay area to a state I was happy with.
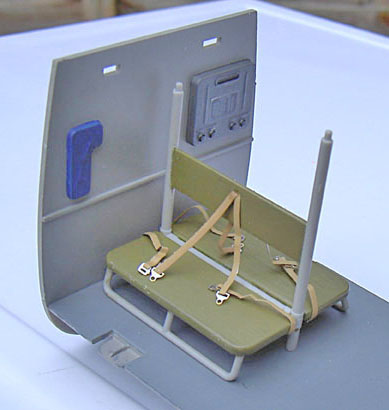
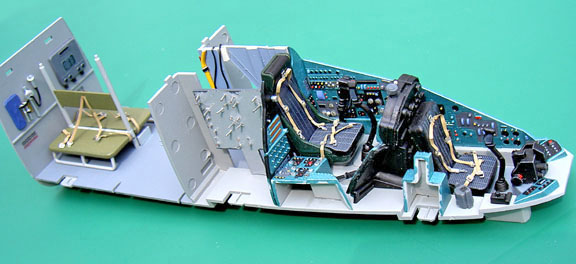
The next section to be worked on was the interior crew/cargo area, again the Verlinden book had good photo data to help me and I added seat harnesses, electrical boxes, plumbing, emergency equipment
and warning notices in Russian made on the computer courtesy of Photoshop.
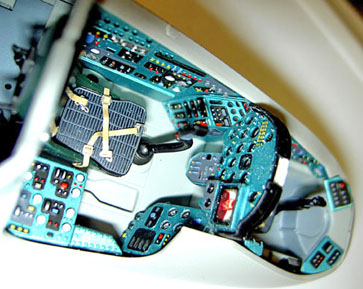
The kit cockpits are quite comprehensive and apart from a lot of detailed painting of the ‘old technology’ dials, switches and circuit breakers and adding seat belts and buckles I didn’t need to do further work in this area. Just behind the rear cockpit a series of electrical boxes and radio gear is housed, these were not in the kit so I added them although they are hard to see when the fuselage is closed up.
The main cockpit colour is peculiar to the Russians a sort of metallic green/blue hue! Using the references mentioned I mixed my own paint from Tamiya acrylics including their ‘Clear Green’. The entire cockpit is hand painted.
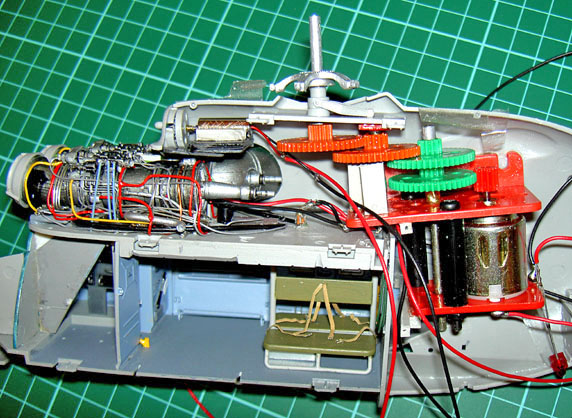
The major work that I embarked upon was to motorize the main rotor, tail rotor and cooler impellor.
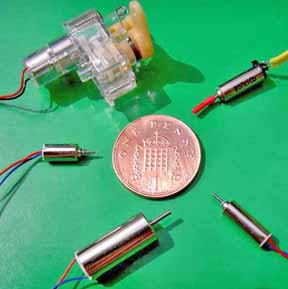
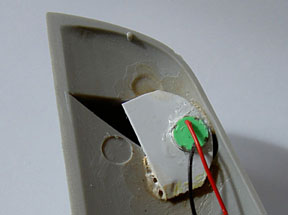
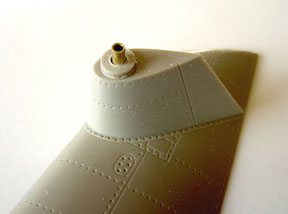
Since very small motors are freely available now and at an average price of £1. 80p each I keep a goodly stock of them to use in most of my projects. Above is a photo of some of the types available with a 1p piece to give scale comparison. Next to that I show the installation of the tail rotor motor.
All these mini-motors run on no more than 1.5 volts they have high rev rates but low torque, this can be increased by gearing down the motor with mini gears that modellers who are into indoor flying use to drive quite large propellers.
The motor with a clear housing containing tiny gear wheels is one that powers a pager’s vibration action.
In the past motorising the tail rotor of helicopters meant running a long articulated drive shaft from the main body of the aircraft and using bevel gearing very hard to obtain in small scales.
The main rotor’s power source is a much larger motor which drives the 19 inch diameter blades at a reasonable speed giving plenty of torque when passed through the home made gearbox. It took a day or two to figure out gear ratios and hardest of all how it all would fit into the fuselage without impinging on the cargo/seated area. The pictures below show the results
All the paints used externally were hand mixed using Humbrol enamels and an Aztec airbrush.
I chose the Russian scheme for ‘Blue 04’ from a unit based at Berlin-Brandenburg in 1992 and used the kit decals for the majority of the markings, however some internal and external data and warnings needed adding and I did this by downloading the Russian alphabet from a web site and utilizing Photoshop, compiled the missing data and printed it out onto decal paper suitable for use with bubble-jet printers, after a couple of hours drying time I coated the printed decals with Halfords clear lacquer.
I added a total of 13 mini bulbs to the model; these illuminated the navigation, hazard and formation lights.
The landing light was a 3 volt krypton bulb and the flashing hazard lights were 3mm red LED’s with the flashing circuit incorporated into the bulb itself.
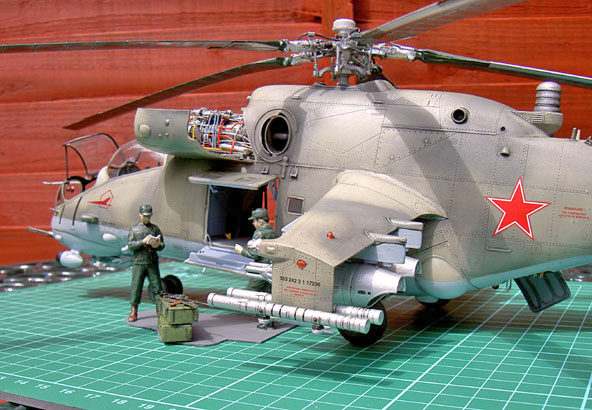
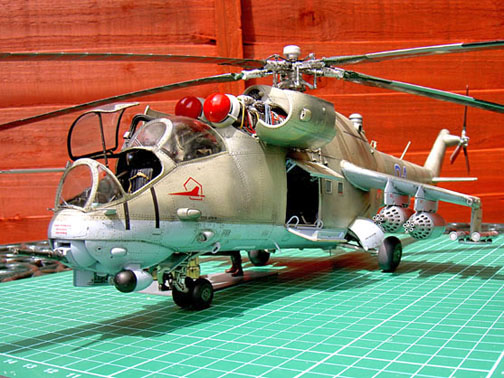
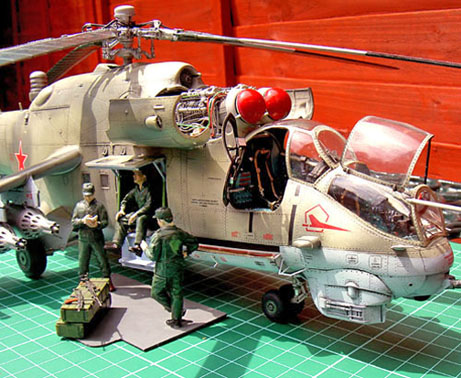
Below are pictures of the completed model.
The main and tail rotors were further detailed with hydraulic pipe work and control rods, both rotors are removable for transportation purposes.
Underwing stores are fully catered for and there are 42 items to choose from complete with decals!
I was very pleased with the finished model another feather in Trumpeter’s cap. I recommend this kit and I am sure that it will satisfy most discriminating model makers.
© Brian Boot 2004
