Revell
Rosenbauer Simba
8X8
Airport fire / foam tender
Kit No. 07514. 1: 24th scale
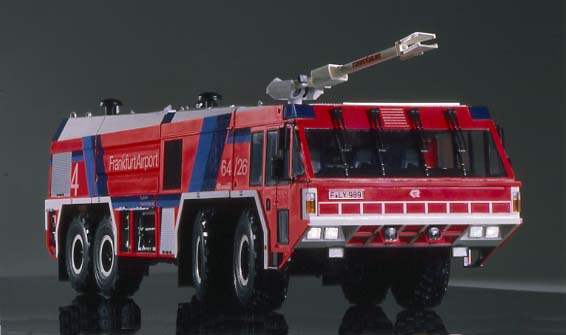
When Revell announced their GFLF Simba 8x8 at the 1988 toy fairs I was quite excited as this is a big (and I mean big!) Airport Fire/Foam Tender. I have a particular penchant for Fire Engine models as they seem to capture, for me at least, a little of the excitement present on the full-size vehicles when they speed along the road with their lights and horns blazing away! Maybe why I find fire vehicles so intriguing is because, as a mere truck driver, my most exciting event seems to be waiting for a traffic light to turn green!The kit is moulded in three colours; black for the chassis components etc., white for body panels and silver for the roof, hatch covers, lockers and roller shutters. The clear plastic moulding for the windows in my kit had suffered some slight distortion, due to the flow of the plastic, but as they are quite thin it was not too much of a problem. I would have preferred the blue tinted plastic parts for the flashing lights to have been supplied clear as a more realistic finish can be achieved with Tamiya’s Acrylic Clear Blue.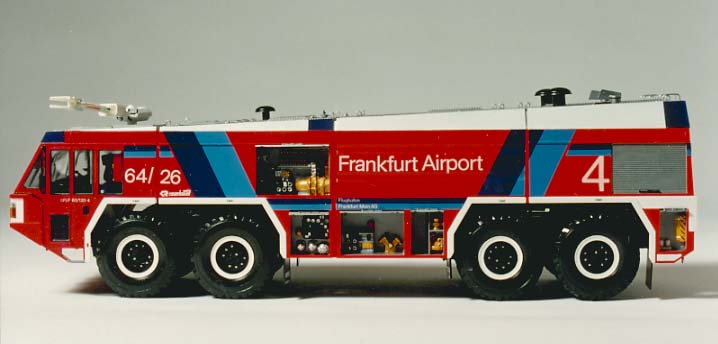
Realistic balloon tyres are moulded in fairly soft vinyl which seem to ‘sit’ right with the weight of the kit on them. Two sheets of different sized wire mesh is supplied for the grilles and covers and can be easily cut to suit with plenty to spare. A large sheet of decals provides markings for no less than six airport vehicles; five from Frankfurt Main and one from Munchen (Munich). Informa-tion required for the kit’s construction is presented in a 20 page booklet which, despite a number of errors, is good enough to do the job.
CONSTRUCTION NOTES Step 1. Part Al needs the little tab on its rear inside trimming slightly so that part D73 can fit more easily. Also note that part 073 has a different notch to that shown.
Step 2. The air tanks, parts 19 and 21, are shown cross-numbered - beware!
Step 3. The front and rear suspension bags, if assembled as shown, will be incorrect. By the time I had discovered the correct positions I had forgotten the part numbers, so remember that the torque rods locate at the front of each unit while the shock absorbers on the rear end locate fore and aft of the bags; those on the steering end fit to the rear of the bags.Step 13 Particular attention should be paid to the drag link, part 268, which fits behind the shock absorber on the left of the front axle. It’s advisable to leave the shock absorber off until after the steering linkage has been fitted.
Parts for the steering i.e. drop arms, drag links etc., require their ends to be melted over with a heated screwdriver. Unfortunately, the pegs to be melted are not really long enough, so I drilled them out and replaced them with 1.25mm rod heated at both ends to form rivet heads. If you are a smoker, a lighted cigarette is the best heat source for this purpose.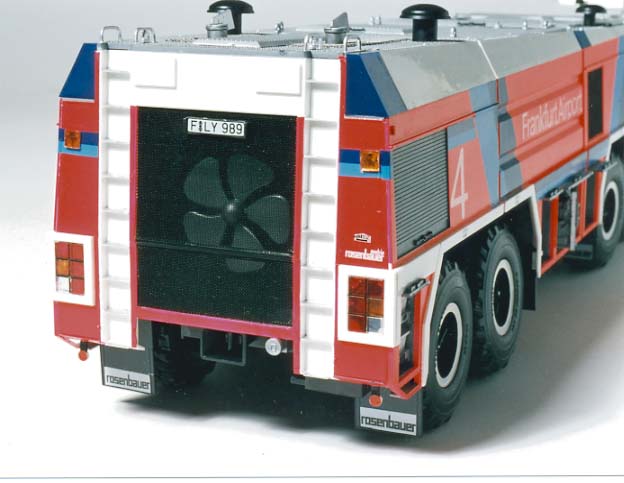
Step 16. The supplied outer wheel halves look very bare and reference to the box top shows how they should be with split rims. To remedy this omission, roll a piece of cardboard around the wheel rim Sellotaping it to form a tube. Then take a length of .5x.5mm strip and run it through your fingers until it starts to curl. Now cement it around the outer edge of the rim using the card to keep it in position repeat for all eight wheels!
When you come to the painting stage, make sure you apply plenty to the rims to ensure a smooth representation of the real thing.
Step 20. Parts 277and 279were a little too long, so I cut the end fitting off and replaced it after shortening the rods by the appropriate amount.
Steps 28-30. With the rear cupboards, parts 21 1H and 210H, if you fit them as shown you will find that the end plate, part L164 will not locate properly. Therefore, swap the boxes to the opposite sides so that the sloped corner is to the rear, matching the end plate. Runners for the roller shutters need checking as some are wrongly num-bered. Make sure they are up the right way and arrange them to suit the particular shutter. The wire mesh for the grilles is best cut with a pair of heavy duty scissors. Sizes are given for each piece, though you may find it difficult, as I did, to cut round holes in the section that has the exhaust stacks protruding. I made do with square holes here with a fairly heavy knife, but if you have very fine cutters, you should manage it okay. Fix the grilles into position with a dab of super glue in each corner.
Steps 45-46. The doors to the cab are operable but as the hinges are rather fragile I fixed mine closed. However, I have since noticed a finished model with the doors half open and thought that it looked much more impressive!
To make the front and rear lights appear a little brighter, their recesses were lined with ‘Chrome’ Sellotape and the ‘glass’ parts were treated with Tamiya’s Acrylic Clear paints.
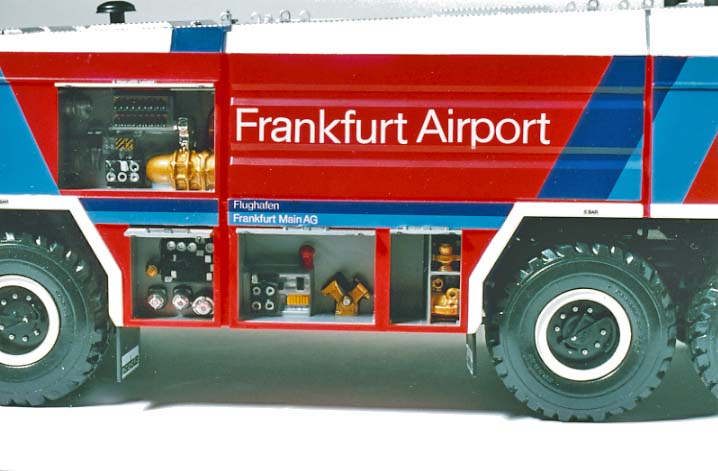
Construction, as a whole, followed the plans and worked quite well, despite some complicated structures which only looked hard before you actually assembled the parts together. It took me about three days to build the model, but the painting of all the details in the hatches and side lockers took a week to finish!
One major fault in the instructions concerns
Step 65, locating the body to the chassis. You have to locate the front end first as the chassis fits into the cab structure, not vice versa as shown.
PAINTING AND FINISHING
Basically, the kit falls into two major parts for painting; the chassis and body. All of the chassis is black so you could leave it unpainted as virtually none of it can be seen on the finished model. The body, including the cab, can be hand or spray painted before assembly.
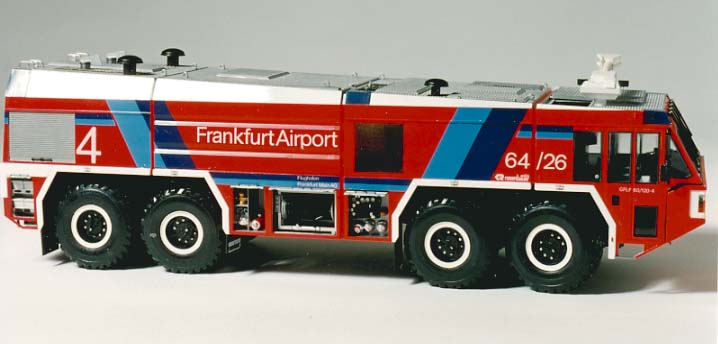
As the plastic is white no undercoat is necessary, but you should mask off the mudguards and white areas around the cab and rear end. I chose to finish the model in the fluorescent red scheme of Frankfurt Airport and used an old pot of Joy paint. However, Humbrol and Revell both produce a fluorescent red which, although matt, comes up close to the original finish with a couple of coats of varnish, try Johnson's Klear (Future)
When you unmask the mudguards etc., you can hand-paint these small areas with Humbrol 22 Gloss White. The front flap, part 149L, was painted red overall and then the raised lines were scraped to reveal the white areas. Repeat this process directly below in the area between the headlights.
For the silver roof I used Humbrol’s Polished Aluminium (unpolished) but the side lockers were finished in Humbrol 56 Aluminium, as were the roller shutters. Many different colours are used for the interiors of the equip-ment lockers and all are indicated on the instruction sheet. The inside of the cab is mostly black, though you can add highlights by using both semi and matt black.
SUMMARY
I wouldn’t say “much needed” but certainly “much appreciated”! A very impressive model which is sure to catch everyone’s eye. At £59.95 the kit may seem rather expensive, but you get quite a lot for your money and it will surely occupy a lot of hobby time...l hope you enjoy the kit as much as I did!
| Last
Page |
Airbase |
What's New |
Home |
Reviews |
Next Page |
