AMTECH/AMT
EC135 ARIA/ALOTS
Telemetry gatherer
Kit No. 728701. 1:72nd scale
AMTECH/AMT
EC135 ARIA/ALOTS
Telemetry gatherer
Kit No. 728701. 1:72nd scale
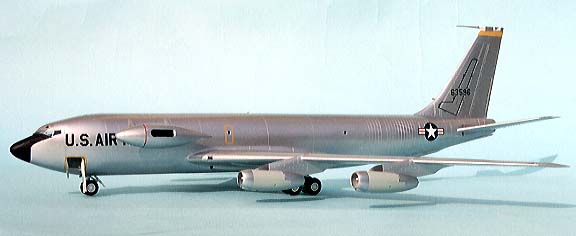
This is the kit that AMT never got around to issuing, now AMtech have released it with four options, (1)EC-135N ARIA/ALOTS, (2)C-135B T/RIA, (3)EC-135N ARIA & (4) EC-135E ARIA, plus a photo of a fifth possibility that you can build from a basic KC-135 kit but for which you must provide your own markings. The kit comes with the standard AMT parts except the fuselage has that big bulbous nose, the tailplanes are the larger variety and you get both sets of engines namely the J-57s and TF-33s.
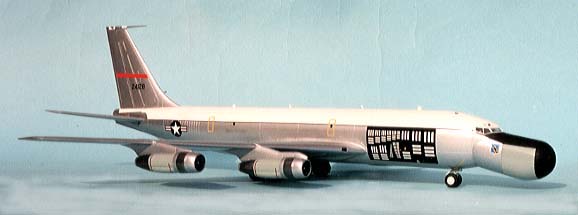
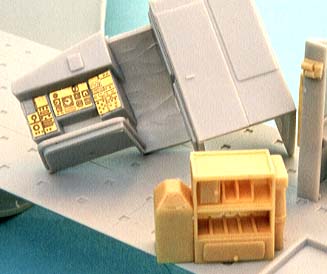
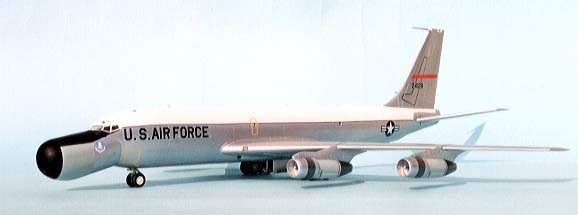
The kit has the ALOTS pod and numerouse antenna types, also included is a resin set to make a fuel dump in place of the boom. The decals cover two white over silver corruguard and two white over ADC Grey aircraft and both colour groups have alternate engine fits, I chose to make version 2 the C-135B which was used to calibrate the ALOTS pod camera and I had a basic KC-135 which I added the ALOTS pod to to make the test vehicle for the program as noted in the instruction sheets.
Besides the instructions you get an extra sheet showing the ALOTS Pod & fuel dump assembly plus an eight page information sheet with a short history and some interviews with crew ex members, among whom is Bob Guerre, well known to you guys no doubt.
Construction Notes
I always begin with the wings on this model and they need a little reinforcement, there are two ways to do this,
1. glue the lower outer wings to the upper halves and add two 80thou blocks of plasticard under the inner edge of the lower wing this will act as a stop for the centre section to locate properly and firmly to avoid the dreaded wing droop, and
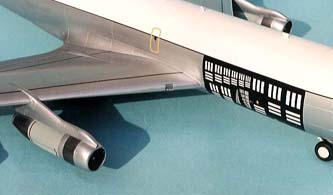
2. is to add a 60thou "spar" along the upper wing half and add some packing on top of it at the join for the centre section, (see photo) the spar is shown here in a temp position but it should be fixed in the centre of the wing with superglue to avoid the plastic cement seeping through the top of the wing.
The enormous length of the fuselage can lead to distortions but if you add some 15thou tabs on alternate sides of the top and bottom joins you will have no problems. Before you join the halves together add the fuselage windows as they have a nasty habit of falling inside if you add them later, mine did so I used Testors "clear parts cement" to make new ones..
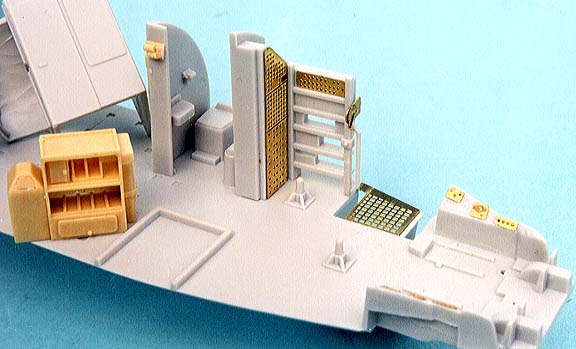
The instructions show the main wheel bays and spar being assembled to the floor but I would suggest you trap, not cement, the floor in the fuselage and cement the spar and bays to the centre section of the wing, there are good locations for the parts, this ensures that it assumes the correct angles of dihedral. I have added some 20thou tabs around the fuselage/ wing centre section gap, to ensure a solid location for the wing
These sets are usefull if you are going to leave the cargo door open but if you want it shut then you will need to add some packing inside the door frame to keep it level on the outer surface.

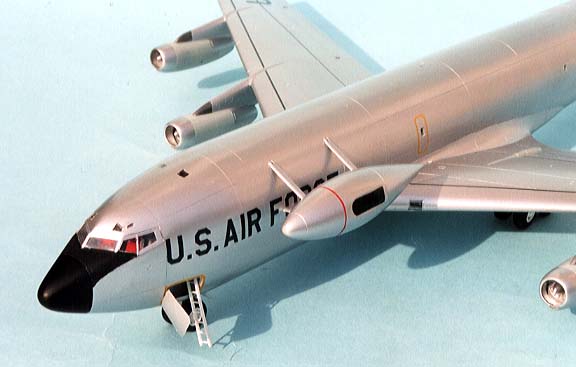
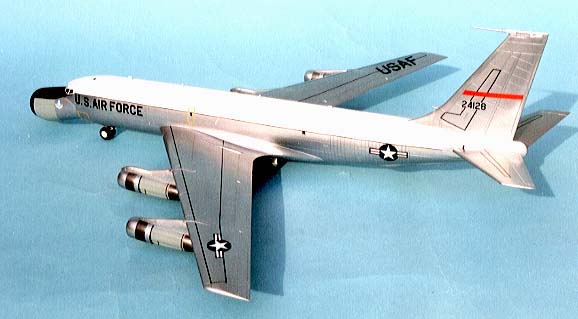
Note the strengthening ribs on the rear of the fuselage, the joint between these will need carefull attention with a narrow needle file, I assembled the engines and sprayed and masked them before adding them to the wings, the pylons were sprayed with the wings. The semi mat black nose cone was sprayed first and masked then the ADC grey was added and masked, Humbrol 130 satin white was used to build up the colour on the topside and then given a final very thin coat of gloss white No 22. This was left for a day then the edges were masked with Tamiya tape of course and paper towell filled the gap. These aircraft were painted with corruguard and to simulate this I used Humbrol "polished alluminium" not polished but coated with Klear/Future, I would have liked to use Alclad II
but that would have given a bare metal finish which is not what I would have wanted
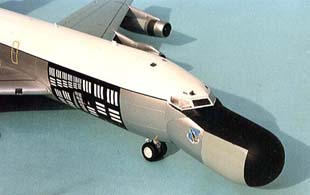
Note the cheat line over the door window and the different metalic colours on the engines also the differenc in pylon shape.
 Pay attention to the height of the cheat line and note the position of the tiny outline on the lower edge of the calibration decal.
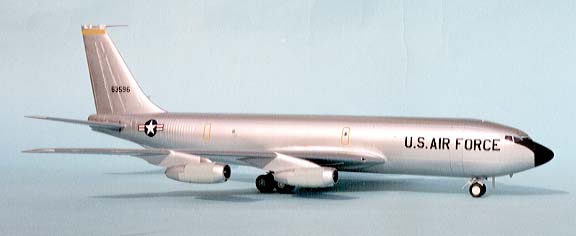
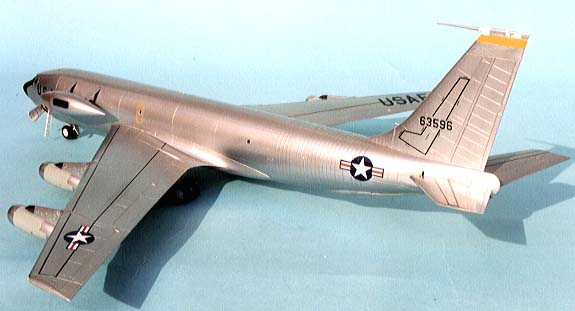
I wanted to show off the ALOTS pod on a separate aircraft so I chose the spare KC-135 I had in the loft and made up the fifth suggestion on the information sheets, an NKC-135 sn56-3596, all the constuction has been dealt with so enjoy the pictures.