Revell/Monogram
Dornier Do217 E-5
Bomber
Kit No. 04557. 1:48th scale
Ted's
Corner
Revell/Monogram
Dornier Do217 E-5
Bomber
Kit No. 04557. 1:48th scale
Ted's
Corner
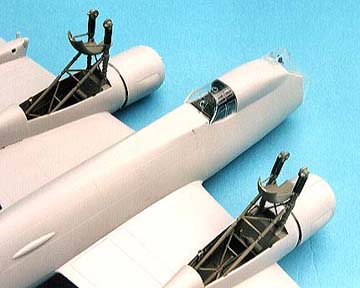
This is one of those nice kits that you come across now and then, the parts are crisp, it goes together easily and they fit really well, the clear part really are clear and there is plenty of detail in the cockpit to keep even the superdetailers happy.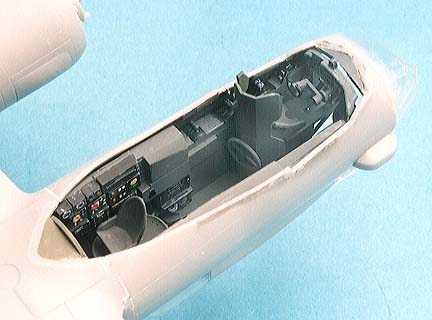
There is a lot of painting to be done before construction begins, the walls of the cockpit need to be fully painted before assembling or you won’t be able to reach some parts and there are lots of them, it took me two days to paint all the tiny dials, knobs and switches etc. but it was certainly worth the effort. The engine faces need careful painting, early on, as they are to be enclosed in the two halves of the nacelles. Take care, when adding cement to part 104, the retaining bush, not to get any on the outer surface or your prop won’t turn.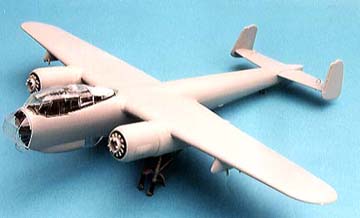
The exhaust are supposed to be inserted at this stage but you may need to enlarge the holes for them or you could leave them off until the final stages when you will need to remove the locating tab and insert from the outside as I did.
The upper fuselage/midwing section is a great Idea and works well but I would advise you to cement the outer wing panels to it and get as good a joint as possible before adding the fuselage and lower wing halves.
The instructions show tape being used to hold parts together whilst drying which is a good Idea but make sure, if you have used liquid cement, to apply it before putting tape on the parts or it can creep under the tape and mar the surface, I use 10mm masking tape and I cut several bits about an inch long and hang them on the side of my bench ready to use as needed.
There are no problems with alignment on this bird as those wing and tailplane sections keep everything perfect but you must bear in mind that the engine nacelles are handed so Identify them some how when you build them up, yes I know most of you know that already but someone is building his first model kit somewhere.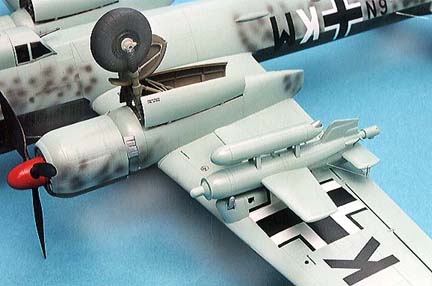
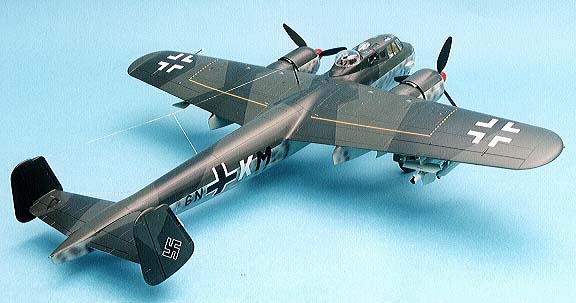
The underwing fuel tank should be rotated 90 degrees so the fins are horizontal I am informed but don’t mount it or the Henschel bomb until the decals are in place as these go over the pylons (the Promodeller decals are in separate pieces for this purpose whereas the Revell Germany ones are not and are tricky to apply)
Painting and decalling
There are a number of Gun barrels protruding from various windows and they make life difficult when you are masking up, so only the nose section was glued on. The gondola and cockpit glazing were simply tacked in position with white glue and removed after spraying when the guns were added then they were cemented back on permanently.
There is a set of canopy masks available for the Dornier but I didn’t have a set so each individual window was masked using Sellotape (scotch tape) pressing into the frame edges with a cocktail stick and then cutting around with a new scalpel blade, it took for ever!!!!
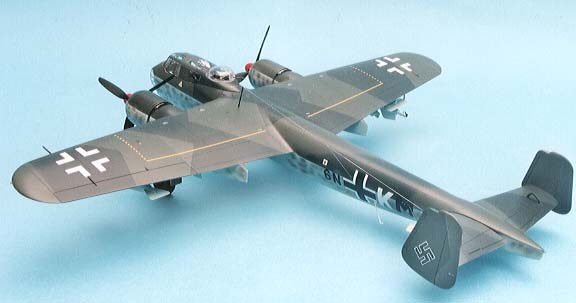
The camouflage colours are RLM 72/73 which give very little contrast in fact you can hardly see the difference so I added a touch of Yellow and White to the 73 just to emphasise it a little more (not strictly correct but effective none the less).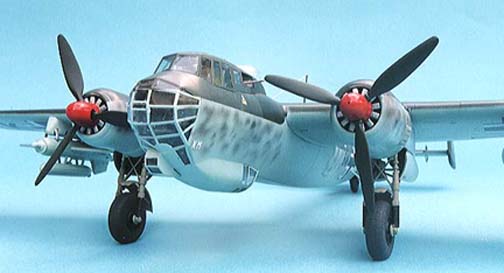
The lighter colour was sprayed first and left overnight then the edges of the colour were masked with 10mm Tamiya tape and the darker colour added carefully, again leave overnight then mask off the upper colours to spray the RLM 65 light blue and the mottling on the fuselage sides. Once this was finished the main masking was removed and a couple of coats of Johnsons Klear were dusted on in preparation for the decals and another coat after their placement. To bring everything back to a slight sheen I used a mix of Klear and Tamiya flat base in 3 to 1 proportions and lightly dusted a final coat before removing the canopy masking. All the remaining parts were assembled and aerials were added to finish off an impressive model.
| Last
Page |
Airbase |
What's New |
Home |
Reviews |
Next Page |