Kit Form Services
Volvo F-89
Resin conversion set
Kit No. 0000. 1:24th scale
Kit Form Services
Volvo F-89
Resin conversion set
Kit No. 0000. 1:24th scale
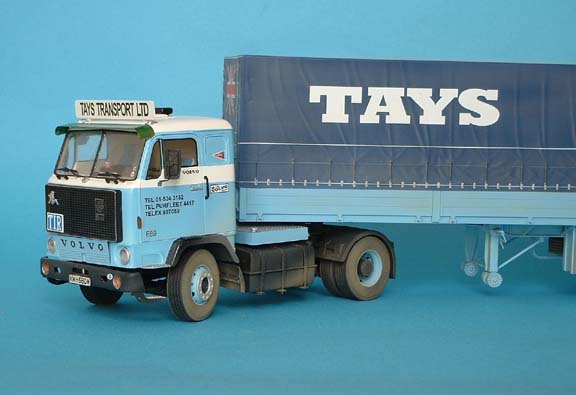
My Volvo F-89
I have been building truck models since the early seventies when AMT first arrived in the UK. But I have never found a truck that my family owned or that I drove until now, KFS announced the new F-88 Volvo transkit and when I saw the kit on Howard’s web site I ordered one straight away Howard tells me I was the first to order, I was so keen to get my hands on this baby,
Around the mid seventies I used to do The Saudi run, at first with a Mercedes 14-18, then we got Volvo F-89s which at the time was one of the most powerful trucks in normal haulage with it’s 330 bhp engine and I wanted to build a model of this particular machine.
Well KFS mail order must be good as the kit arrived two days after I posted my cheque, I quickly opened the box and was amazed at the quality of the parts inside, I soon realised why KFS prices are on the high side, from Howard I learned that they are moulded by one of the finest moulding firms in the country and with quality like that I for one am very happy.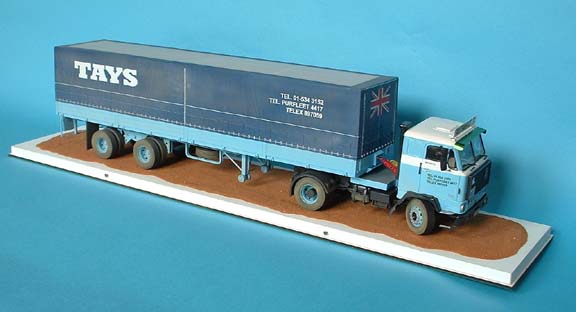
The kit comes as an F-88 really with the small radiator grille on the etched frame but there are a number of extras which enable you to make the 88 and a half (that’s an 88 with the big radiator grille) and the 89, my choice. The first job was to construct the chassis from an Italeri FH kit according to the KFS instructions,
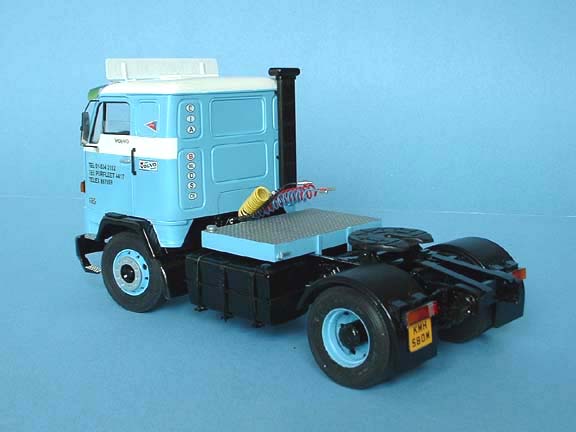
adding the new fuel tank battery box and air tanks. I found, when finished, that the front wheels almost touched the lower door step so I would suggest that when moving the front springs forward you mount them an1/8th of an inch further back than noted on the instructions to give that extra clearance
We had saddle tanks fitted across the chassis and I made one from 30 thou plasticard and some “Plastruct” tread plate, a filler cap was added to the top and an outlet tap/valve added to the rear side, we used to place a length of hose pipe on the tap straight into our road tank to discharge it.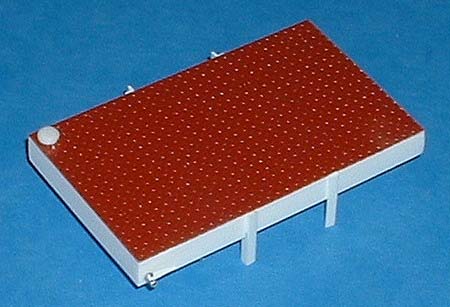
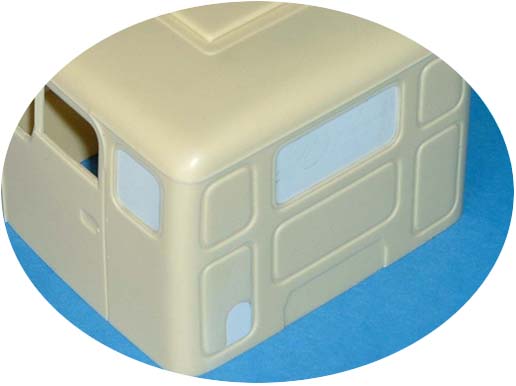
The real F-89 only came as LHD so the cab needed converting, firstly the gearshift. I filled the RH side of the hump with scrap plastic and filler then sanded smooth next I cut a similar depression on the LH side of the hump (not strictly true to shape) but it was the best solution.
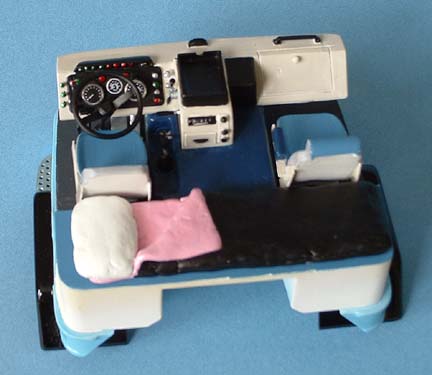
The dashboard was another story, the strip of warning lights on top of the dash was sawn off (carefully) and replaced on the other side, then all the remaining detail was sanded flat and a glove compartment inscribed. Now a new panel was cut from 20 thou card as the base and cemented to the LH side, various thickness of rod were gathered and sections cut to represent the big Tacho’ and the other large dial with the air, temp, oil and fuel gauges in the middle of the base and a thin slice of smaller rod was cut to show the rev counter between the pair of them.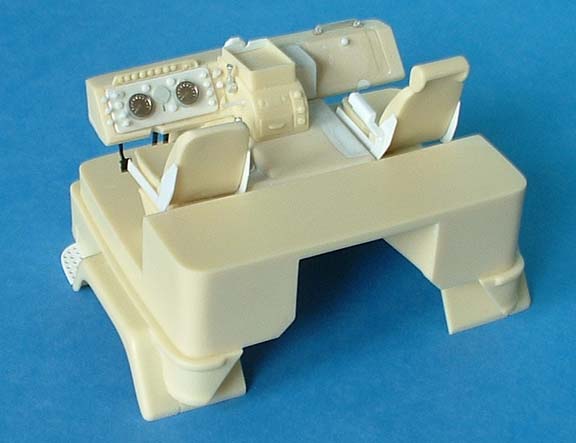
Now came the tedious part, all the switches, a lighted cigarette (no I don’t smoke) is held near
the end of some fine 1mm rod and this forms a mushroom and with a little practice you can make them all the same size, each one is cut off with an1/8th of an inch stalks and when I had enough they were inserted into 1mm holes I had drilled in the appropriate positions around the dash. Some larger mushrooms were made and the heads only cut off to represent other warning lights etc.
A piece of 80 thou card was used to make the demister vent in the centre of the dash close to the screen and a small long stemmed switch was fashioned from card to represent the splitter box switch on the side of the “tray mount”. The clutch pedal was from the FH kit but the other pedals were shaped from square rod and mounted on the floor. There are some nice etched steps on the chromed sheet but the real things are turned over at the edges and seem much deeper so add a piece of 40thou card beneath each step, sand to shape then drill the holes through with the correct size drill to improve the look of the parts.
The seats are a little “generic” I think so I added some plasticard strip around the edges to represent the “Bostron” seats we had fitted, next was the bunk, no driver would be without a sleeping bag (it kept the mossies off) so two strips of milliput were rolled out and cut to size, place one on top of the other and fold the top one back from one side only, add a pillow from the remaining milliput and leave to harden.
Because of the problems with thieves from Turkey onwards it was unwise to have rear and rear side windows fitted in the cab as they were easily removed so we had them steel plated and so my clear model windows were traded for solid plasticard and painted. Two inside door handles are provided in white metal but they bear little resemblance to the real thing so again the square rod came out and new door handle/arm rests were fashioned from this while one of the metal handles went on the RH side dash for the passengers use.
While working on the cab I filled the rear panel where the 88 stack pipe went with 15 thou card and added a breather pipe from the spares box (suitably modified) on the RH side of the cab, in real life this had a pipe through the rear wall below the floor which led to the engine but as my cab was to be fixed down I never bothered with that. The wind shield wipers will have to be LH drive type so the original locations were cut off and new ones made in the correct positions you can now use the plastic wipers from the FH kit as the etched metal ones are RHD and while I was in this area I relocated the grab handles further forward slightly.
The metal cab mounts below the floor are placed wider than the chassis locations but this gives you room to adjust if you get it slightly out of line when it comes to mounting the cab permanently.
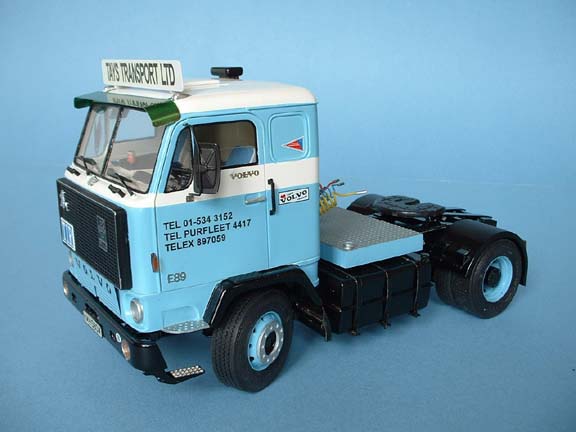
Painting and decorating all resin parts need washing with mild soapy water and when mine were dry I primed them with Halfords white primer, this was gently rubbed over with very fine wet and dry paper before spraying a gloss white on the roof area (to reflect the heat) and a band around the base of the windows.
After waiting for 24 hrs these areas were masked using Tamiya masking tape before spraying the light blue on the cab shell and the base, The interior areas were all hand painted along with the window frames using semi matt colours mostly then the front wings were painted gloss black, again by hand, in between all this, the chassis was sprayed using Humbrol gloss black.
To create a lived in appearance I turned to TMW Magazine for some scale images and made a can of coke, a box of Kleenex, a map book and a news paper this last item was definitely incorrect as it had the wrong date on it but then so did the tax disc from Fantasy Print Shop (I hope I don’t get slaughtered for this error).
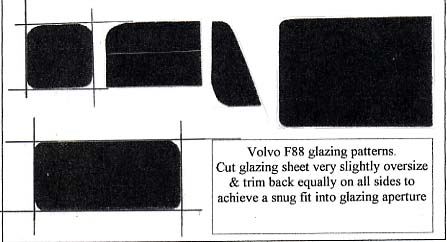
KFS supply not only the clear plastic sheet for the windows but also give you patterns to cut out each individual item, very useful, and a sign of how much thought goes into this product, well done Howard. When I was happy with my cab it was fixed to the base/floor then using a 2mm rod cut to length and slid between all four pivots it was mounted onto the chassis which now had the wheels all cemented on, check the alignment carefully using the bumper bar as a guide and super glue the front and rear mounts.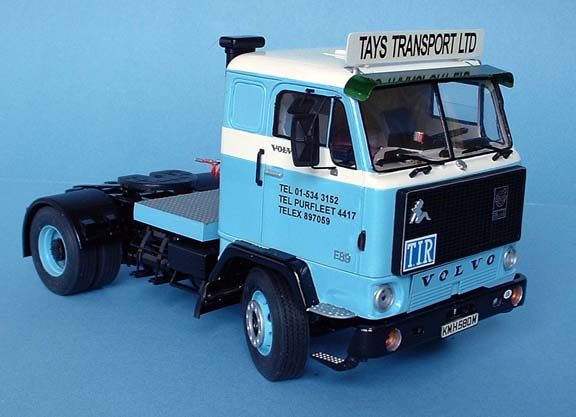
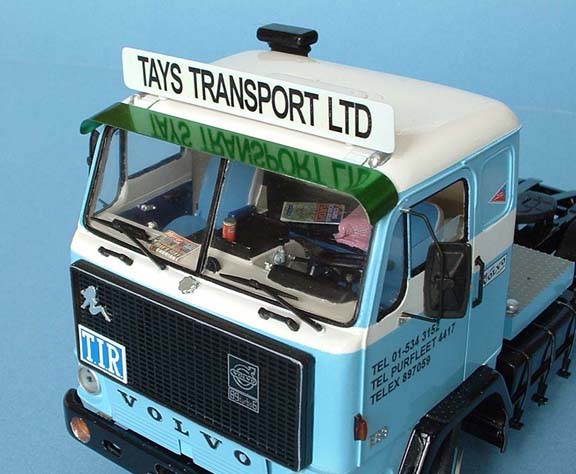
Now is the time to add those external details, I tried to fit a clear plastic sun visor but all the kit items in my spares box were too wide so I resorted to the etched fret and bent the one supplied to the correct width then sprayed it with Tamiya clear green paint which I thought looked quite realistic.
The grill was cut from the fret and fixed to the surround and the badges were added, the whole thing was then sprayed Semi matt black, when this had dried but before it went hard I used a round knife blade to lightly scrape the paint from the raised edges of the badges and logos which seemed to pick them out nicely
The white metal mirrors were sanded smooth with fine paper then polished with Brasso till you could see your reflection and the backs were painted black. Flower arranging wire bent to shape was used for the arms, four mounting brackets are provided but on the real truck the top pair are smaller than the bottom due to lack of space on the door frame so I drilled a small hole here to take the end of the wire and added a small plastic bracket on top to represent the real thing and used those supplied for the bottom brackets.
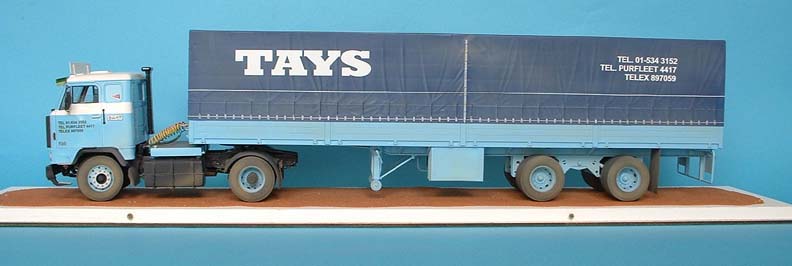
I wanted to add a headboard for the company name so it was made from 30 thou card, mounted on bent plastic brackets and raised just clear of the roof to allow air to flow beneath and enter the roof vent when raised. All the suzies for that period in time were made from fine telephone wire and mounted on the rear cab mount bar, decals were used to make the number plates and there I was nearly 30 years ago with my truck, sorry, we called them lorries in those days.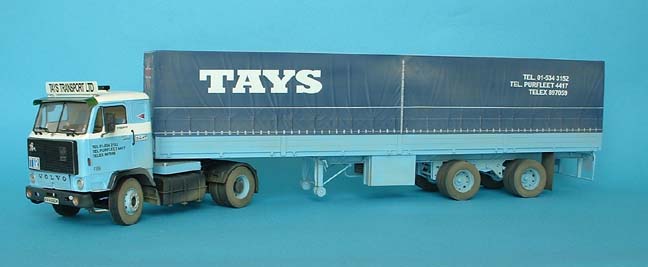

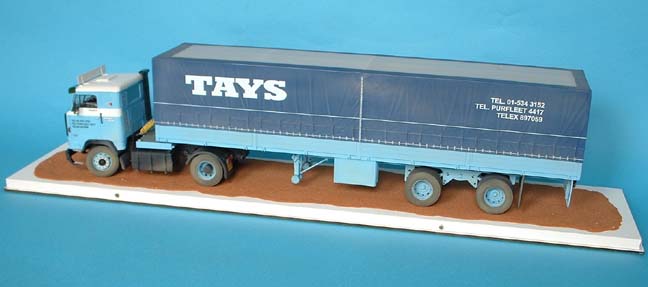
The trailer was built using two kits one was Italeri and the other Heller, neither kit make a true TIR tilt like mine so I had to scratch build parts of both. The chassis was Italeri as it had a spread axle similar to my prototype and that was assembled as per instructions but the ends of the "container arms" were removed and the pin was relocated further forward. The body work came from the Tilt trailer issued by Heller/Airfix, the floor and the four sides were built up as per the instructions and then the centre section of each "bearer" below the floor was cut away so the chassis would sit snugly into the gap. My next job was to make ends that had tilt fixings front and rear, I had built a few heller trailers before with open side panels and so my spares box had some spare full tilt sides (wasn't I lucky) these were cut and sliced to make up various bits and then cemented together, and the joints cleaned up,. The loops were added from spare sections and the straps were made from strips of plasticard. areas that needed new cord fitted were made from stretched sprue and where the ends of the cord met at the back I have super glued a flap on, this was made from wine bottle foil.
The real trailer I used had been a flat bed originally and had some support bars along the chassis,I used 40 thou square rod to represent these and the rear under run bar was formed from Plastruct TB2 which is wire reinforced. I had a tool box fitted and this was fashioned from 30 thou card and mounted on to the body with Fineline "C" chanel, the same material was used to make up the spare wheel carrier.
I had rub down decals made and these were applied with care after the paint had cured then Floquil weathering paints were used to give a dusty look, on the real truck after crossing the desert the whole vehicle was yellow but I could not bring myself to emulate that so it just got dusty but there is genuine Saudi sand on the base to add a little realism.
Ted Taylor, June 2003.