Aeroclub
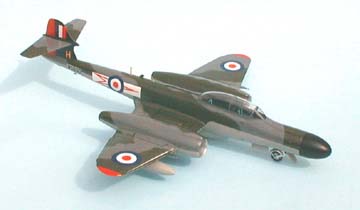
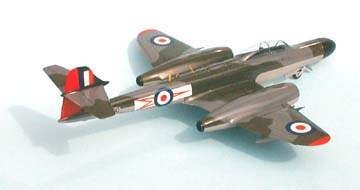
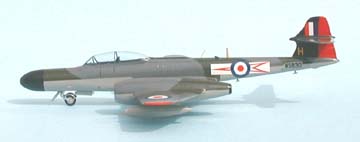
Gloster Meteor NF.14
Night fighter
Kit No. 0000. 1:48th scale
<>This is a Multi Media kit with vac form parts, resin cockpit tub and intake cowlings plus white metal items.
<>
The meteor has always been a favourite of mine and I have wanted a model in1/48th scale for years, yes I know of the Pamela Veal kit in the Mid seventies but it was a vacform kit and I like others was frightened to try one even if I could have afforded one. Geoff Prentice showed me his model at the time and that made me envious until now, as soon as I heard from Aeroclub that they were producing a whole batch of various types I placed my order for the F8. Later as it transpired that John Adams had done a lot of research on the long nosed meteors and he has issued these later releases to the correct dimensions and with new updated construction methods as well as updating earlier models, to make life a little easier for us modellers.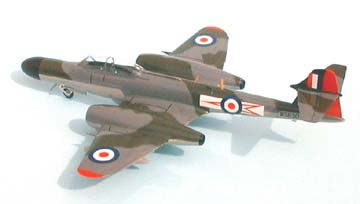
The kit is in the usual stout box and is described as multimedia, it contains two nicely vacformed sheets, I would say the standard is approaching that of Dynavector, and a bag of white metal parts which include the undercarriage, cockpit seats and instruments along with a number of other small parts. Some of the parts come injection moulded but resin is used for the cockpit bathtub and the fronts of the nacelles with spar and fan blade details built in, you even get a piece of tubing to use for the engine exhausts what more could you want except a crystal clear canopy, and it is, so you had better treat the cockpit right
Construction notes
I won’t bore you with the details of cutting out the parts except to say there is a fair amount of scraping and sanding to do and that can be messy so get permission from management before you use the lounge , I made up the wing section first, the trailing edge was thinned right down and the rear of the nacelles chamfered off to take the exhaust pipes. I used Slaters Mek Pak as it is less likely to eat through the thinned plastic joins. The resin intakes were added using cyanoacrylate glue (superglue) and I found I had a small gap where the leading edges met the intake, I had obviously taken too much away when removing the excess plastic so be warned, I packed the gaps with plasticard scraps and finished of with a bit of filler to smooth things over.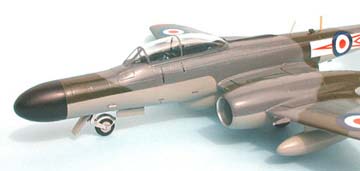
The one-piece cockpit was painted and all the interior parts added then left to dry next the supports for the nose wheel leg were put in place and part 4m was positioned but not cemented yet. The fuselage was my next job and I was surprised to see how long it was, over 12 inches, the interiors of the joins were reinforced with the strips of plasticard supplied and when hardened I started to refine the cut out for the wing with just a little sanding and trimming here and there until a good fit was obtained. The cockpit was now slid into position through the wing space, a bit tight but with care works well, the flanges were added as instructed and the main wing was cemented up into the cut out, all that remained was to run a tiny bead of PVA glue along the joint and it was done.
The remainder of the cockpit parts were added and painted, the canopy was cut out and fixed with PVA glue and I found I needed to fill a small gap along one side with PVA, I think I may have trimmed just a little too much off but I am not sure, so take care. A small drill is required to make the holes for the axles in the undercarriage legs and support the part to be drilled with a small block of wood, you can use flower arranging wire for the axles as I did. The legs were all cemented in with cyanoacrylate (I liked the new improved wheel bay mountings for this) but the wheels were left off until the painting was finished.
Painting the rudder and wing tips were first sprayed white Hu 130 then the red was sprayed on, later these and the canopy were masked off with Tamiya masking tape before spraying the nose cone and fin with black Hu 85, these were subsequently masked and the underside medium sea grey was sprayed on. The demarcation lines on the fuselage and nacelles were masked but the wing edges were left bare as the angle of the airbrush would do the trick for me, the green and grey were done freehand with the airbrush almost closed and held very close to the surface to obtain the outlines then opened up a bit to fill the spaces. When the masking was removed (carefully) I coated the whole with Klear, added the decals and added one final coat of Klear to seal it all in. The undercarriage bays and legs were painted with aluminium and the wheels were finally pinned in position then secured with superglue. The canopy was at last unmasked and I had a model I had waited years for.
In summary I would say that while not quite up to Dynavector standards it is 9 tenths of the way there so try it for yourself and see what I mean.
The NF11 and NF12 are also available now so you have a choice.