
Dynavector
De Havilland Hornet
Twin engined RAF fighter
Kit No. 0000. 1:48th scale
Dynavector
De Havilland Hornet
Twin engined RAF fighter
Kit No. 0000. 1:48th scale

These Dynavector
Kits
are superb, if you have never tried to
build a vacuform before
but
wanted that special model well
wait no more try one from
this range.
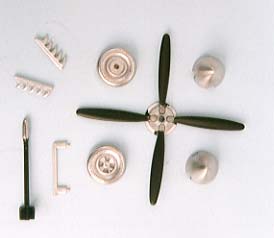
Just some of the metal parts
included in the box
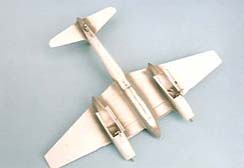
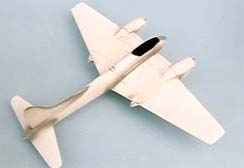
The two views
below
show the matt grey paint used to check that the seams are good,
if not they can be
rectified
and checked again
There are two other
options
in the kit, a Mk 1 and a camouflaged F-3.
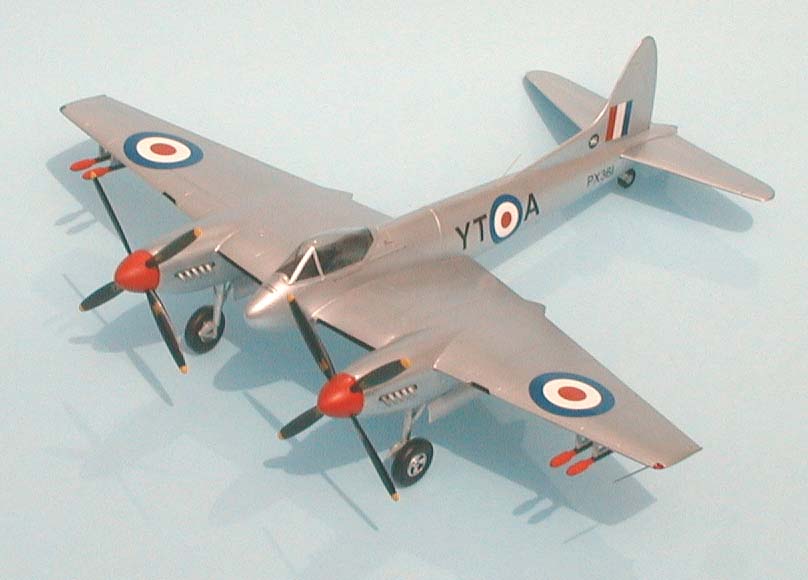
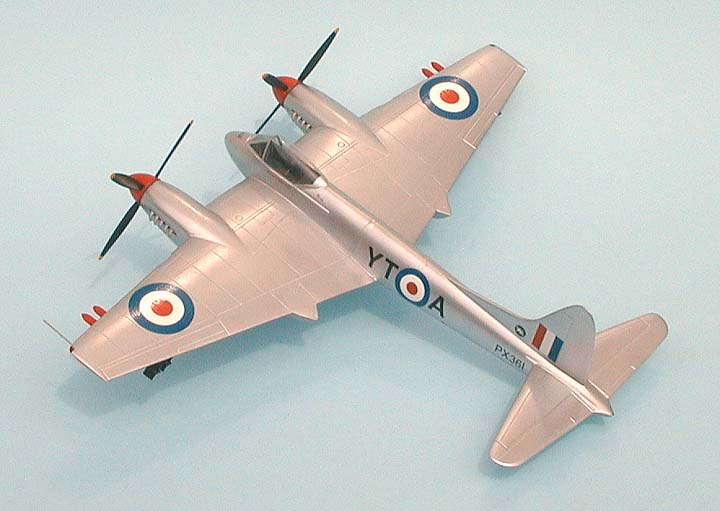
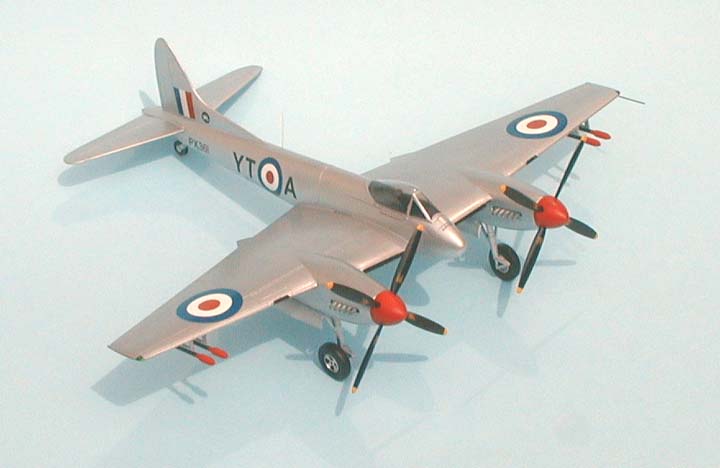
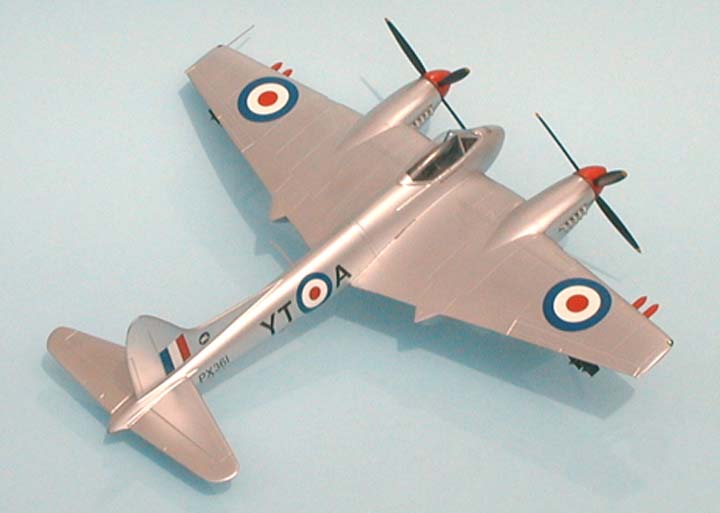
Dynavector DH Hornet F1/F3
1/48th Scale Kit No 4807
The Hornet was a development on the lines of the Mosquito but to smaller proportions and it served with the RAF from 1946 to 1955 it was also developed for the Royal Navy as the Sea Hornet and is the subject of a future Dynavector release.
The kit comes as two vacuformed sheets with finely moulded main components plus a bag of white metal parts which include the undercarriage, props and spinners, cockpit details, radiators and rockets plus many other tiny pieces. Two canopies are supplied for those who make a mistake and a decal sheet covering two Mk3 machines and one Mk1, the instruction sheet seems pretty basic but all you need to know is there, of course you must be a fairly experienced modeller to have bought one of these kits as they are not for first timers.
Construction Notes
I feel there is no need to go into removal of components from the sheets again here as you may well be aquainted with my methods and an equally good description is on the instruction sheets with diagrams. As mentioned there are two versions included so you need to make up your mind early which to do as you need to use the replacement fin and tailplanes for the Mk1 After making up the cockpit and painting the interior of the fuselage around the cockpit area I added the stiffener as recommended and some tiny 20thou plasticard tabs along the edges of each half of the fuselage, arranged so that they interlaced, at the same time I cleared the holes for the tailplane support and cut out the tailwheel bay area. As I wanted to use the cannon nose I lightly scored the area to be removed but did not detach it until the fuselage was hardened off, all the bits were mounted inside and the halves cemented and taped up until hard, a point to note here, never tape up before cementing as the cement can easily creep under or along the tape and ruin your surface undetected.
Whilst waiting I had a dry run with the engine nacelles and wings which seemed perfect but I found later that the Radiators were a tight fit at 3mm back from the lip. The wing stiffeners were added, heeding the warning about the choice of cement, and I adjusted the wing so the intake lips were parallel then slid the radiator in from the side as close to the front as possible and superglued it at the same time checking to see the appropriate nacelle half was a good fit.
The exhaust holes were removed from the nacelles and the holders (retaining trays) plus a few small tabs cemented in I then taped each nacelle up tight so I could get the centre hole correct for the prop shaft, this was drilled and filed for a tight fit. When satisfied the tape was removed and the halves cemented together, later the gear doors were removed and the shaft inserted and fixed with superglue, when finally fitted to the wing I found that I needed a tiny bit of filler by the radiator air intake but this was the only filler I used.
By now I was able to remove the lower nose area and add a couple of tabs inside to locate firmly the cannon bay section and I added the tailplanes at this time also when the joins were cleaned up the wings were added taking great care to get the dihedral correct, I do this by mounting the fuselage on a mound of blutac and checking the fin is vertical with a set square, the wings are then propped up until the ends are equally at the correct height, leave over night and all should be well.
The remainder of the work was as per instructions and quite easy then after checking all the joints I was ready to spray, I first chose the camouflage scheme but I didn’t like it so I oversprayed with Humbrol polished aluminium then coated the whole with Johnson’s Klear to seal it before adding the decals, not too many of those on this aircraft, then another coat of Klear went on and all the remaining parts were added and the canopy unmasked, it was finished except for the tiny dorsal aerial which I made from yellow stretched sprue.
A beautifull little model that I am quite proud of.
Since starting this the Sea Hornet Has arrived, it is very much the same but it has that long radar nose extension plus the second crew place, flame damper exhausts and under wing fuel tanks, I am looking forward to it with interest.
Ted Taylor Jan 2000
an excellent article on vacform
modelling can be found here